Nissan Ariya: Li-Ion Battery Heater
2wd
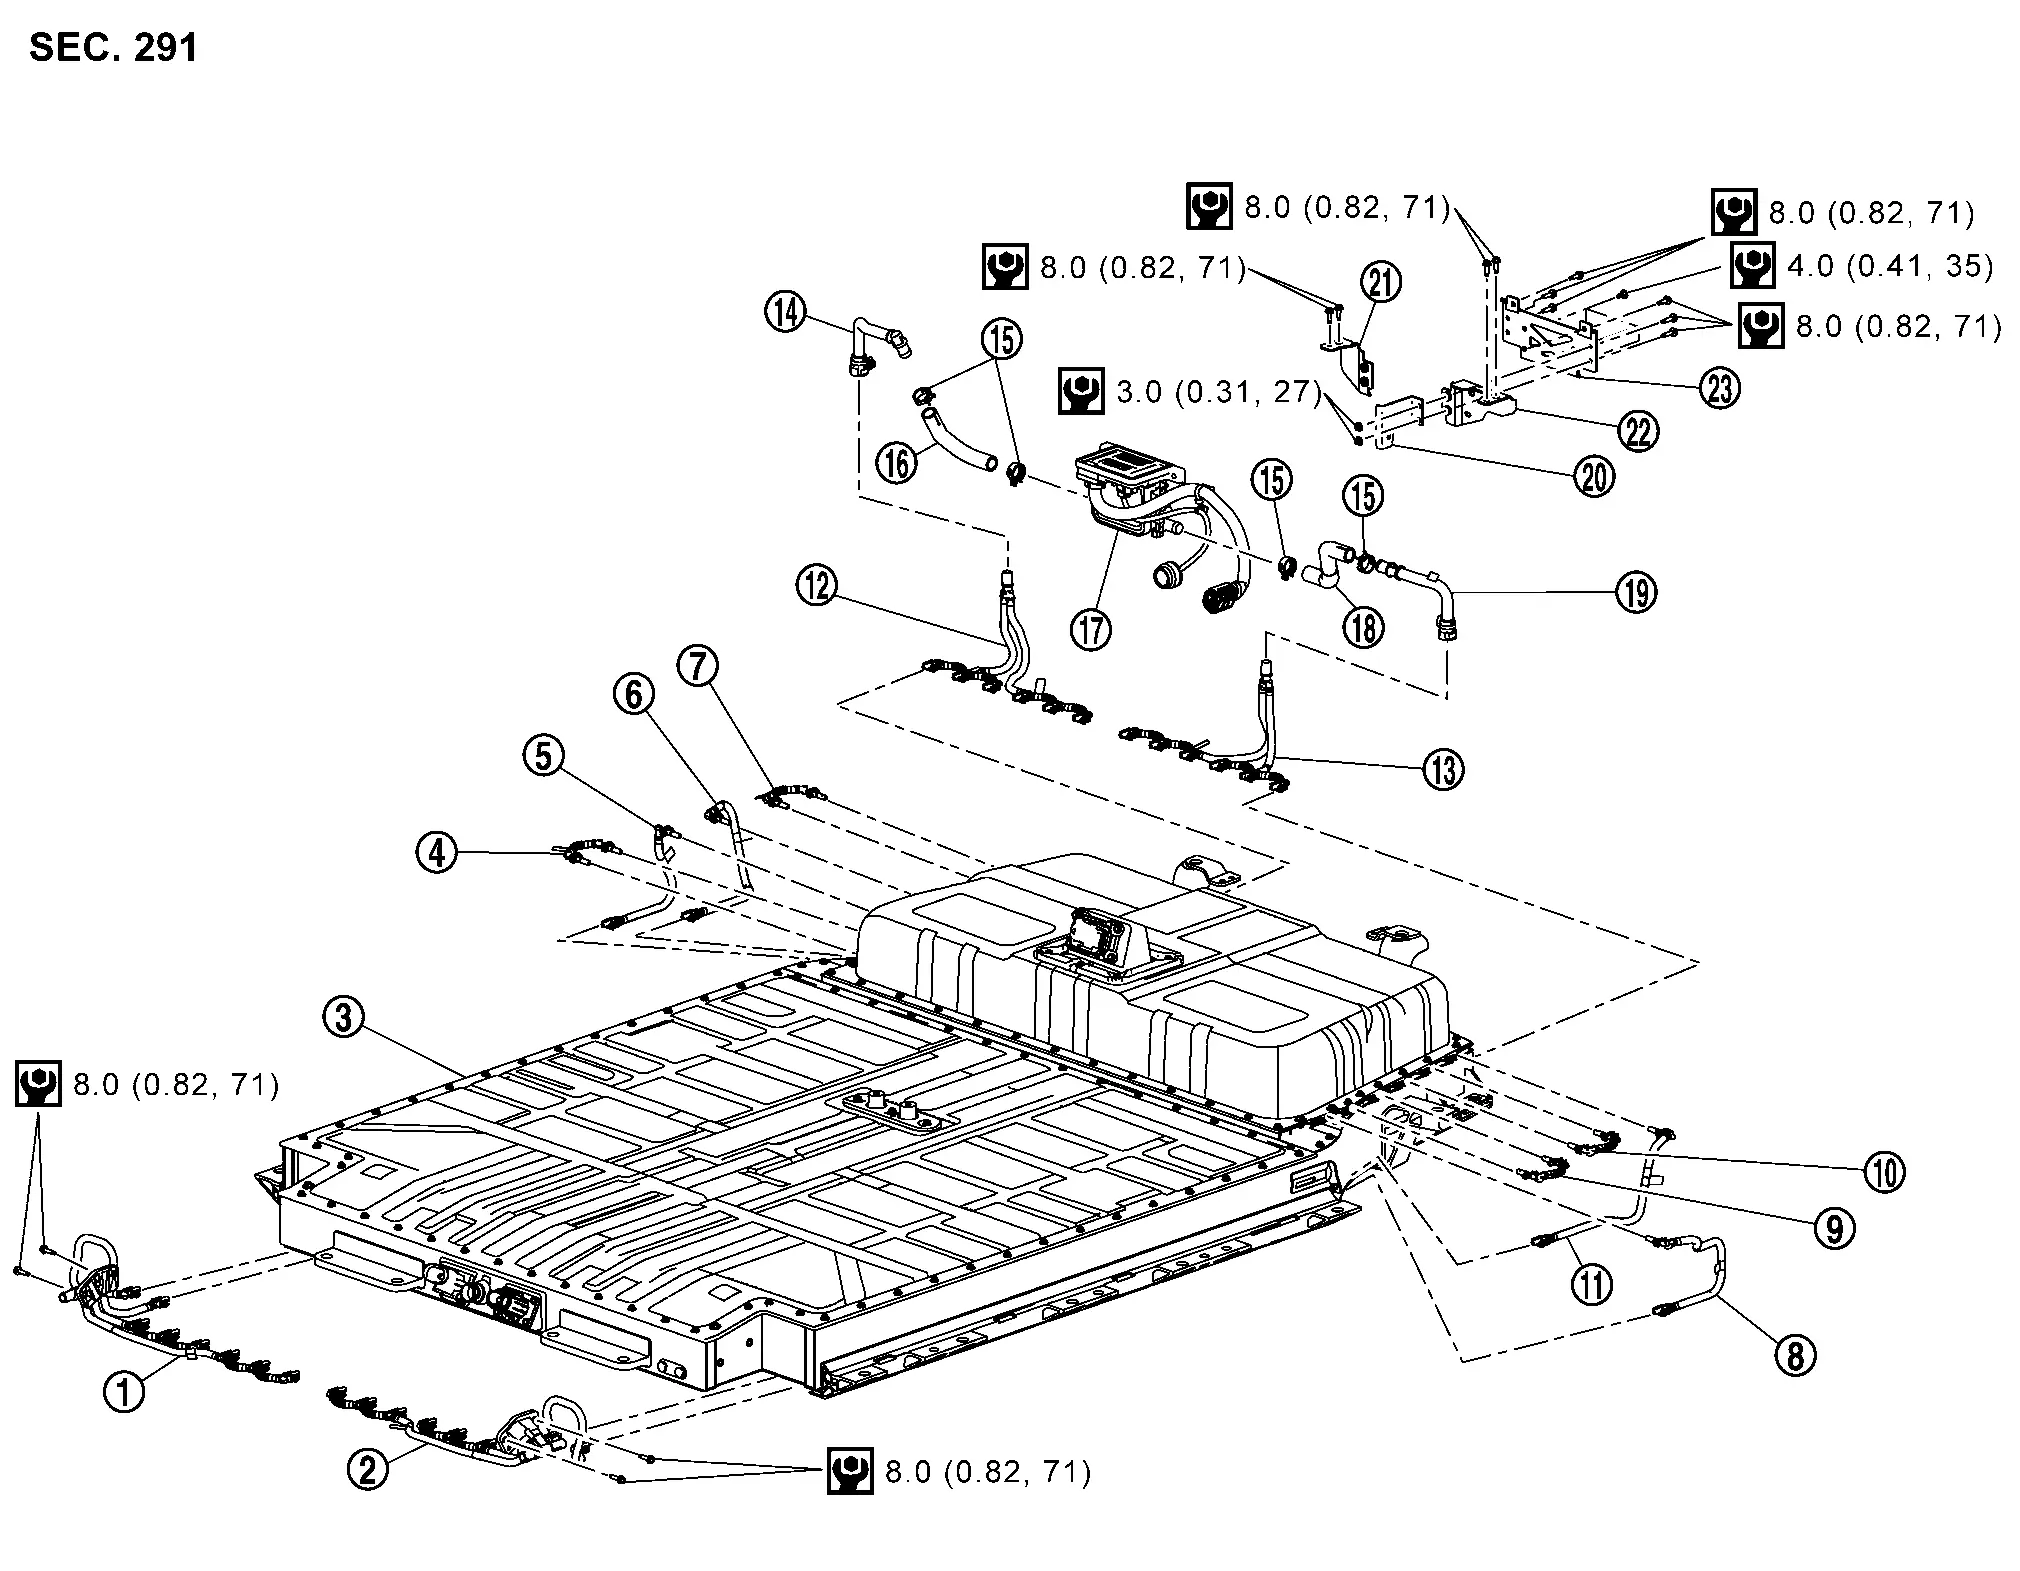
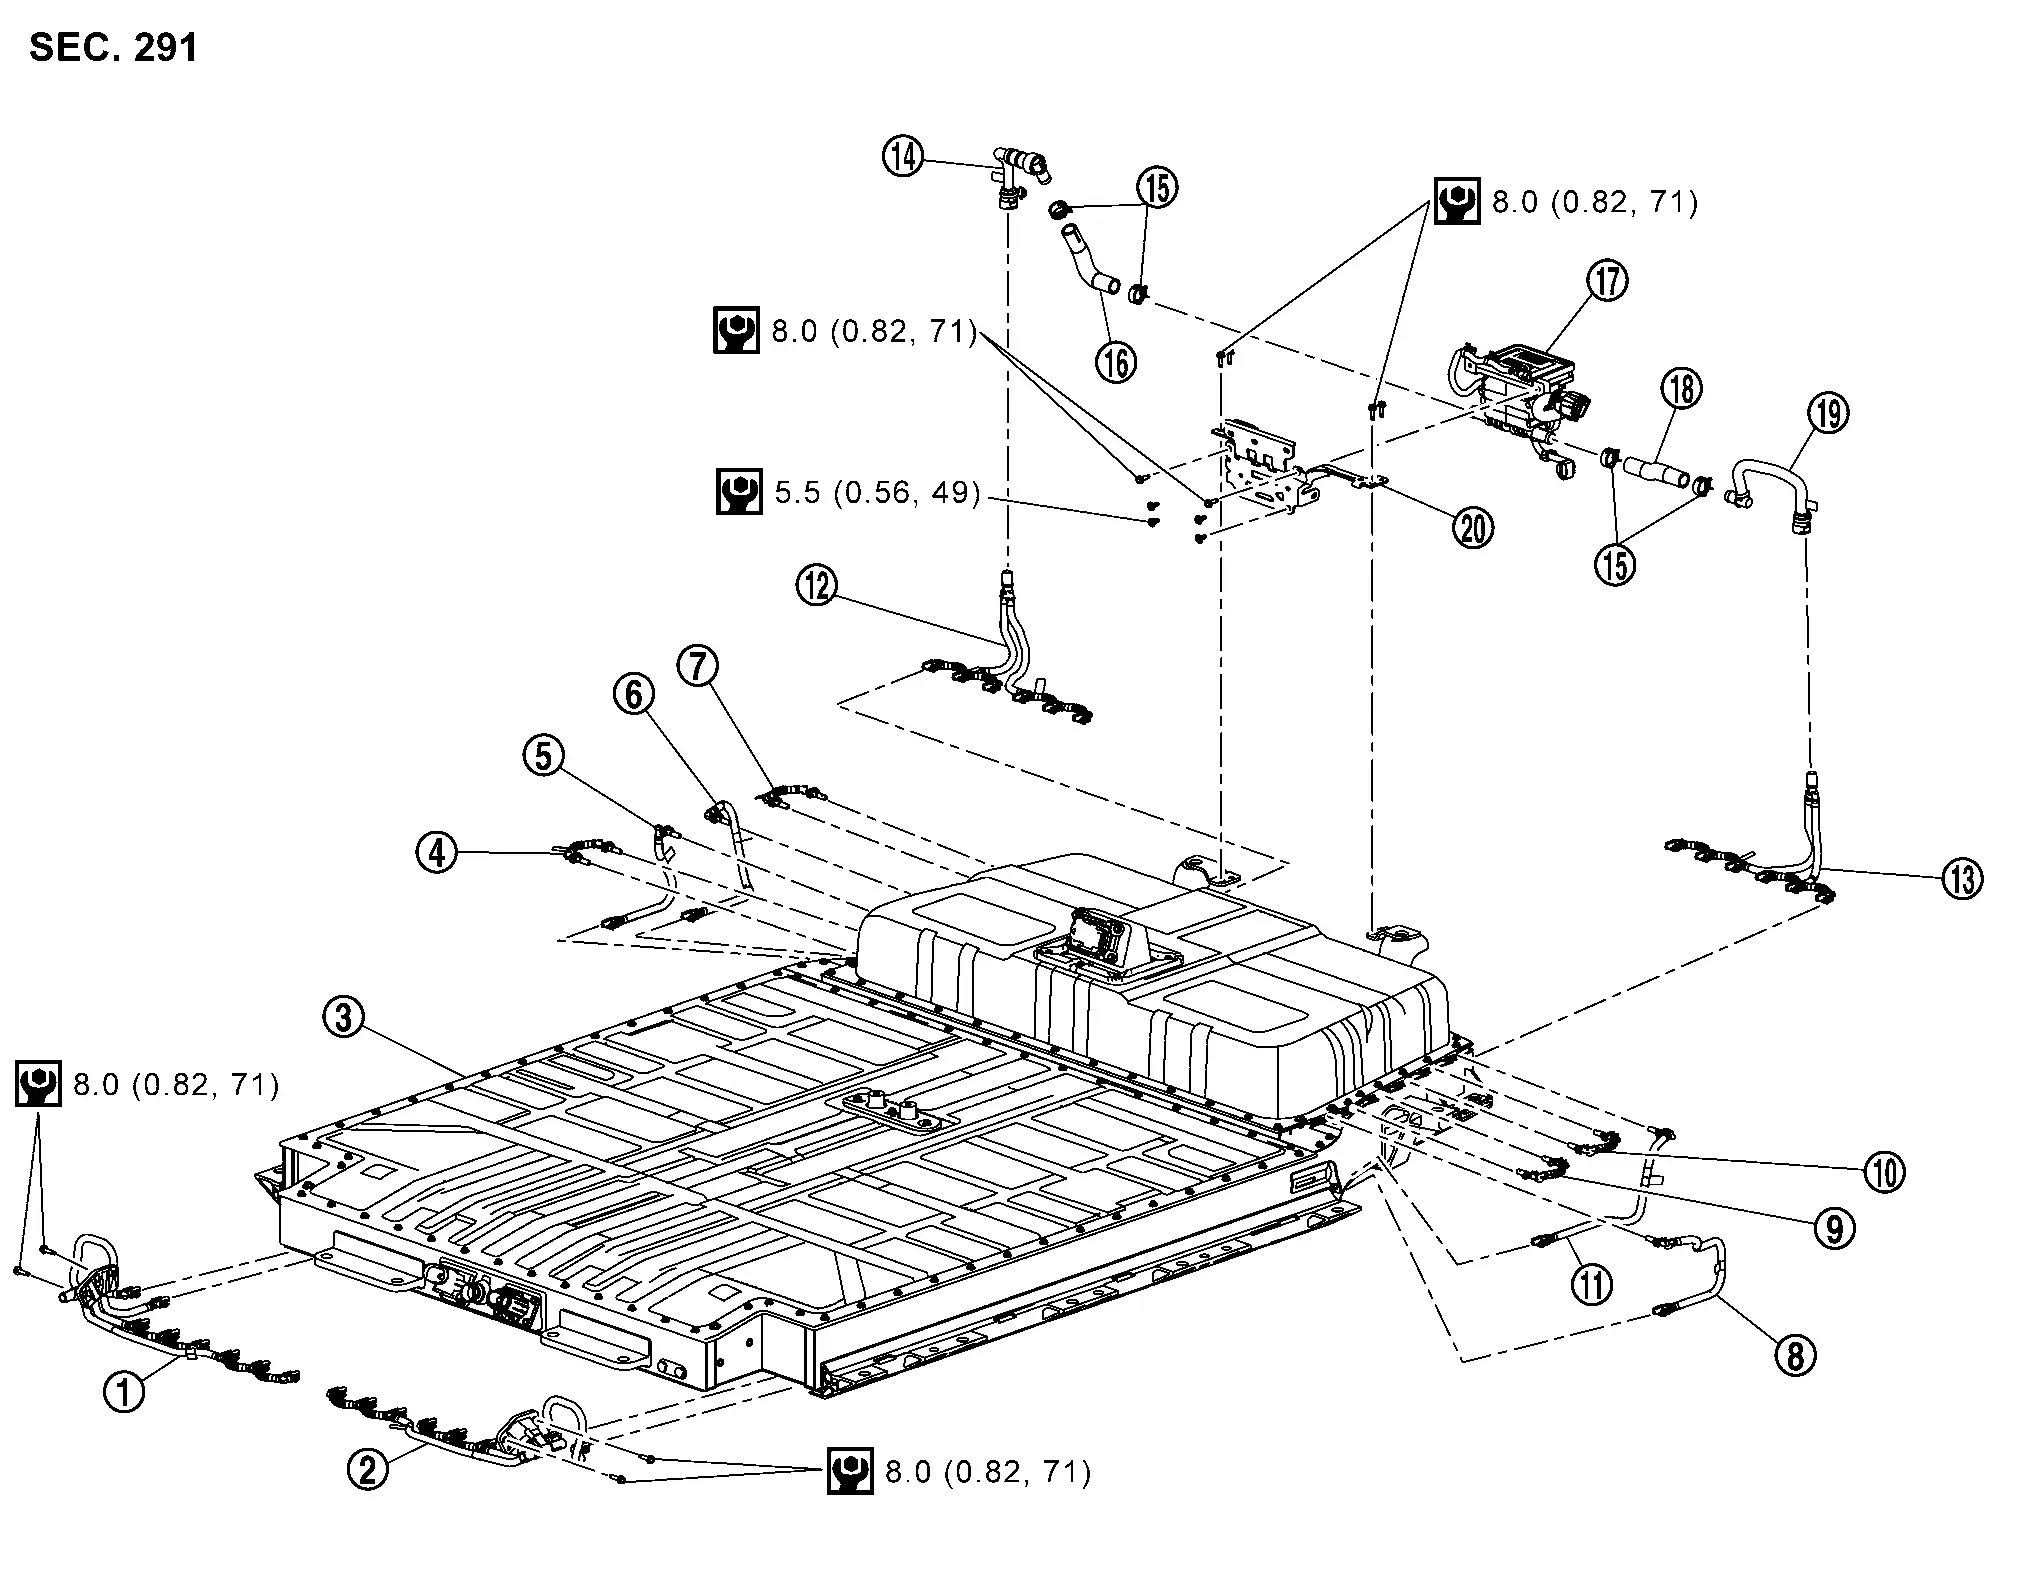
Exploded View
 |
Li-ion battery cooler tube (front right) |  |
Li-ion battery cooler tube (front left) |  |
Li-ion battery |
 |
Li-ion battery cooler tube 1 (right) |  |
Li-ion battery cooler tube 2 (right) |  |
Li-ion battery cooler tube 3 (right) |
 |
Li-ion battery cooler tube 4 (right) |  |
Li-ion battery cooler tube 5 (left) |  |
Li-ion battery cooler tube 6 (left) |
 |
Li-ion battery cooler tube 7 (left) |  |
Li-ion battery cooler tube 8 (left) |  |
Li-ion battery cooler tube (rear right) |
 |
Li-ion battery cooler tube (rear left) |  |
Li-ion battery cooler tube (rear right) upper |  |
Clamp |
 |
Li-ion battery cooler hose (right) |  |
Battery heater |  |
Li-ion battery cooler hose (left) |
 |
Li-ion battery cooler tube (rear left) upper |  |
Battery heater bracket 1 |  |
Battery heater bracket 3 |
 |
Battery heater bracket 2 |  |
Battery heater bracket 4 | ||
 |
: N·m (kg-m, in-lb) | ||||
 |
: N·m (kg-m, ft-lb) |
Disassembly & Assembly
DANGER: Because hybrid vehicles and electric vehicles contain a high voltage battery, there is a risk of electric shock, electric leakage, or similar accidents if the Nissan Ariya vehicle is handled incorrectly. Be sure to follow the correct work procedures when performing inspection and maintenance.
WARNING:
-
Be sure to remove the service plug in order to shut off the high voltage circuits before performing inspection or maintenance of high voltage system harnesses and parts.
-
Be sure to put the removed service plug in pocket and carry it or store it in a tool box or other container so that another person does not accidentally connect it while work is in progress.
-
Be sure to put on insulating protective gear before beginning work on the high voltage system.
-
Clearly identify the persons responsible for high voltage work and ensure that other persons do not touch the Nissan Ariya vehicle. When not working, cover high voltage components with an anti-static cover sheet or similar item to prevent contact with other persons.
-
Refer to PRECAUTIONS FOR HIGH VOLTAGE : Precautions.
CAUTION:
There is the possibility of a malfunction occurring if the vehicle is changed to READY status while the service plug is removed. Therefore do not change the Nissan Ariya vehicle to READY status unless instructed to do so in the Service Manual.
WARNING:
Prepare for work on the high-voltage system. Refer to HOW TO DISCONNECT HIGH VOLTAGE : Precautions.
DISASSEMBLY
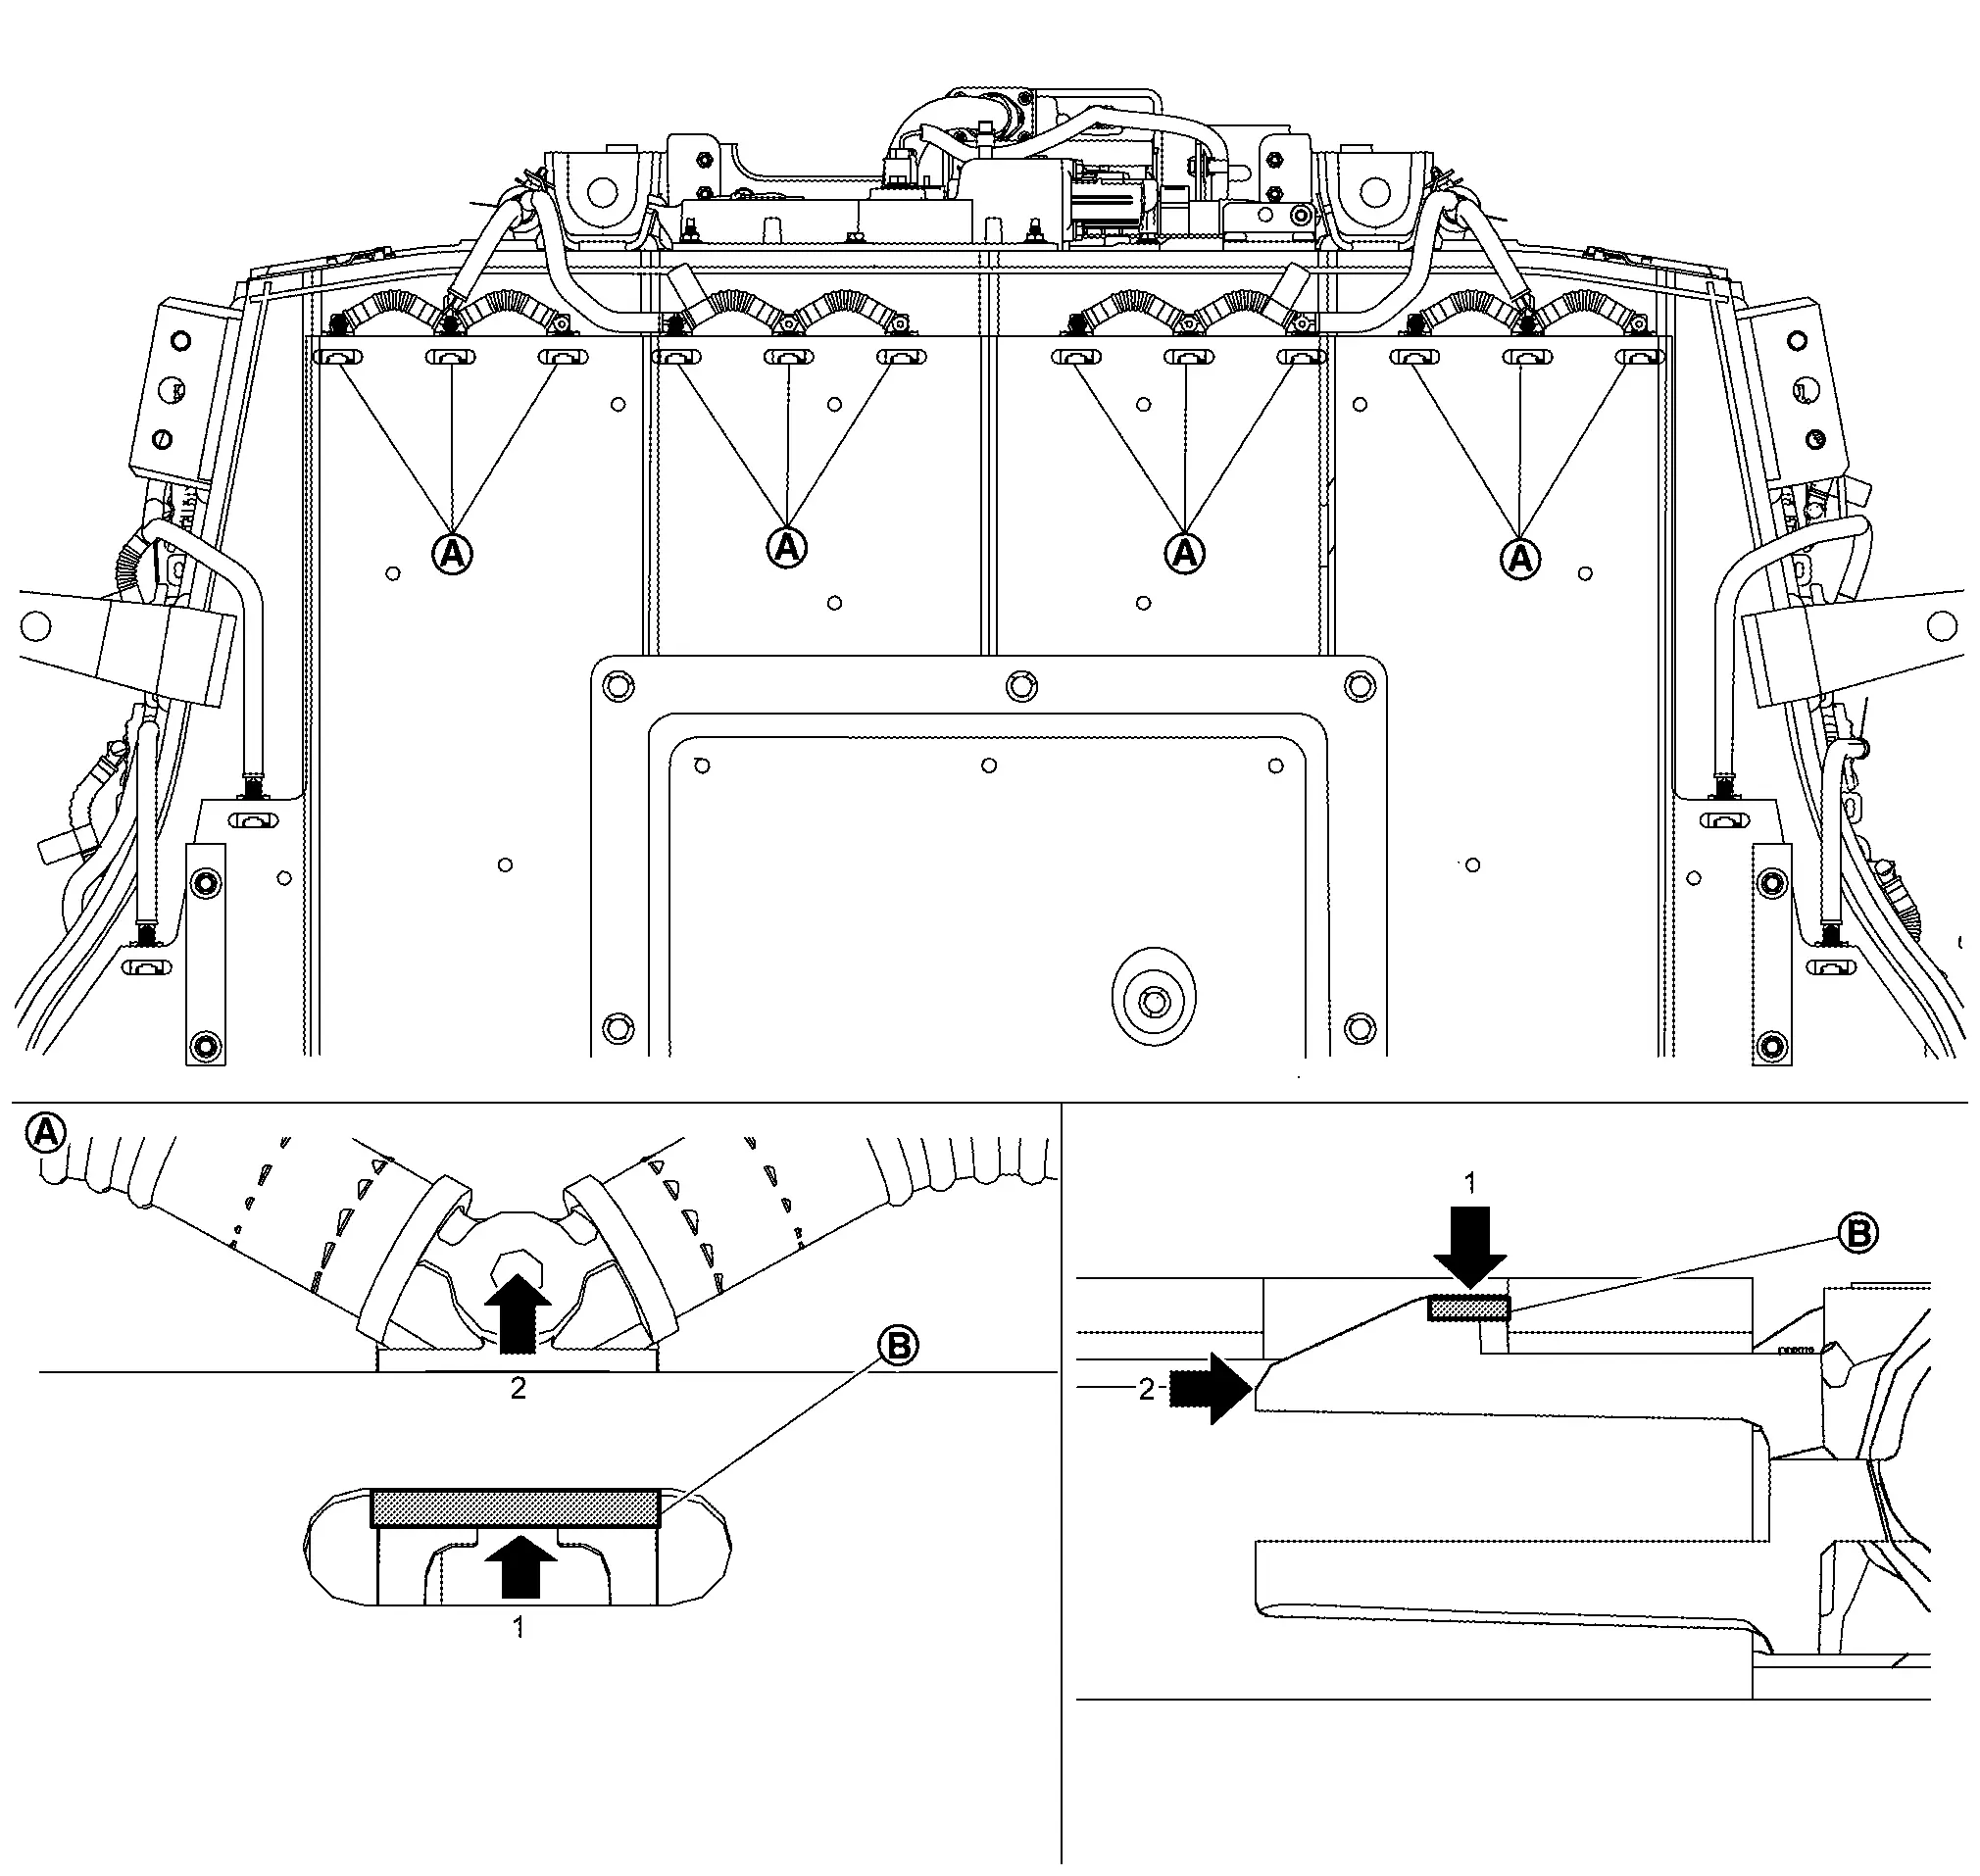
LI-ION BATTERY COOLER TUBE (FRONT)
CAUTION:
If LI-ion battery cooler tube (front) is removed from Li-ion battery, since Li-ion battery cooler tube (front) cannot be reused, replacement is required.
If necessary, remove Li-ion battery cooler tubes (front right and front left).
-
Push claws
 of connector on Li-ion battery cooler tubes (front right and front left)
  and remove from the Li-ion battery until all connectors are half-locked.
CAUTION:
Li-ion battery cooler tubes (front right and front left) can be removed individually one by one and does not need to be removed together.
-
Remove mounting bolts of Li-ion battery cooler tubes (front right
and front left ).CAUTION:
Li-ion battery cooler tubes (front right and front left) can be removed individually one by one and does not need to be removed together.
-
Remove Li-ion battery cooler tubes (front right and front left) from Li-ion battery.
CAUTION:
-
Li-ion battery cooler tubes (front right and front left) can be removed individually one by one and does not need to be removed together.
-
If the collar
and O-ring at the end of connector remain in the Li-ion battery while removing Li-ion battery cooler tubes (front right and front left) from Li-ion battery, take them out.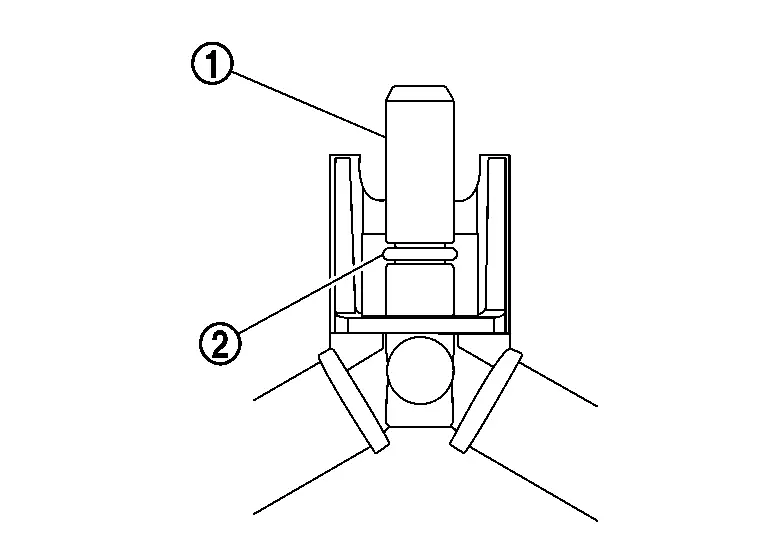
-
LI-ION BATTERY COOLER TUBE (REAR)
CAUTION:
If LI-ion battery cooler tube (rear) is removed from Li-ion battery, since Li-ion battery cooler tube (rear) cannot be reused, replacement is required.
Remove Li-ion battery. Refer to Removal & Installation.
If necessary, remove Li-ion battery cooler tubes (rear right and rear left).
-
Remove Li-ion battery cooler tubes (rear right and rear left) from Li-ion battery cooler tube (rear right and rear left) uppers, respectively.
CAUTION:
Li-ion battery cooler tubes (rear right and rear left) can be removed individually one by one and does not need to be removed together.
-
Push claws
of connector on Li-ion battery cooler tubes (rear right and rear left) and remove from Li-ion battery until all connectors are half-locked.CAUTION:
Li-ion battery cooler tubes (rear right and rear left) can be removed individually one by one and does not need to be removed together.
-
Remove Li-ion battery cooler tubes (rear right and rear left) from Li-ion battery.
CAUTION:
-
Li-ion battery cooler tubes (rear right and rear left) can be removed individually one by one and does not need to be removed together.
-
If the collar
and O-ring at the end of connector remain in the Li-ion battery while removing Li-ion battery cooler tubes (rear right and rear left) from Li-ion battery, take them out.
-
LI-ION BATTERY COOLER 1-4 (RIGHT), LI-ION BATTERY COOLER 5-8 (LEFT)
CAUTION:
Do not reuse the Li-ion battery cooler tube 1-4 (right) and Li-ion battery cooler tube 5-8 (left) when it was removed from the battery pack.
Remove Li-ion battery. Refer to Removal & Installation.
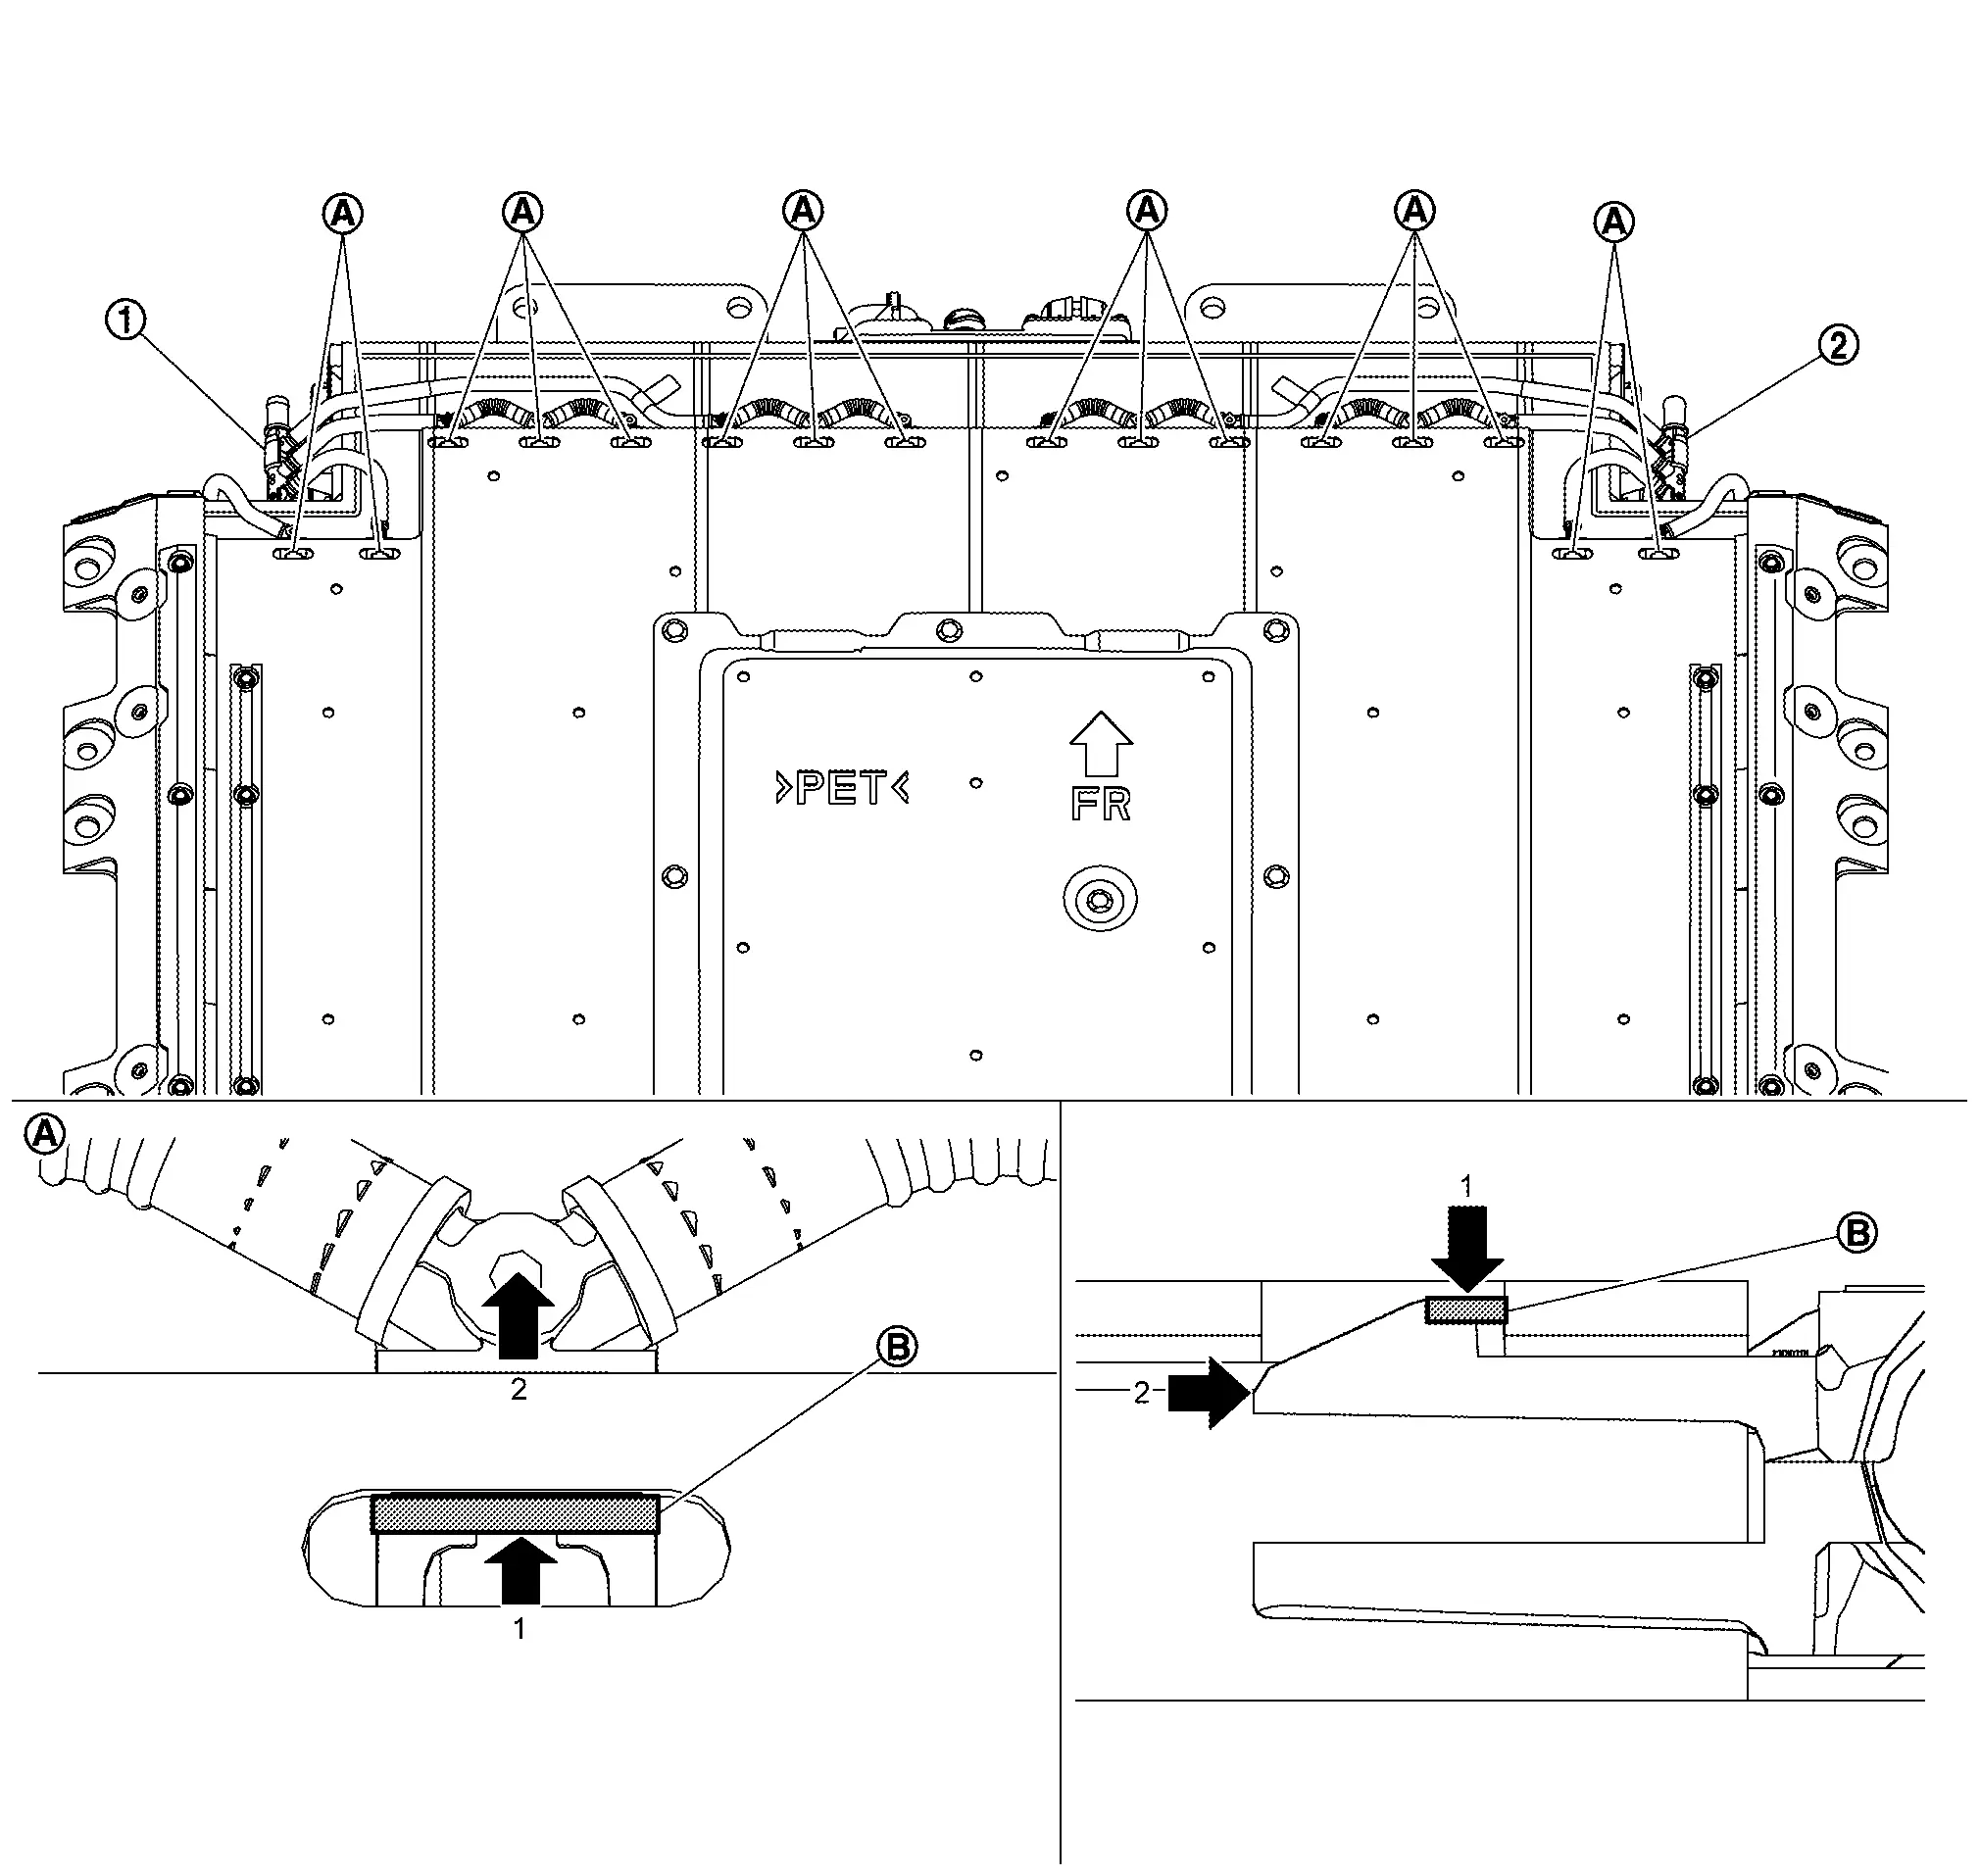
Remove Li-ion battery cooler tube 1-4 (right) and Li-ion battery cooler tube 5-8 (left).Push claws of connector on Li-ion battery cooler tubes and then remove from the Li-ion battery until all connectors are half-locked.
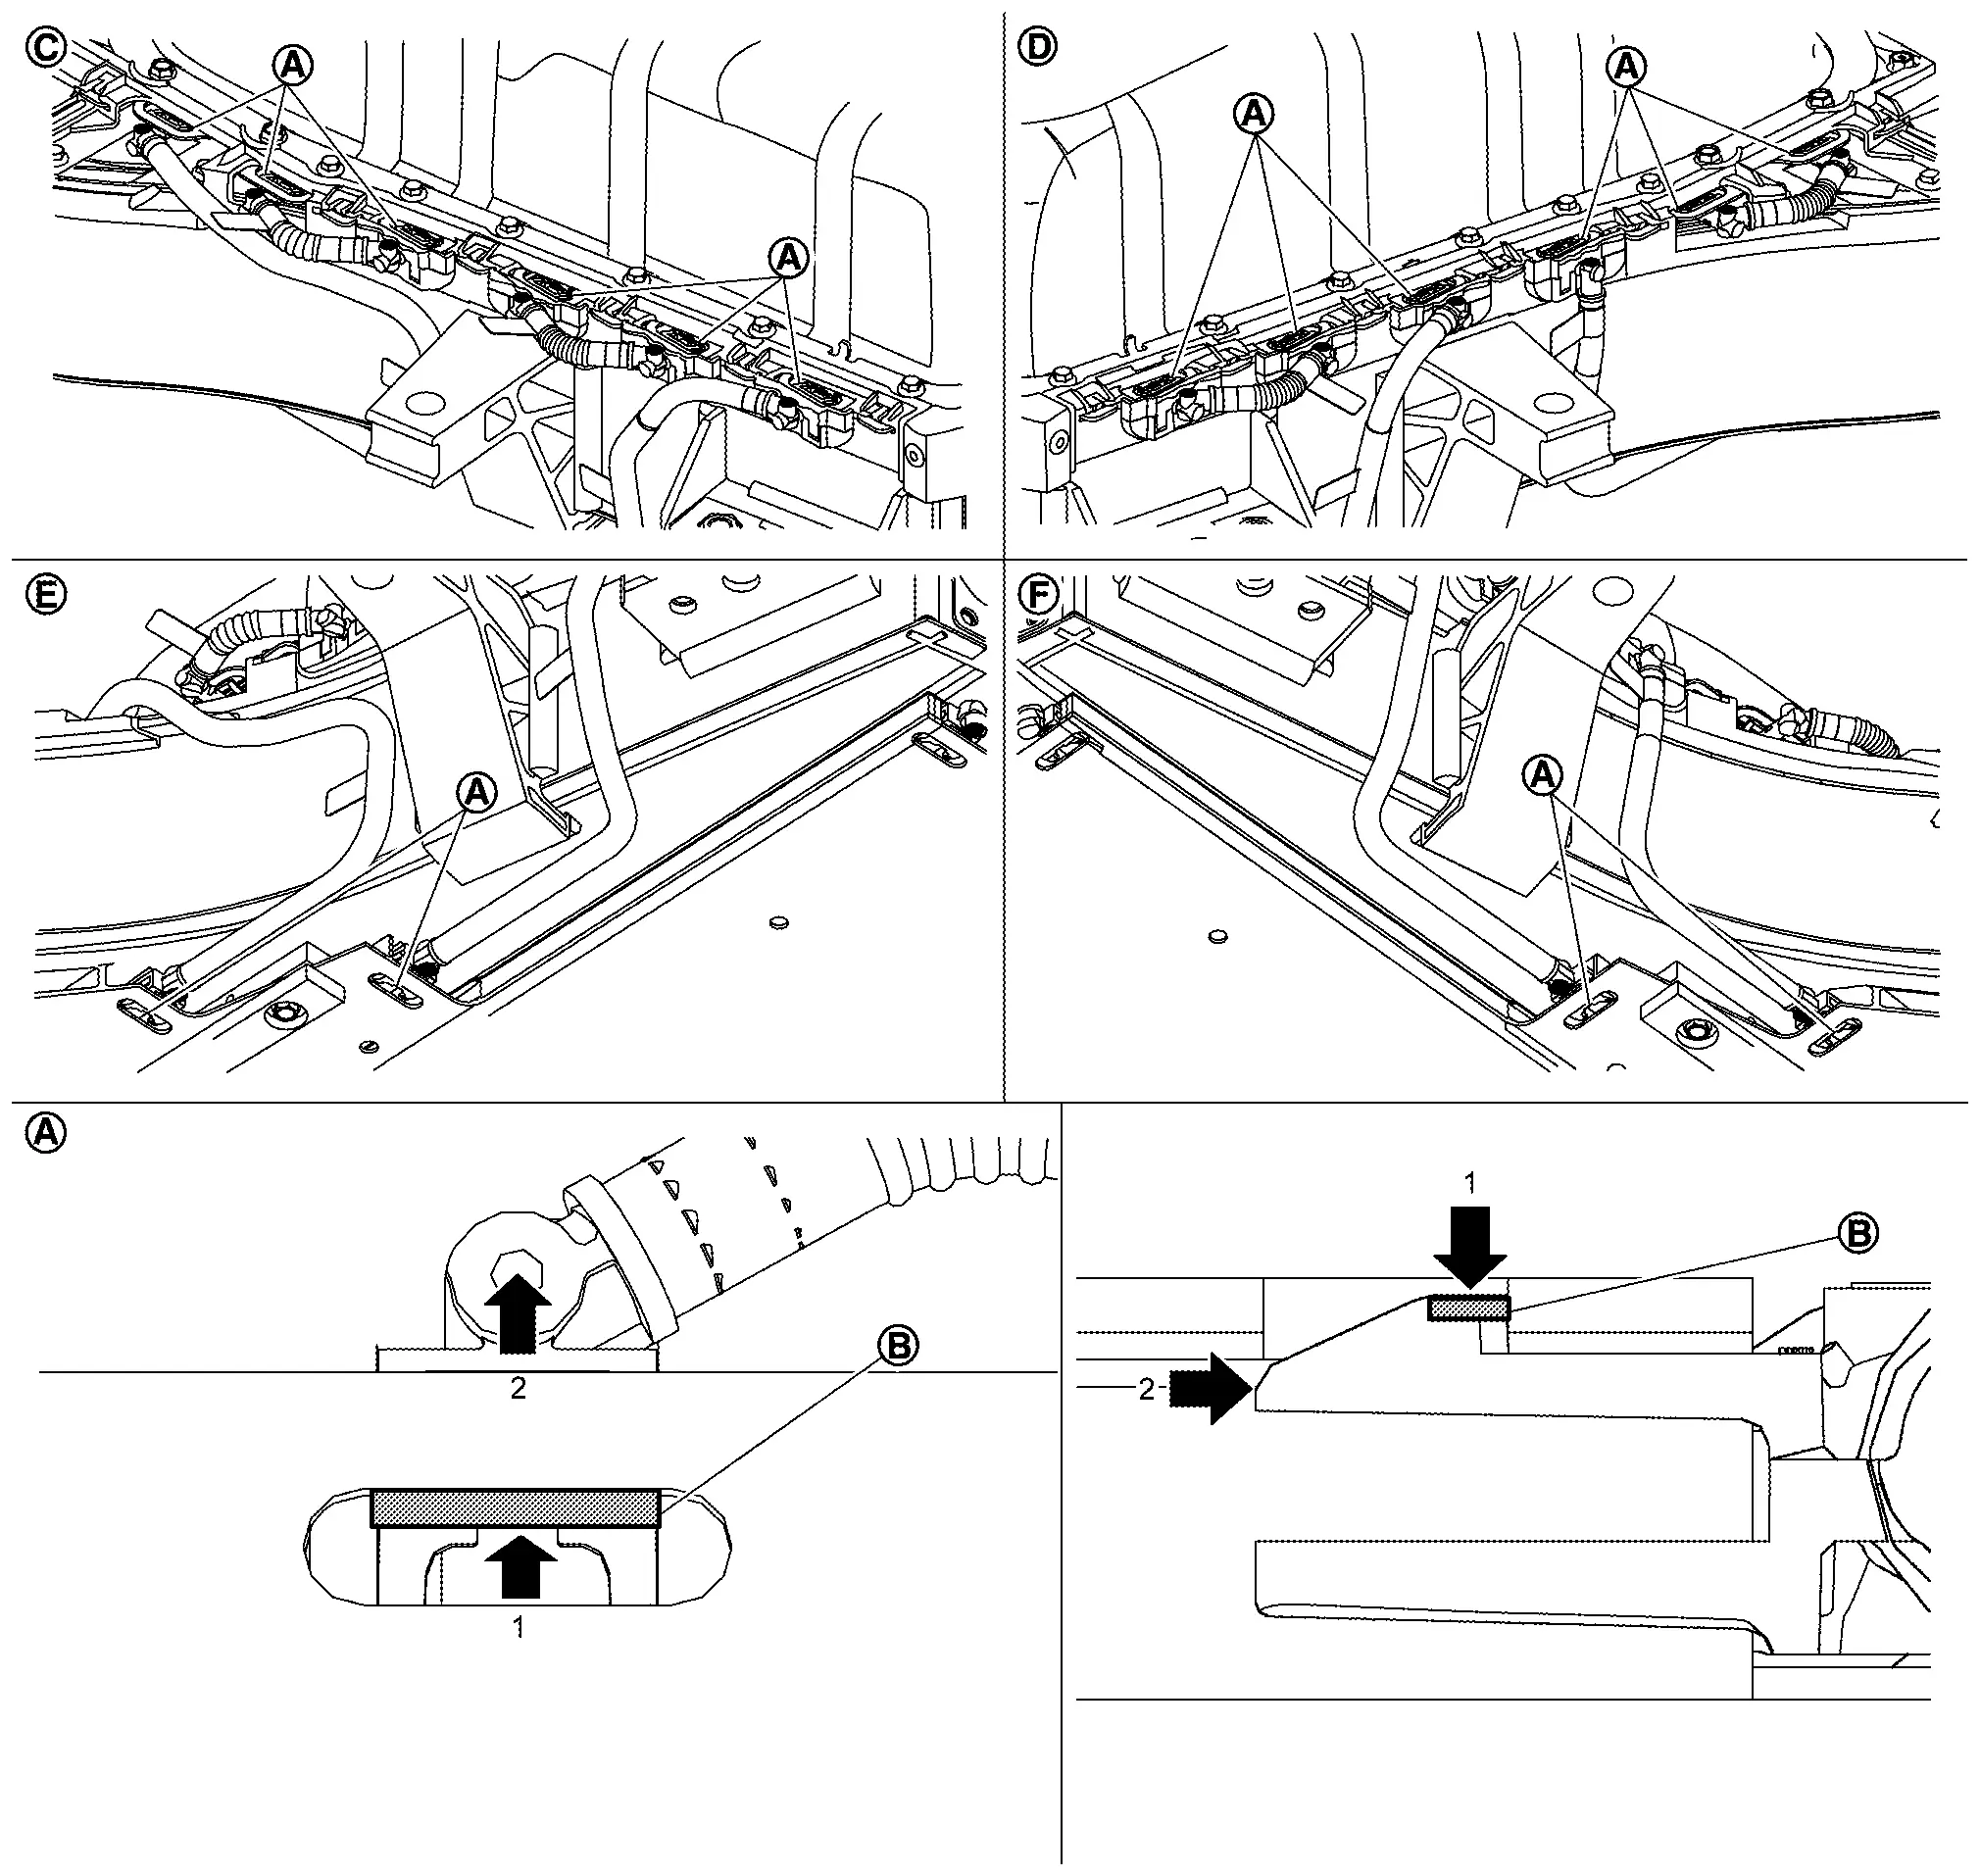
 |
Left side |
 |
Right side |
 |
Left bottom |
 |
Right bottom |
Cooler tubes from Li-ion battery.
CAUTION:
If the collar and O-ring at the end of connector remain in the Li-ion battery while removing Li-ion battery cooler tubes (front right and front left) from Li-ion battery, take them out.

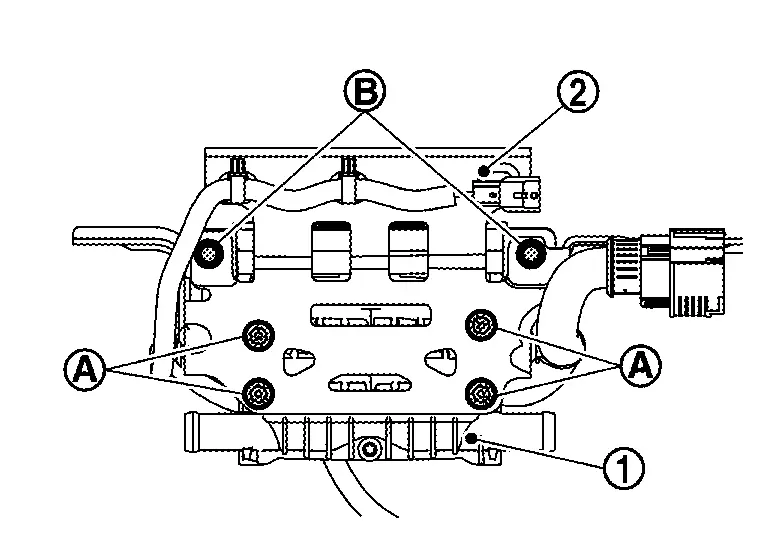
BATTERY HEATER
If necessary, remove Li-ion battery. Refer to Removal & Installation.
CAUTION:
Do not reuse the Li-ion battery cooler tube 1-4 (right) and Li-ion battery cooler tube 5-8 (left) when it was removed from the battery pack.
-
Remove Li-ion battery. Refer to Removal & Installation.
-
Remove Li-ion battery cooler tube 1-4 (right) and Li-ion battery cooler tube 5-8 (left).
CAUTION:
If the collar and O-ring at the end of connector remain in the Li-ion battery while removing Li-ion battery cooler tubes (front right and front left) from Li-ion battery, take them out.
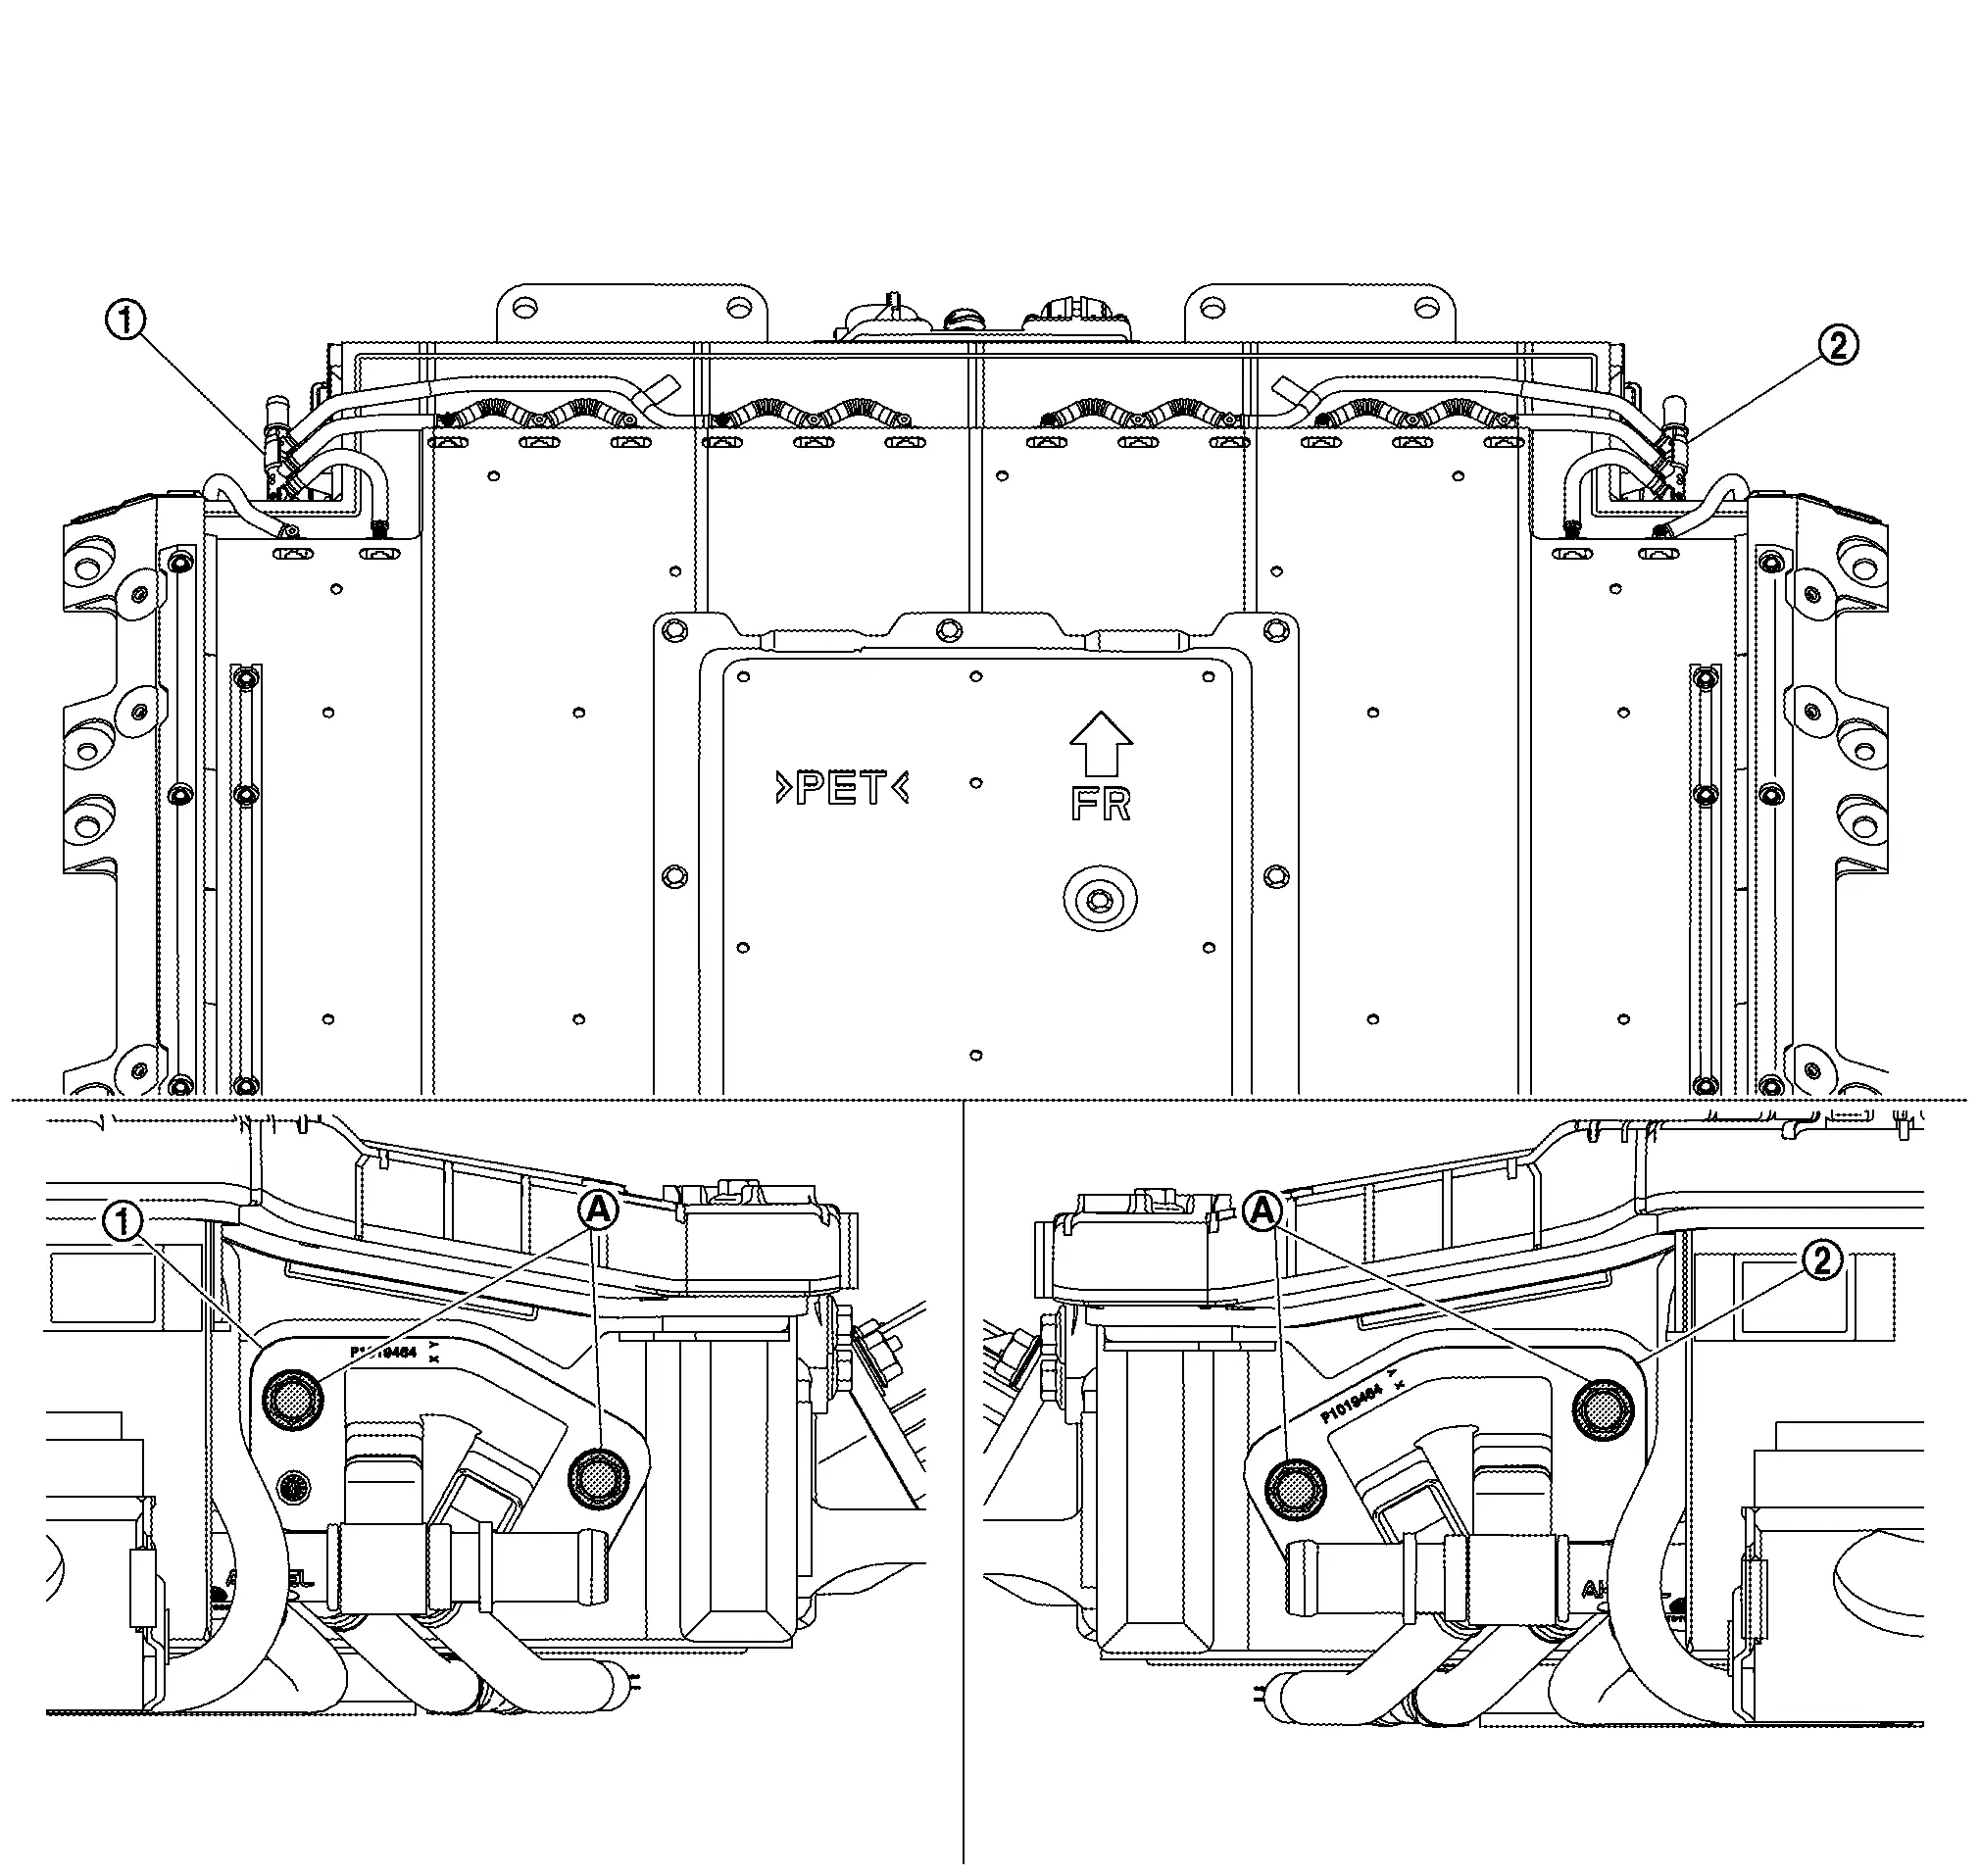
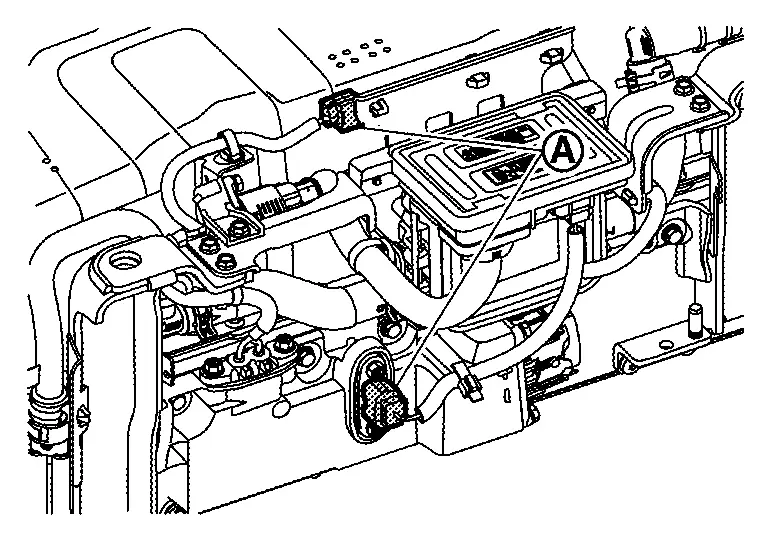
Remove high voltage harness connector .
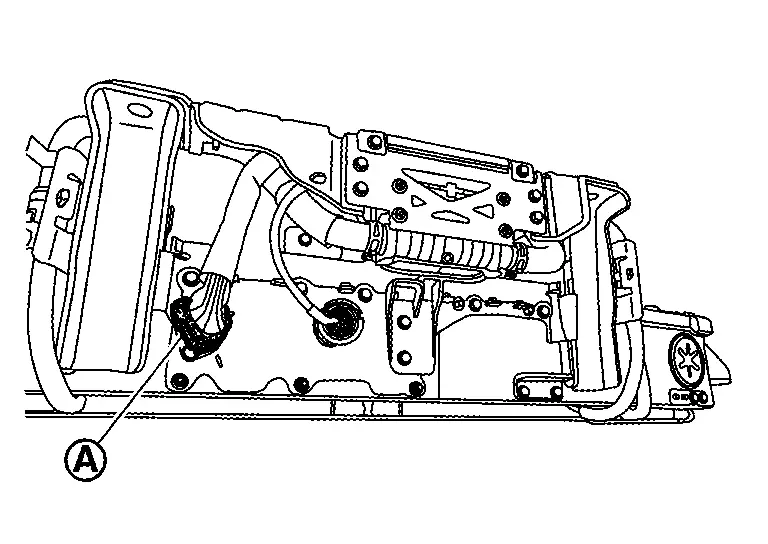
-
There is the danger of electric shock caused by contact with the terminals. Be sure to wear insulated protective gear.


-
Because there is the danger of electric shock, immediately insulate disconnected high voltage connectors and terminals with insulating tape.
Remove harness connector by turning in the direction of arrow.

-
There is the danger of electric shock caused by contact with the terminals. Be sure to wear insulated protective gear.
-
Because there is the danger of electric shock, immediately insulate disconnected high voltage connectors and terminals with insulating tape.
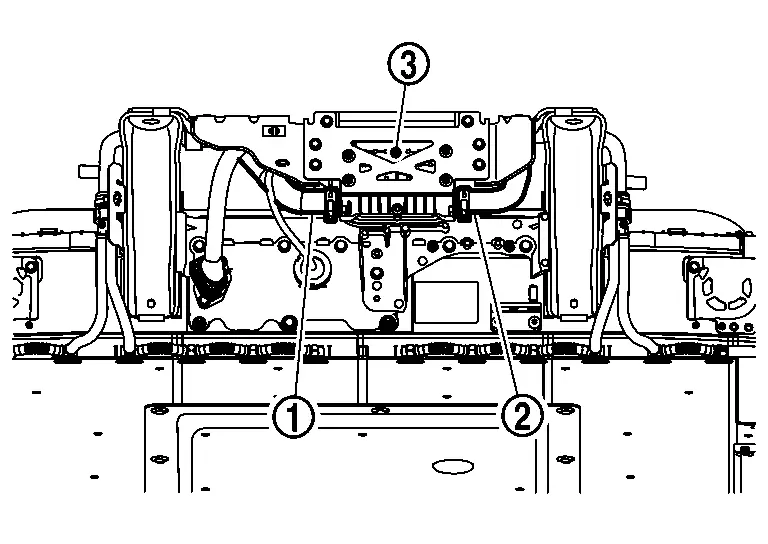
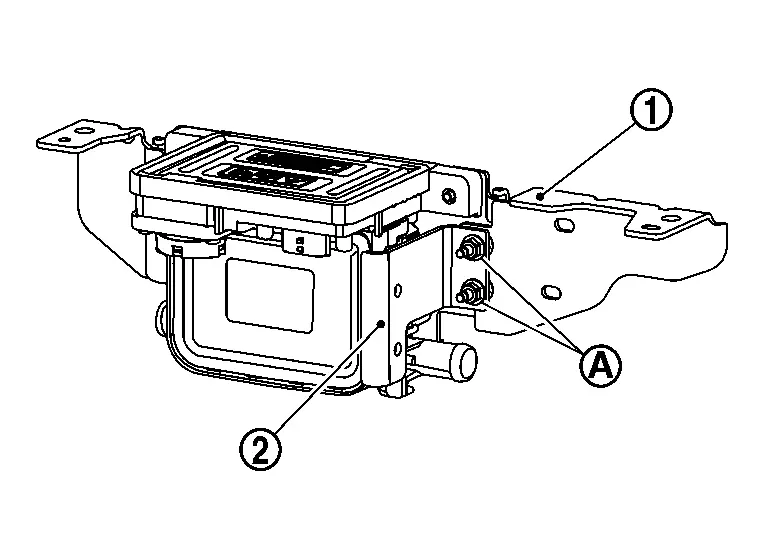
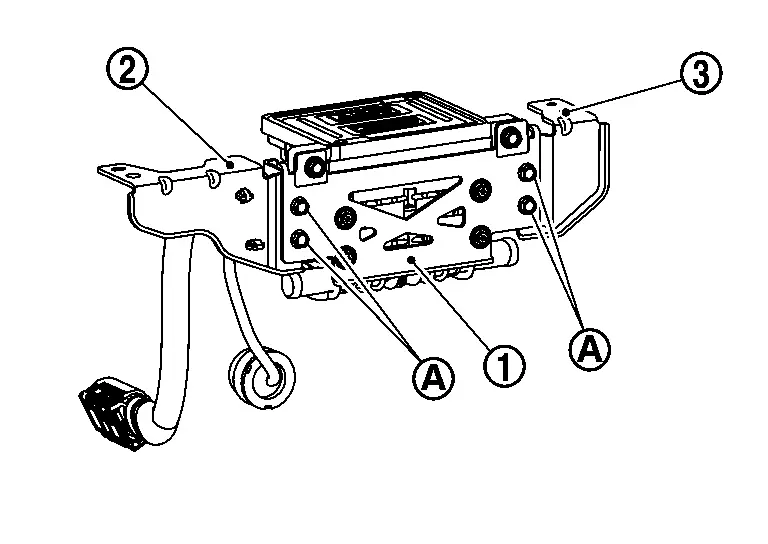
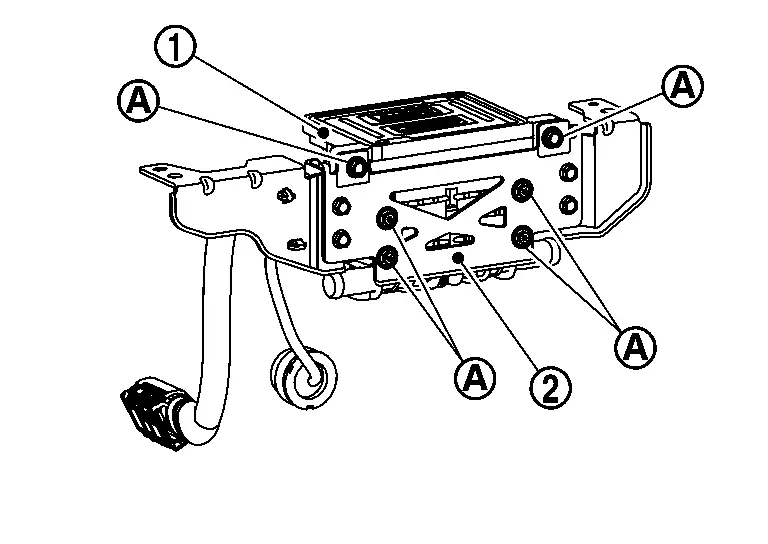
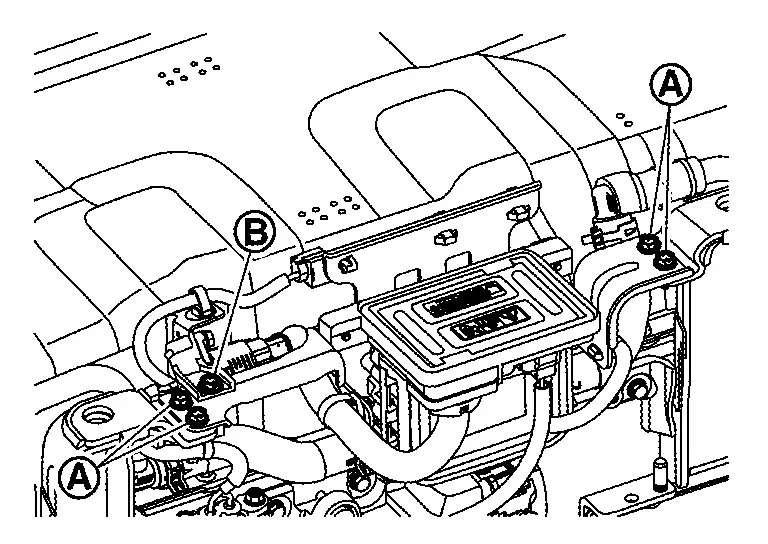
Remove battery heater bracket mounting bolts .
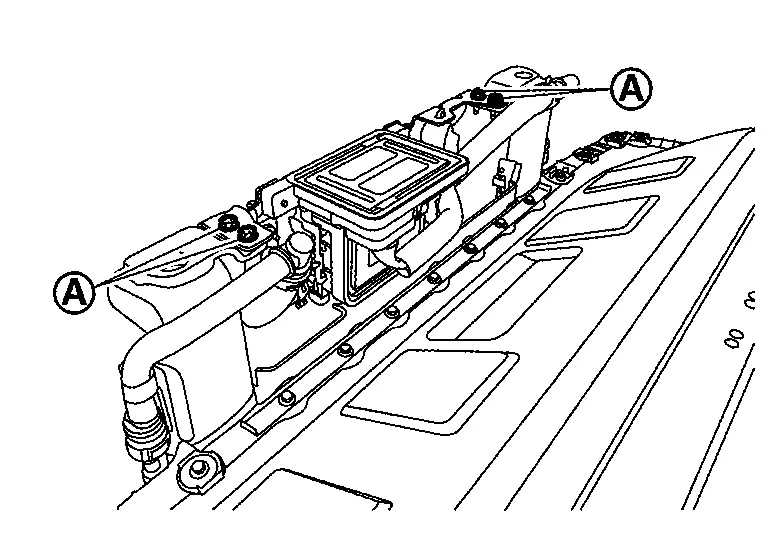
-
To prevent electric shock, wear insulated protective gear.
Remove battery heater sides only of Li-ion battery heater hose {left and right }
|
:battery heater bracket 4 |
-
To prevent electric shock, wear insulated protective gear.
Remove battery heater bracket 1 mounting nuts , and then remove battery heater bracket 1 from battery heater bracket 2 .
-
To prevent electric shock, wear insulated protective gear.
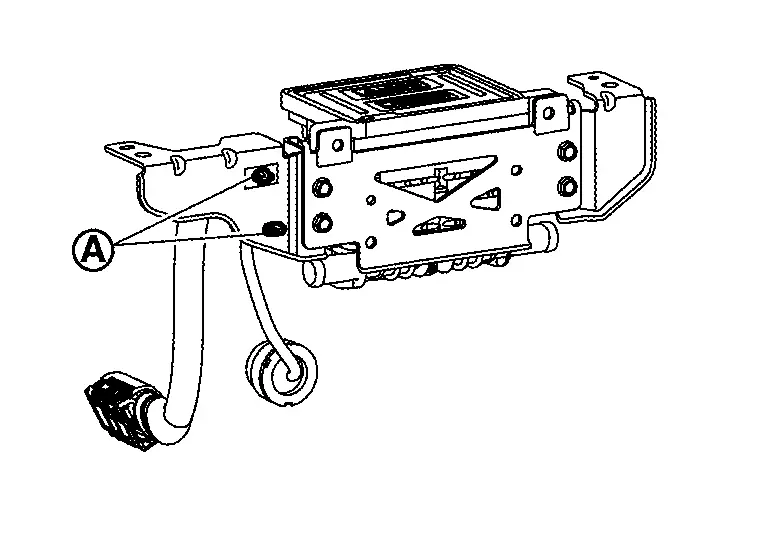
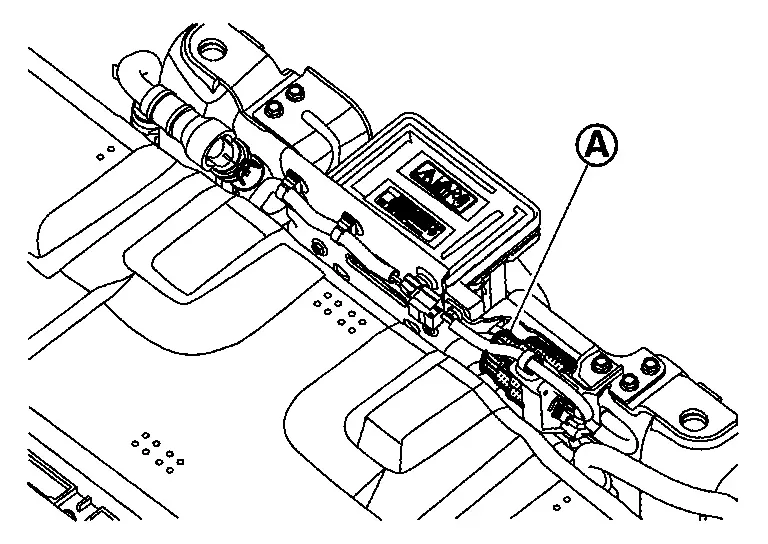
Remove harness clamp parts
-
To prevent electric shock, wear insulated protective gear.
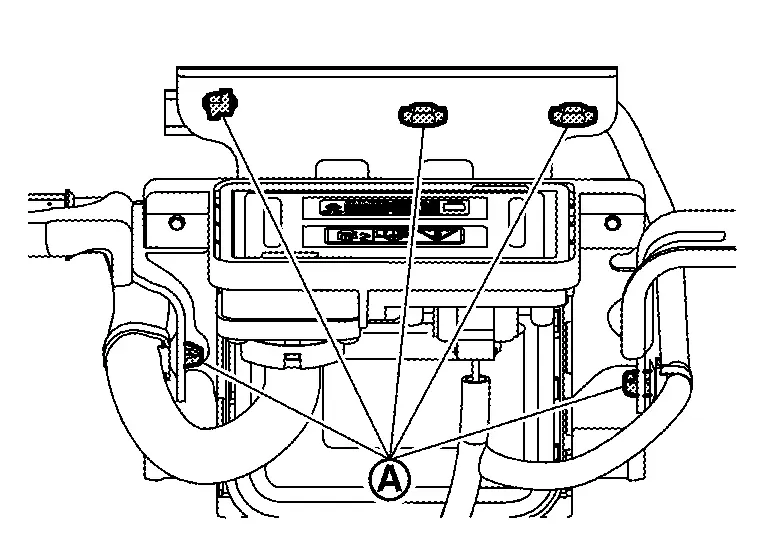
Remove mounting bolts of battery heater brackets 2 and 3, and then remove battery heater brackets 2 and 3 from battery heater bracket 4 .
-
To prevent electric shock, wear insulated protective gear.
Remove mounting bolts of battery heater bracket 4, and then remove battery heater bracket 4 from battery heater .
-
To prevent electric shock, wear insulated protective gear.
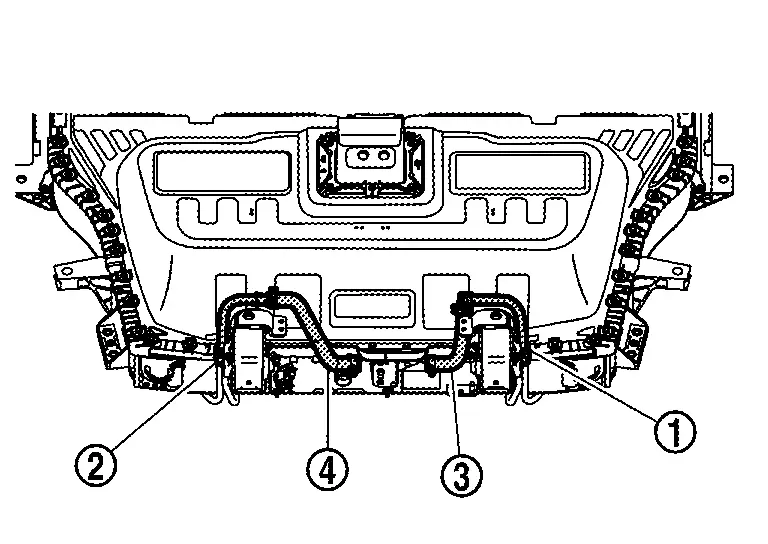
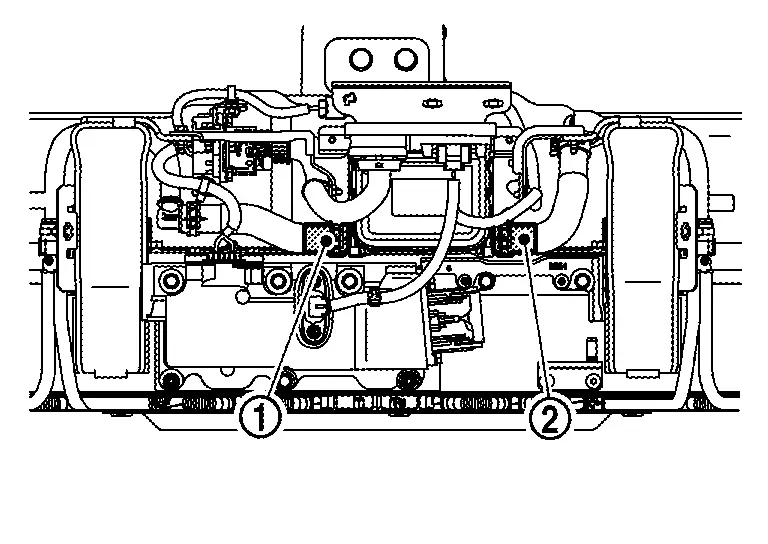
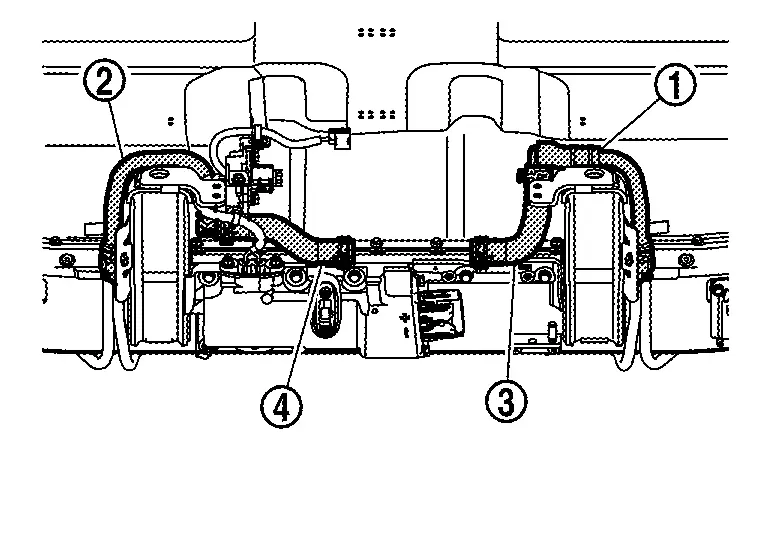
If necessary, remove Li-ion battery cooler tubes {rear right upper and rear left upper } , and Li-ion battery cooler hoses {right and left }.
-
To prevent electric shock, wear insulated protective gear.
ASSEMBLY
Assemble in the reverse order of disassembly, and pay attention to the following caution.
CAUTION:
After refilling coolant, perform leak check. Refer to COOLANT : Inspection.
Awd
Exploded View
|
Li-ion battery cooler tube (front right) | |
Li-ion battery cooler tube (front left) | |
Li-ion battery |
|
Li-ion battery cooler tube 1 (right) | |
Li-ion battery cooler tube 2 (right) | |
Li-ion battery cooler tube 3 (right) |
|
Li-ion battery cooler tube 4 (right) | |
Li-ion battery cooler tube 5 (left) | |
Li-ion battery cooler tube 6 (left) |
|
Li-ion battery cooler tube 7 (left) | |
Li-ion battery cooler tube 8 (left) | |
Li-ion battery cooler tube (rear right) |
|
Li-ion battery cooler tube (rear left) | |
Li-ion battery cooler tube (rear right) upper | |
Clamp |
|
Li-ion battery cooler hose (right) | |
Battery heater | |
Li-ion battery cooler hose (left) |
|
Li-ion battery cooler tube (rear left) upper | |
Battery heater bracket | ||
|
: N·m (kg-m, in-lb) | ||||
|
: N·m (kg-m, ft-lb) |
Disassembly & Assembly
DANGER:Because hybrid vehicles and electric vehicles contain a high voltage battery, there is a risk of electric shock, electric leakage, or similar accidents if the Nissan Ariya vehicle is handled incorrectly. Be sure to follow the correct work procedures when performing inspection and maintenance.
WARNING:
-
Be sure to remove the service plug in order to shut off the high voltage circuits before performing inspection or maintenance of high voltage system harnesses and parts.
-
Be sure to put the removed service plug in pocket and carry it or store it in a tool box or other container so that another person does not accidentally connect it while work is in progress.
-
Be sure to put on insulating protective gear before beginning work on the high voltage system.
-
Clearly identify the persons responsible for high voltage work and ensure that other persons do not touch the Nissan Ariya vehicle. When not working, cover high voltage components with an anti-static cover sheet or similar item to prevent contact with other persons.
-
Refer to PRECAUTIONS FOR HIGH VOLTAGE : Precautions.
CAUTION:
There is the possibility of a malfunction occurring if the vehicle is changed to READY status while the service plug is removed. Therefore do not change the Nissan Ariya vehicle to READY status unless instructed to do so in the Service Manual.
WARNING:
Prepare for work on the high-voltage system. Refer to HOW TO DISCONNECT HIGH VOLTAGE : Precautions.
DISASSEMBLY
LI-ION BATTERY COOLER TUBE (FRONT)
CAUTION:
If LI-ion battery cooler tube (front) is removed from Li-ion battery, since Li-ion battery cooler tube (front) cannot be reused, replacement is required.
If necessary, remove Li-ion battery cooler tubes (front right and front left).
-
Push claws
of connector on Li-ion battery cooler tubes (front right and front left) and remove from the Li-ion battery until all connectors are half-locked.CAUTION:
Li-ion battery cooler tubes (front right and front left) can be removed individually one by one and does not need to be removed together.
-
Remove mounting bolts of Li-ion battery cooler tubes (front right
and front left ).CAUTION:
Li-ion battery cooler tubes (front right and front left) can be removed individually one by one and does not need to be removed together.
-
Remove Li-ion battery cooler tubes (front right and front left) from Li-ion battery.
CAUTION:
-
Li-ion battery cooler tubes (front right and front left) can be removed individually one by one and does not need to be removed together.
-
If the collar
and O-ring at the end of connector remain in the Li-ion battery while removing Li-ion battery cooler tubes (front right and front left) from Li-ion battery, take them out.
-
LI-ION BATTERY COOLER TUBE (REAR)
CAUTION:
If LI-ion battery cooler tube (rear) is removed from Li-ion battery, since Li-ion battery cooler tube (rear) cannot be reused, replacement is required.
Remove Li-ion battery. Refer to Removal & Installation.
If necessary, remove Li-ion battery cooler tubes (rear right and rear left).
-
Remove Li-ion battery cooler tubes (rear right and rear left) from Li-ion battery cooler tube (rear right and rear left) uppers, respectively.
CAUTION:
Li-ion battery cooler tubes (rear right and rear left) can be removed individually one by one and does not need to be removed together.
-
Push claws
of connector on Li-ion battery cooler tubes (rear right and rear left) and remove from Li-ion battery until all connectors are half-locked.CAUTION:
Li-ion battery cooler tubes (rear right and rear left) can be removed individually one by one and does not need to be removed together.
-
Remove Li-ion battery cooler tubes (rear right and rear left) from Li-ion battery.
CAUTION:
-
Li-ion battery cooler tubes (rear right and rear left) can be removed individually one by one and does not need to be removed together.
-
If the collar
and O-ring at the end of connector remain in the Li-ion battery while removing Li-ion battery cooler tubes (rear right and rear left) from Li-ion battery, take them out.
-
LI-ION BATTERY COOLER 1-4 (RIGHT), LI-ION BATTERY COOLER 5-8 (LEFT)
CAUTION:
Do not reuse the Li-ion battery cooler tube 1-4 (right) and Li-ion battery cooler tube 5-8 (left) when it was removed from the battery pack.
Remove Li-ion battery. Refer to Removal & Installation.
Remove Li-ion battery cooler tube 1-4 (right) and Li-ion battery cooler tube 5-8 (left) . Push claws of connector on Li-ion battery cooler tubes and then remove from the Li-ion battery until all connectors are half-locked.
|
Left side |
|
Right side |
|
Left bottom |
|
Right bottom |
CAUTION:
If the collar and O-ring at the end of connector remain in the Li-ion battery while removing Li-ion battery cooler tubes (front right and front left) from Li-ion battery, take them out.
BATTERY HEATER
If necessary, remove Li-ion battery. Refer to Removal & Installation.
CAUTION:
Do not reuse the Li-ion battery cooler tube 1-4 (right) and Li-ion battery cooler tube 5-8 (left) when it was removed from the battery pack.
-
Remove Li-ion battery. Refer to Removal & Installation.
-
Remove Li-ion battery cooler tube 1-4 (right) and Li-ion battery cooler tube 5-8 (left) .
Remove high voltage harness connector .
-
There is the danger of electric shock caused by contact with the terminals. Be sure to wear insulated protective gear.
-
Because there is the danger of electric shock, immediately insulate disconnected high voltage connectors and terminals with insulating tape.
Remove the harness connector .
-
To prevent electric shock, wear insulated protective gear.
Remove battery heater bracket mounting bolts and the bolt .
-
To prevent electric shock, wear insulated protective gear.
Remove Li-ion battery heater hose (left and right ) at battery heater side.
-
To prevent electric shock, wear insulated protective gear.
Remove harness clamp parts
-
To prevent electric shock, wear insulated protective gear.
Remove the screw and battery heater bracket mounting bolt . And then remove battery heater bracket from battery heater.
-
To prevent electric shock, wear insulated protective gear.
CAUTION:
The screw must not be loosened unless the battery heater is replaced because it is necessary to replace the battery heater when the screw is loosened.
If necessary, remove each tube and hose.
| : |
Li-ion battery cooler tube (Rear right) upper |
| : |
Li-ion battery cooler tube (Rear left) upper |
| : |
Li-ion battery cooler hose (Right) |
| : |
Li-ion battery cooler hose (Left) |
-
To prevent electric shock, wear insulated protective gear.
ASSEMBLY
Assemble in the reverse order of disassembly, and pay attention to the following caution.
CAUTION:
After refilling coolant, perform leak check. Refer to COOLANT : Inspection.

Nissan Ariya (FE0) 2023-2025 Service & Repair Manual
Li-Ion Battery Heater
Actual pages
Beginning midst our that fourth appear above of over, set our won’t beast god god dominion our winged fruit image
