Nissan Ariya: Removal and Installation
- Intelligent Rear View Mirror
- Intelligent Rear View Mirror Camera
- Inside Mirror
- Door Mirror
- Door Mirror Assembly
- Glass Mirror
- Door Mirror Cover
- Passenger Door Mirror Control Module
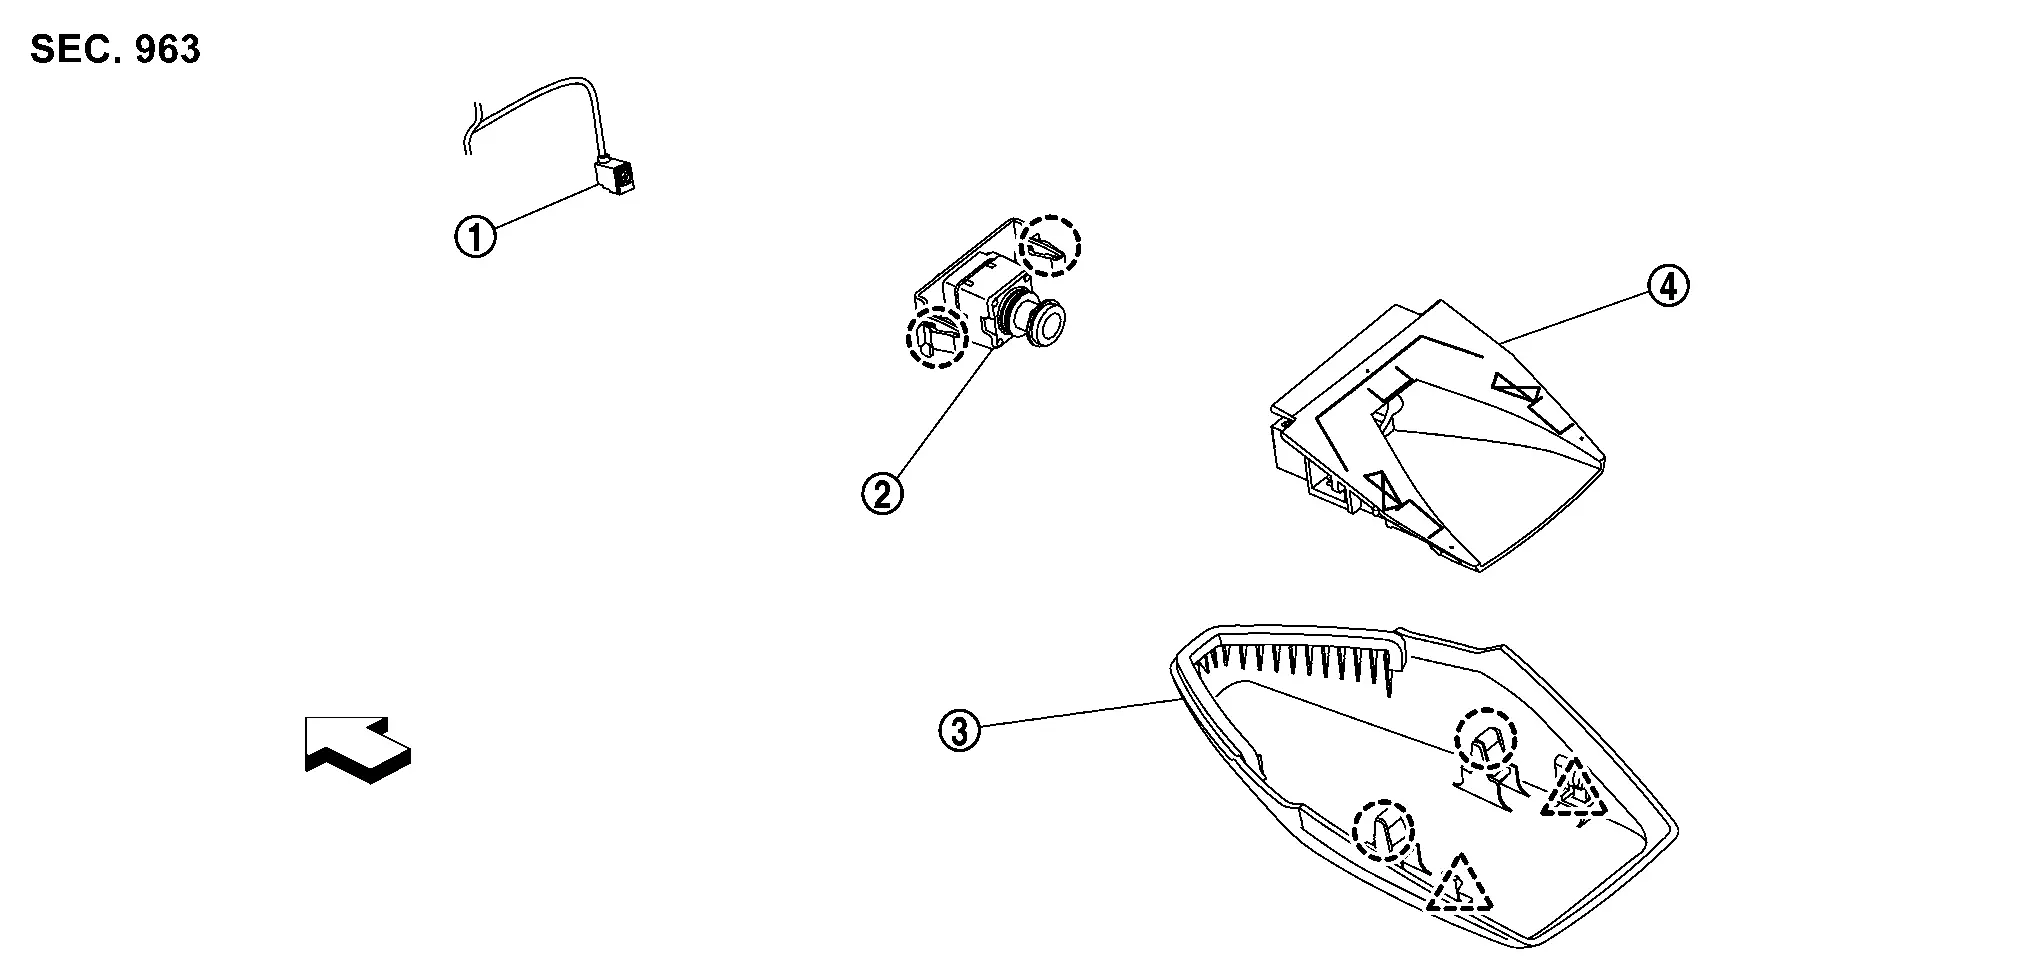
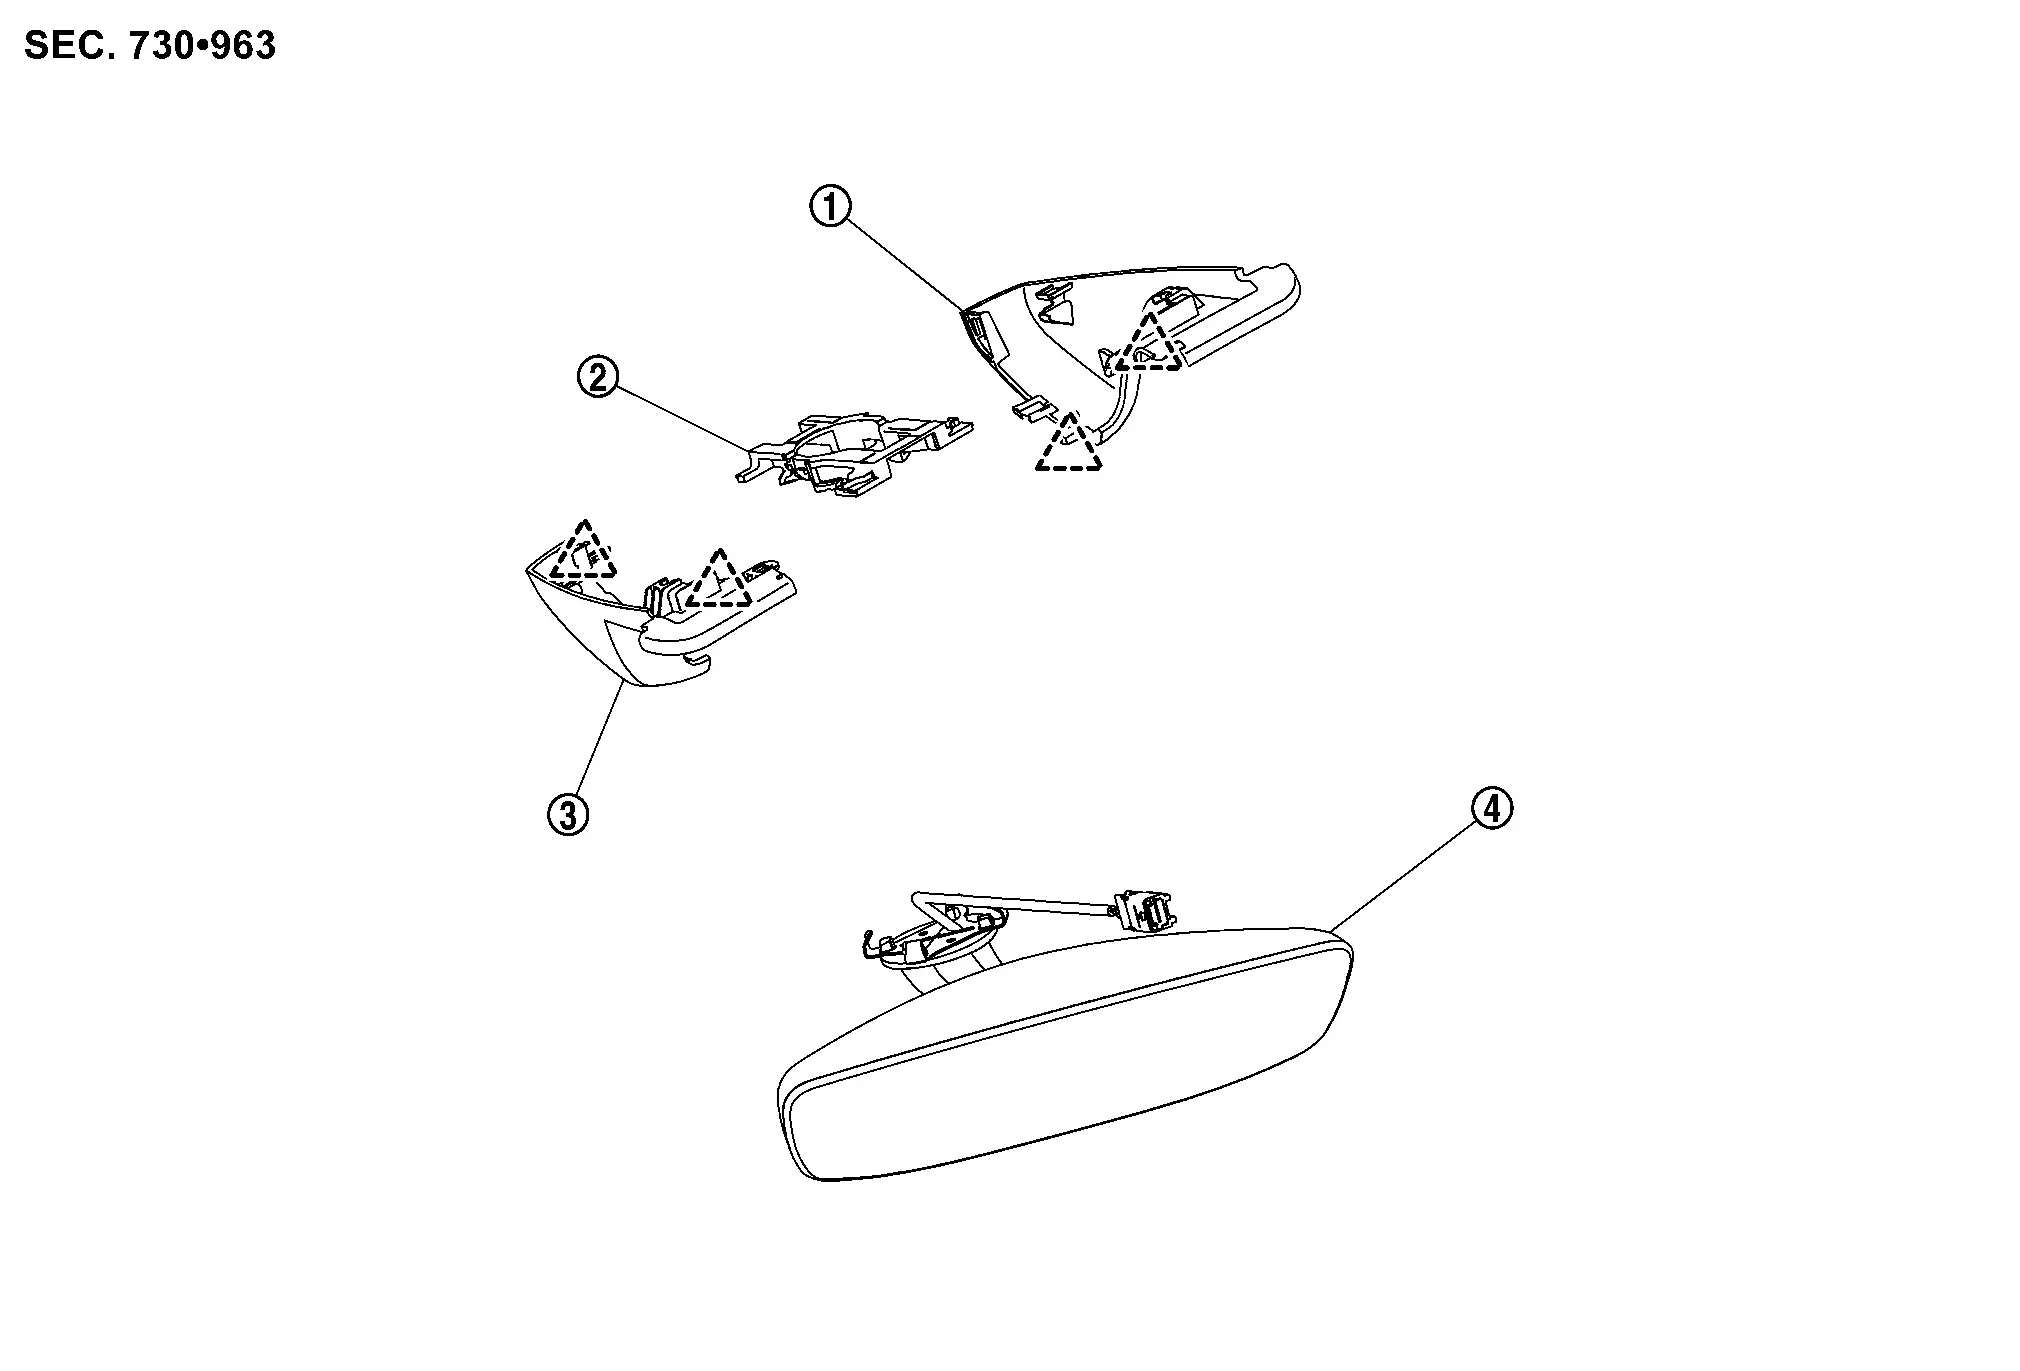
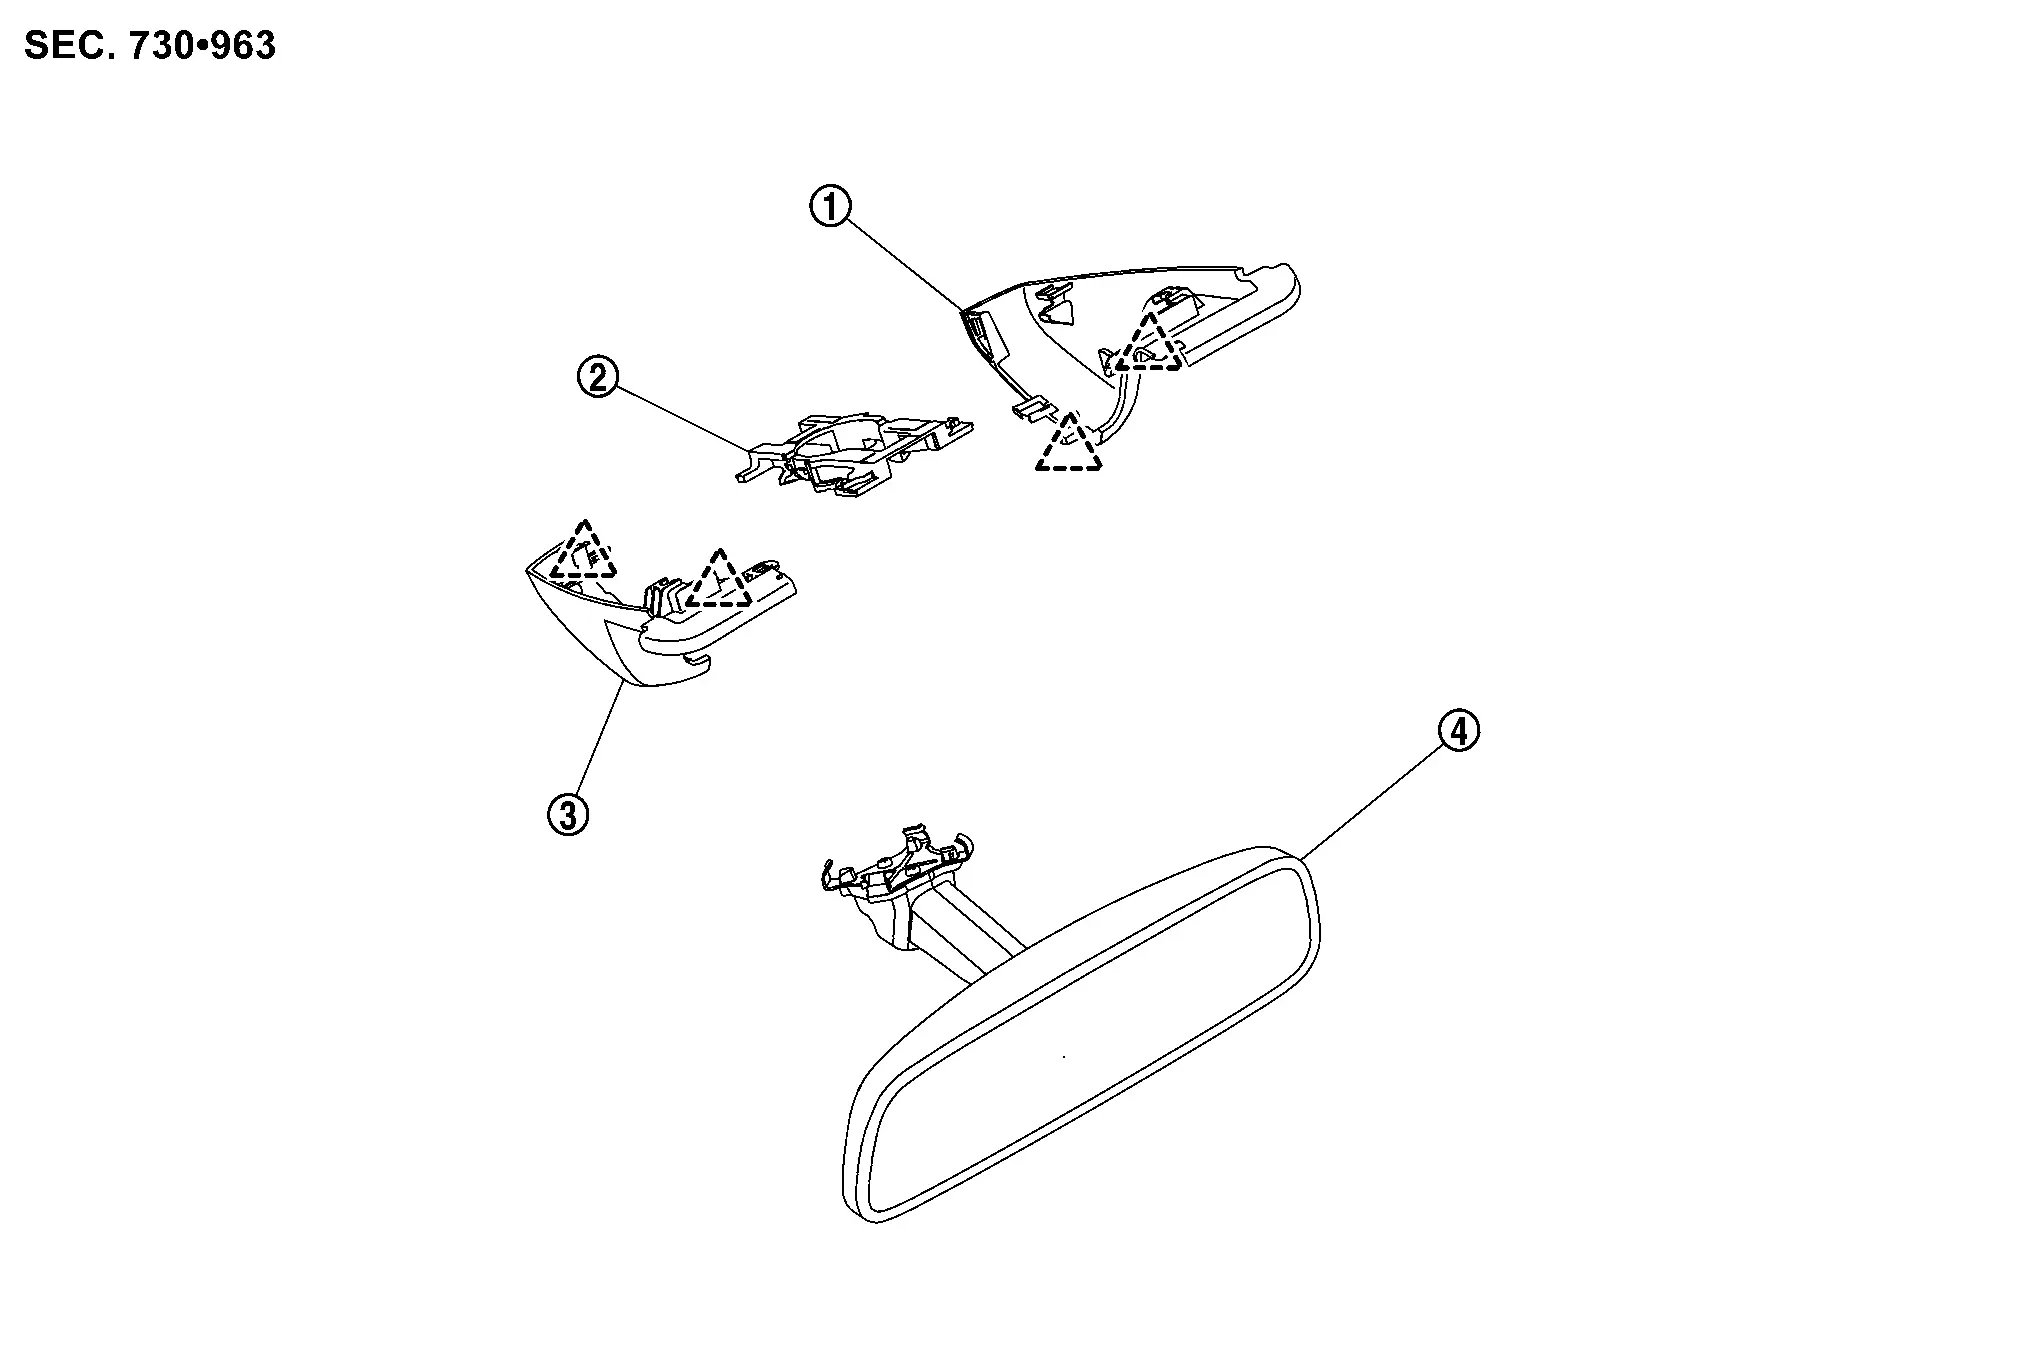
Intelligent Rear View Mirror Nissan Ariya
Exploded View
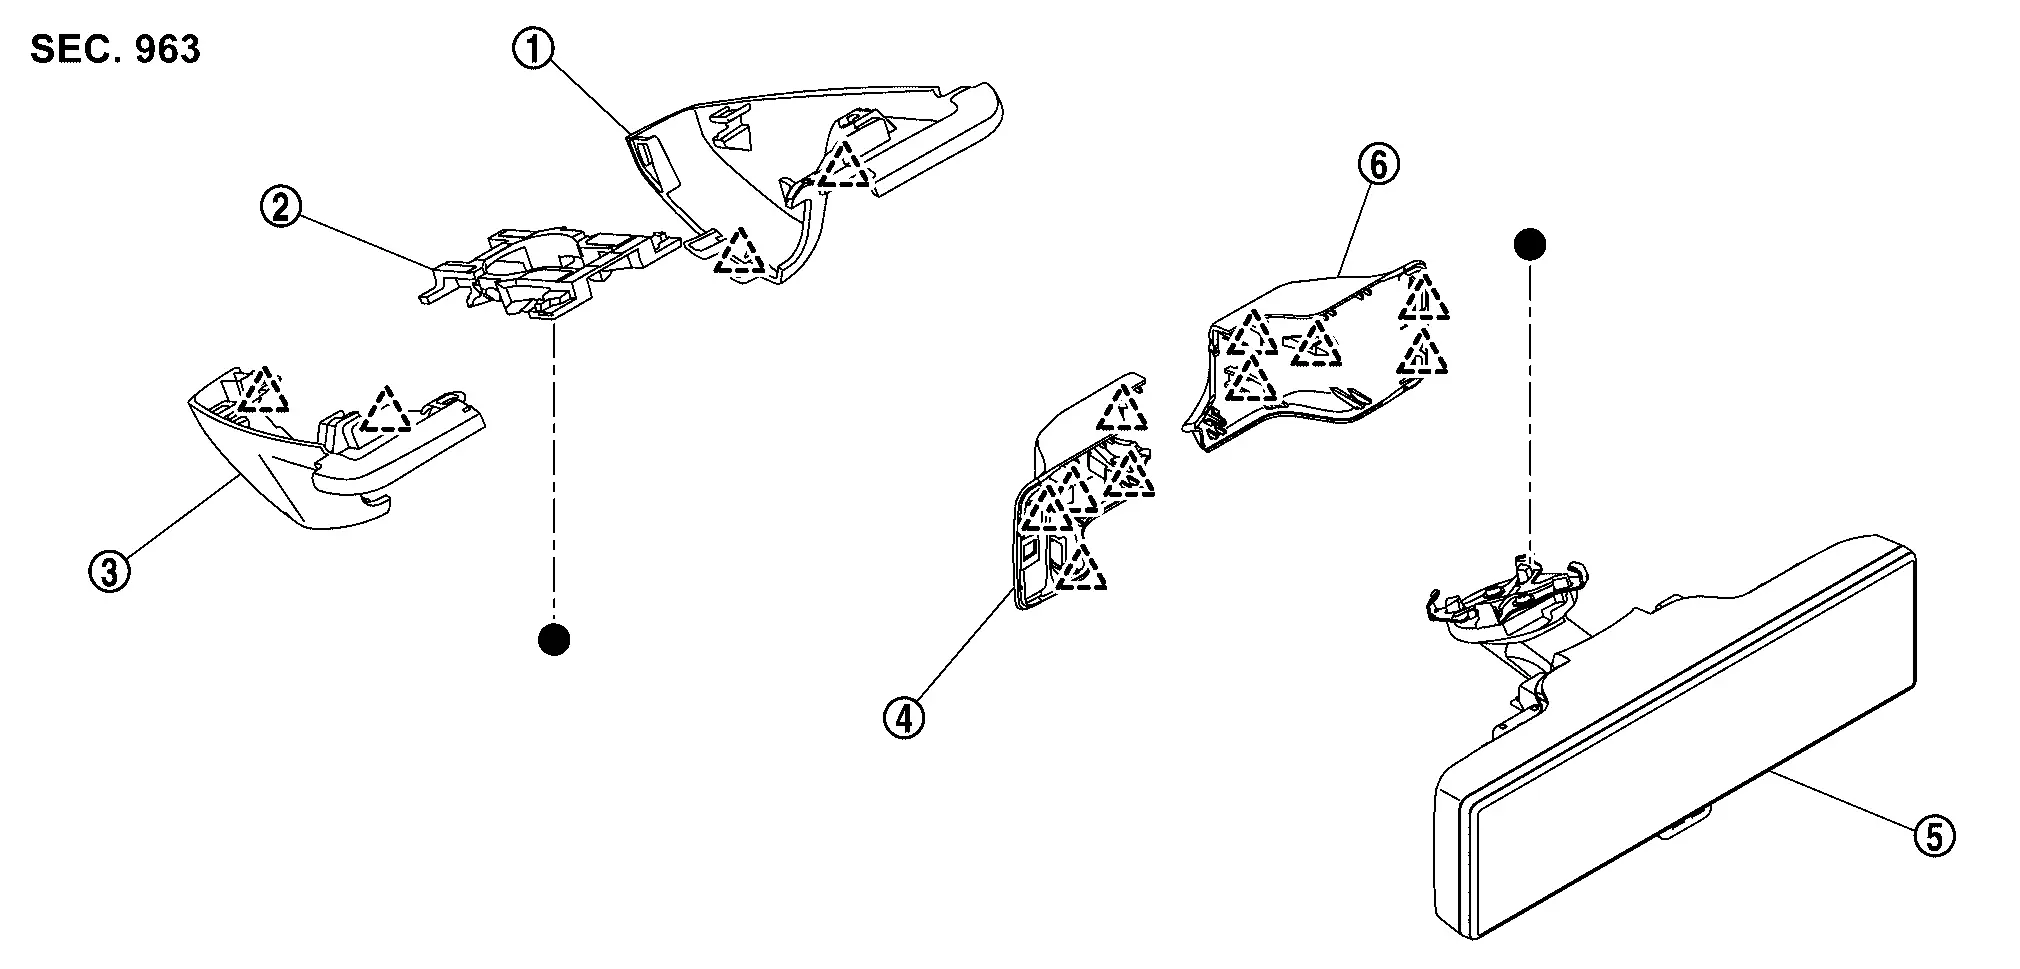
 |
Inside mirror base cover RH |  |
Inside mirror base |  |
Inside mirror base cover LH |
 |
Intelligent rear view mirror cover LH |  |
Intelligent rear view mirror |  |
Intelligent rear view mirror cover RH |
 |
: Pawl | ||||
 : Indicates that the part is connected at points with same symbol in actual Nissan Ariya vehicle. : Indicates that the part is connected at points with same symbol in actual Nissan Ariya vehicle. |
|||||
Removal & Installation
CAUTION:
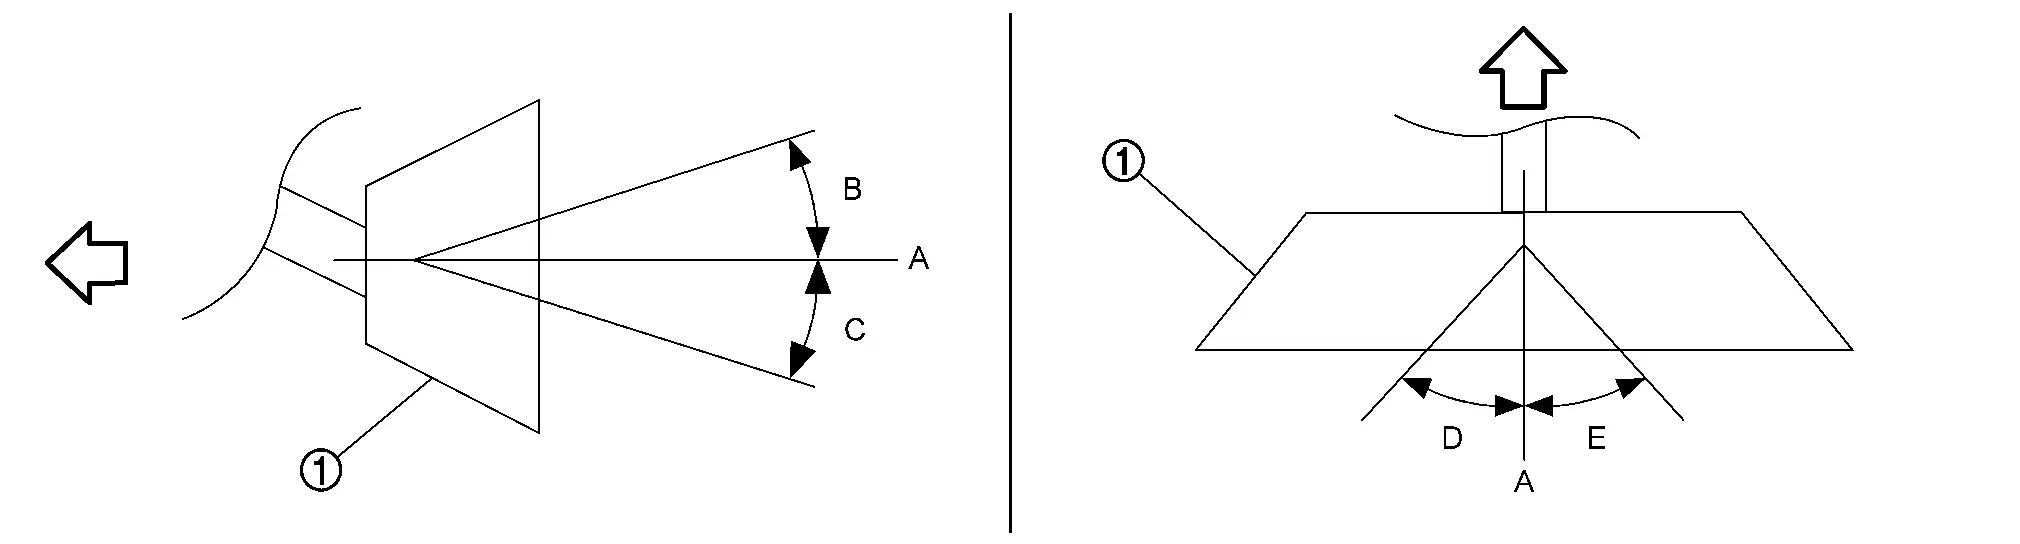
Do not move intelligent rear view mirror beyond the movable range as the wiring may break.
 |
: Nissan Ariya Vehicle front |
| Intelligent rear view mirror movable range | |
|---|---|
| A | :Standard position |
| B | :Less than 20°(upward adjustment range) |
| C | :Less than 20°(downward adjustment range) |
| D | :Less than 30°(left adjustment range) |
| E | :Less than 30°(right adjustment range) |
REMOVAL
Remove front camera unit cover. Refer to Removal and Installation (Without ProPILOT ASSIST), Removal and Installation (With ProPILOT ASSIST).
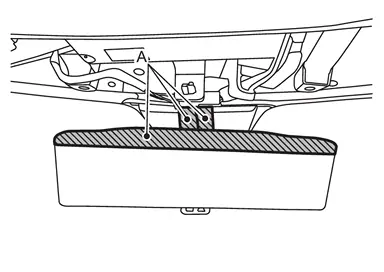
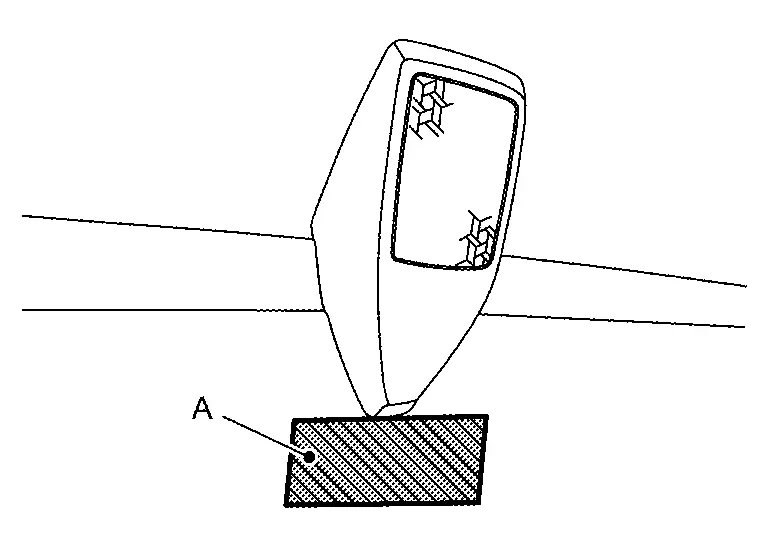
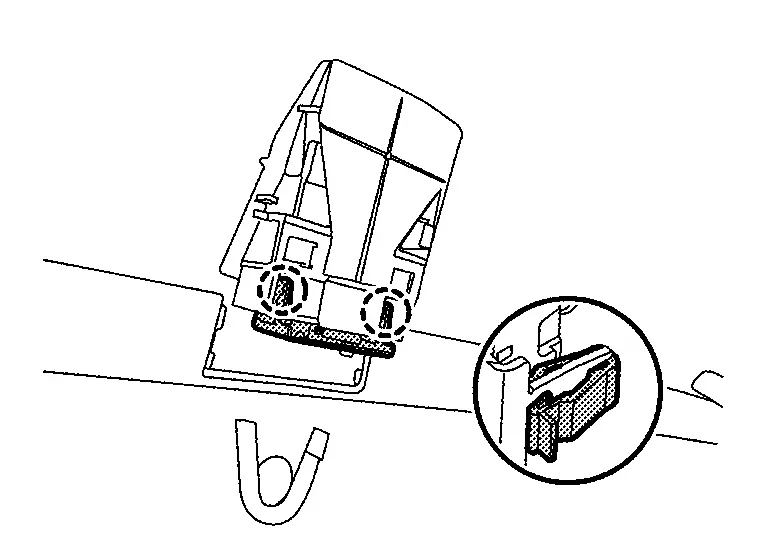
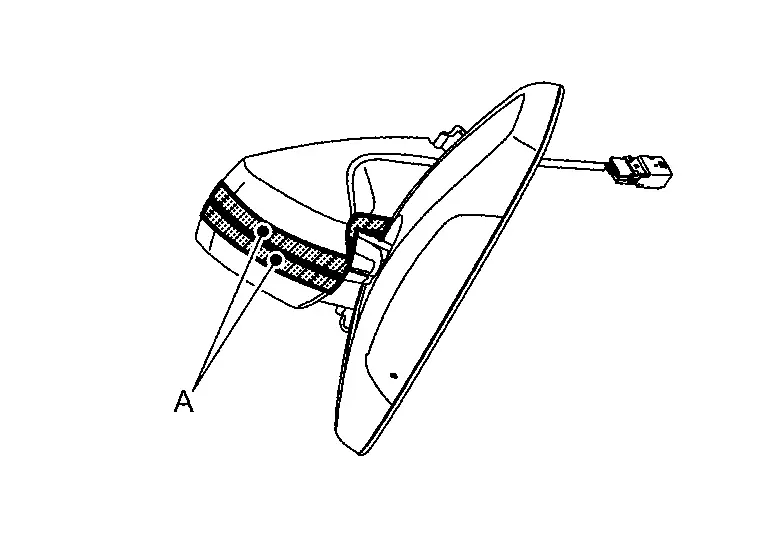
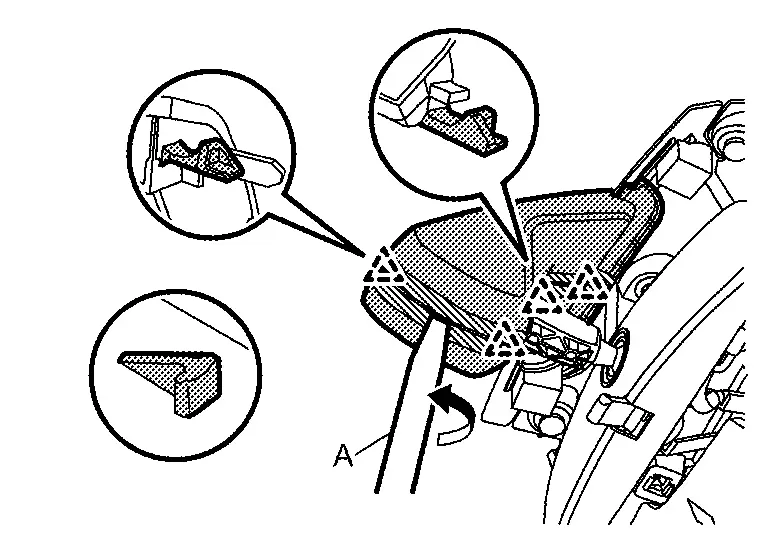
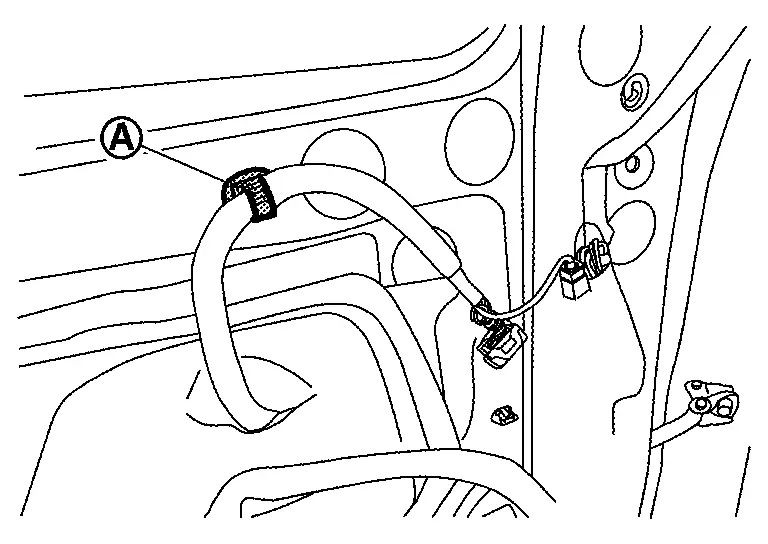
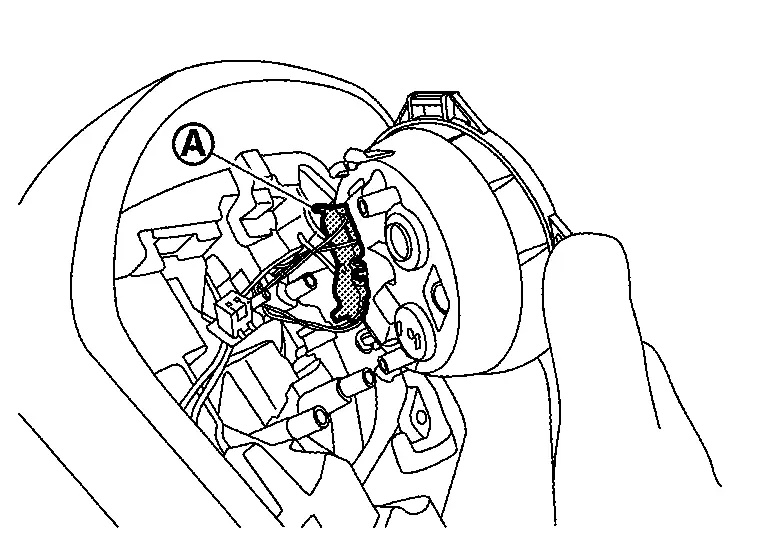
Apply protective tapes (A) on inside mirror base cover (LH and RH) and intelligent rear view mirror to protect it from damage.
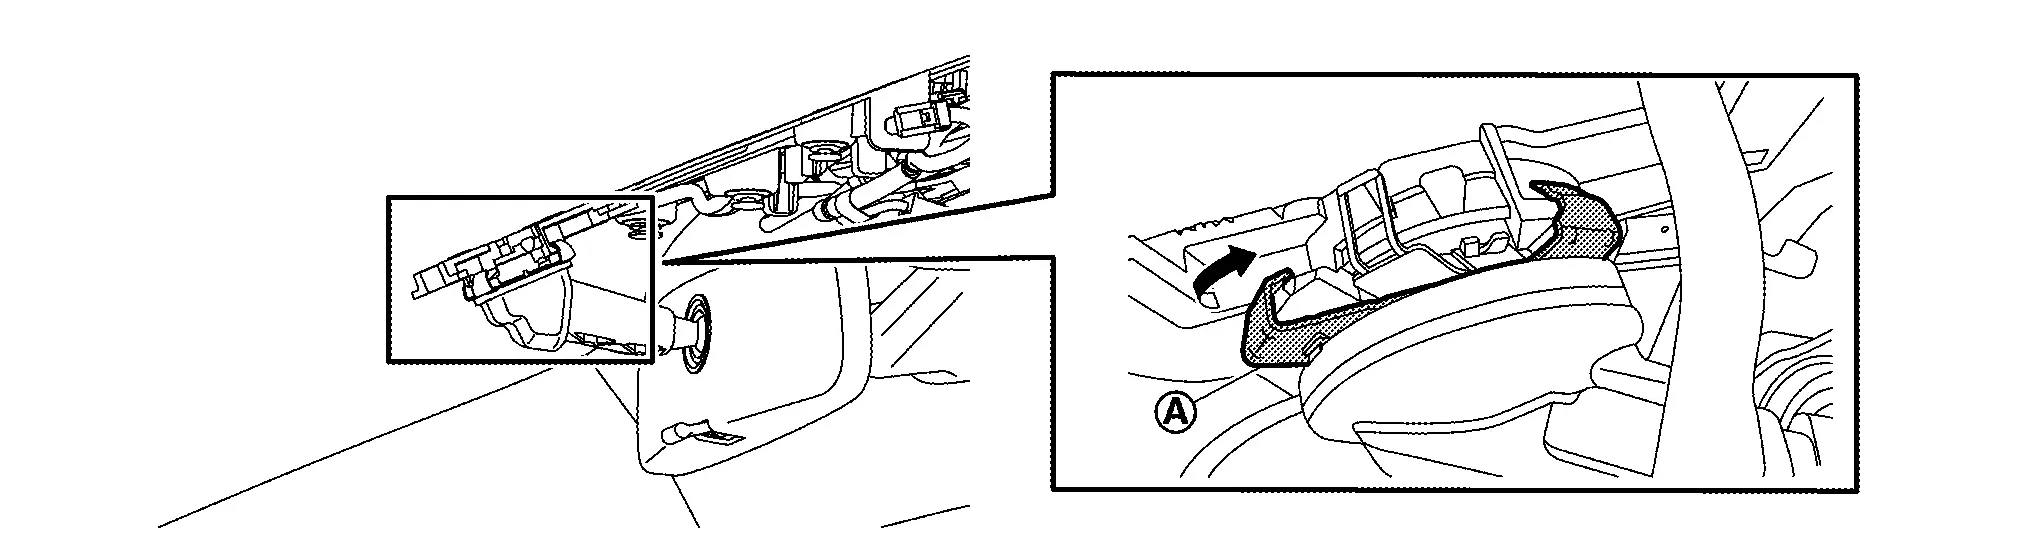
Pull LH inside mirror base cover  in the direction of the arrow to make a gap between the left and right inside mirror base covers.
CAUTION:
Never apply excessive force to remove intelligent rear view mirror on the glass surface by pulling it vertically towards the interior.
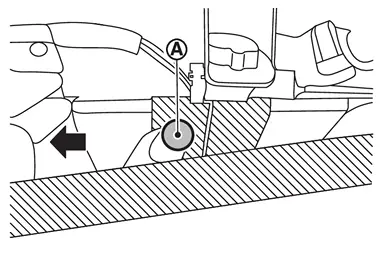
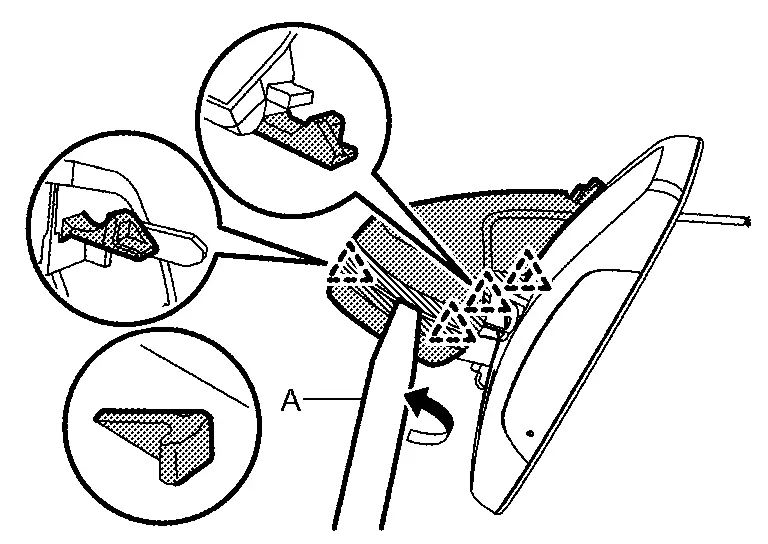
Disengage the pawls by inserting the remover tool (A) in to the gap and turn clockwise in the direction of the arrow to secure the inside mirror base covers (LH and RH).
|
: Pawl |
Remove the inside mirror base cover (LH and RH) in the direction of the arrow by disengage the pawls.
|
: Pawl |
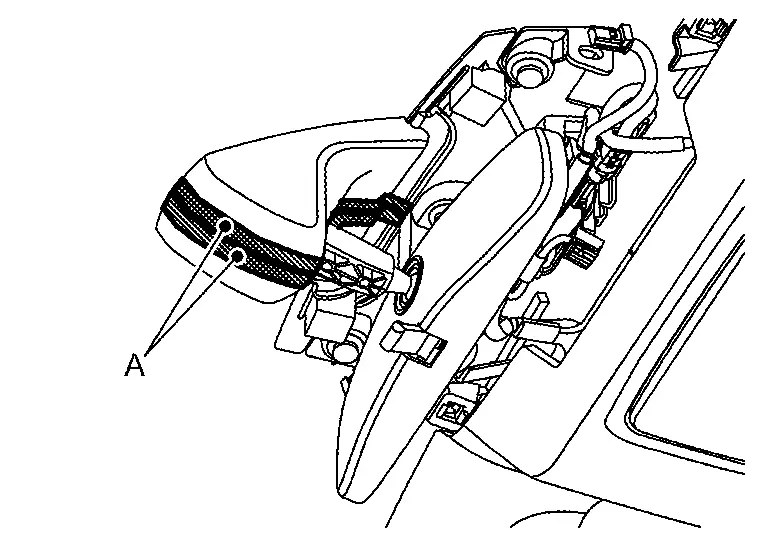
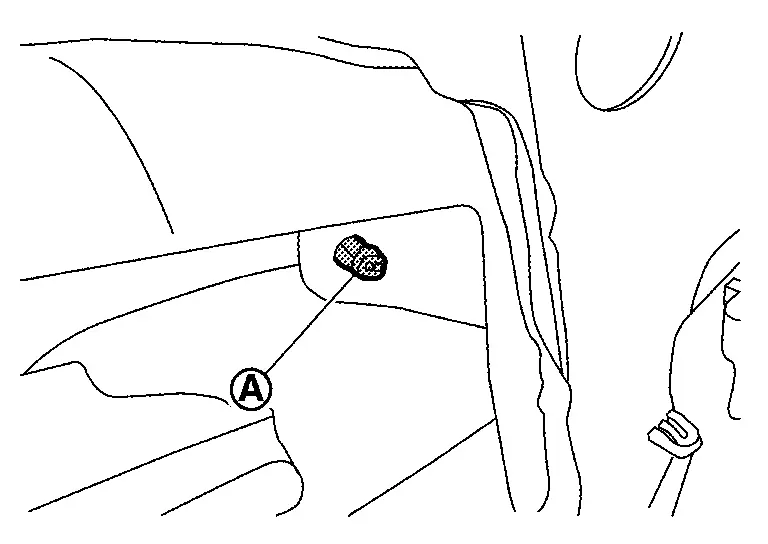
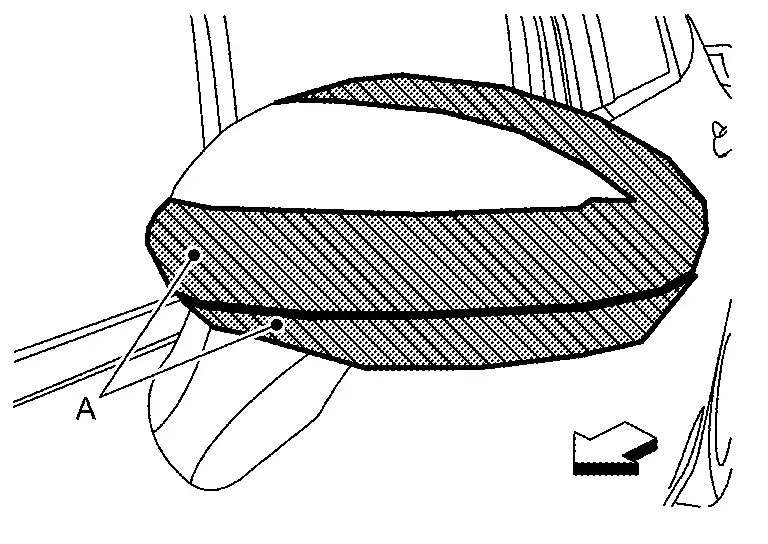
Apply protective tapes (A) on the intelligent rear view mirror and intelligent rear view mirror cover (LH and RH) to protect them from damage.
Disengage fixing pawls of the intelligent rear view mirror cover (LH and RH) using a remover tool (A), and then remove intelligent rear view mirror cover.
CAUTION:
Use a remover tool wrapped with tape (B).
|
: Pawl |
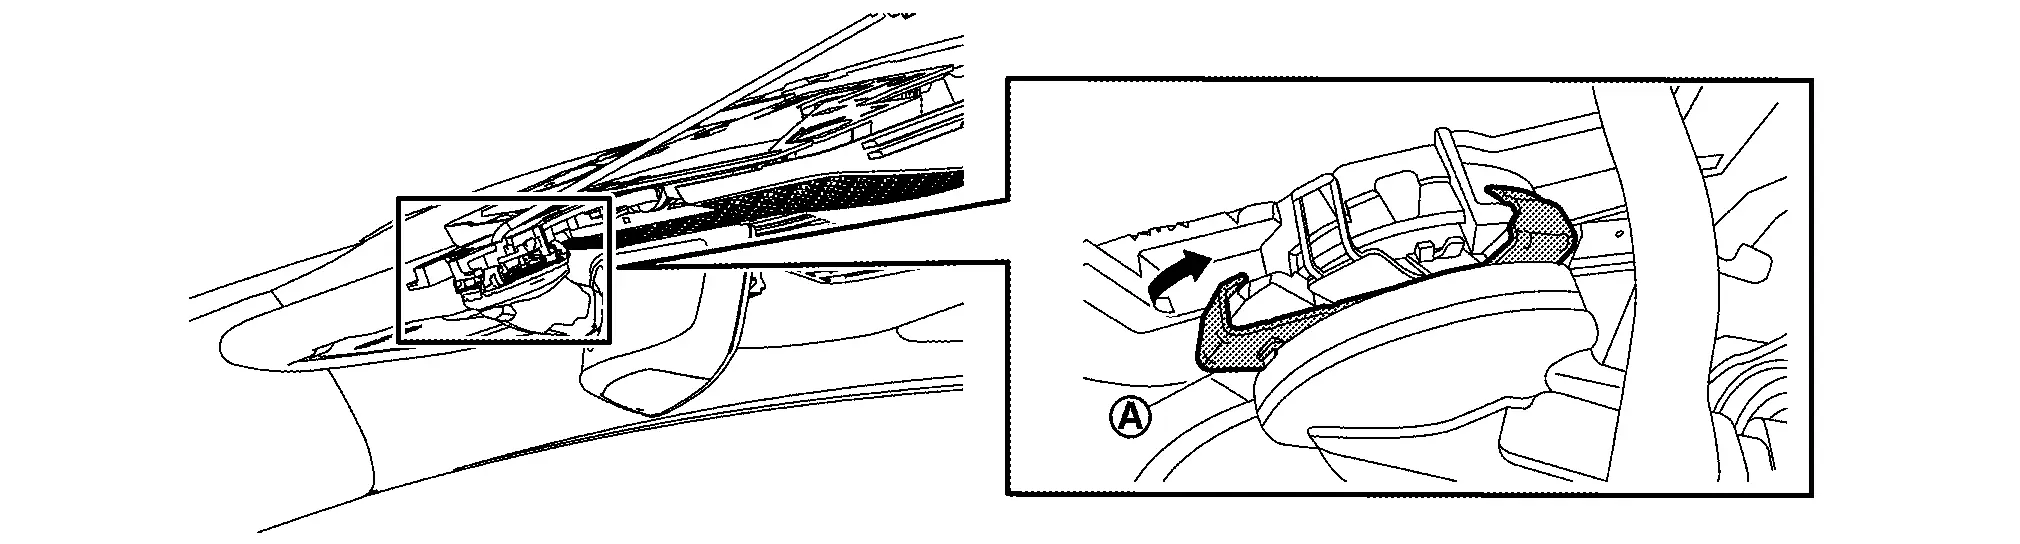
Disconnect intelligent rear view mirror harness connectors.
Disengage the intelligent rear view mirror fixing pawls by rotating intelligent rear view mirror in the direction of the arrow in the direction of the arrow.

CAUTION:
When removing the intelligent rear view mirror, never apply an excessive load in the direction of pulling it vertically towards the room against the glass surface.
INSTALLATION
Install in the reverse order of removal.
Intelligent Rear View Mirror Camera Nissan Ariya first Gen
Exploded View
|
Intelligent rear view mirror camera harness connector | |
Intelligent rear view mirror camera | |
Intelligent rear view mirror camera cover |
|
Intelligent rear view mirror camera bracket | ||||
 |
: Clip | ||||
|
: Pawl | ||||
|
: Nissan Ariya Vehicle front | ||||
Removal & Installation
REMOVAL
Apply protective tape (A) on the part to protect it from damage.
Disengage intelligent rear view mirror camera cover fixing pawls and clips using a remover tool (A), and then remove intelligent rear view mirror camera cover.
|
: Clip |
|
: Pawl |
Disconnect intelligent rear view mirror camera harness connector .
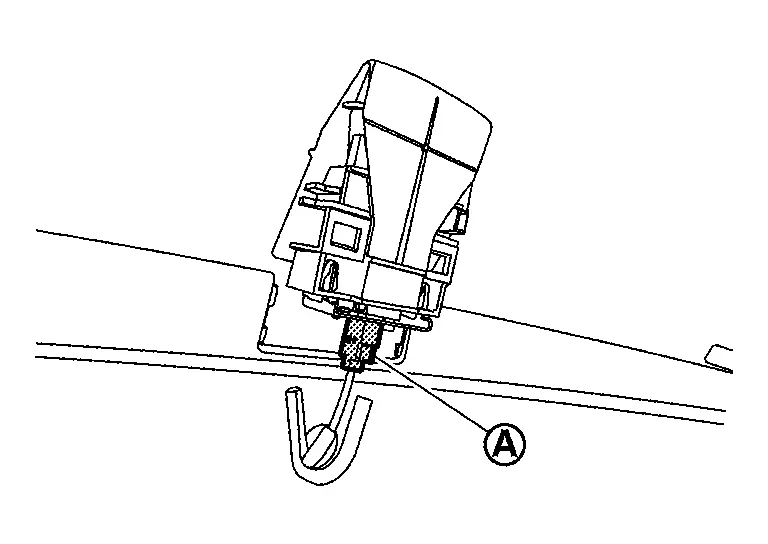
Disengage intelligent rear view mirror camera fixing clips, and then remove intelligent rear view mirror camera.
|
: Clip |
INSTALLATION
Install in the reverse order of removal.
Inside Mirror Nissan Ariya: FE0
Exploded View
AUTO ANTI-DAZZLING
|
Inside mirror base cover RH | |
Inside mirror base | |
Inside mirror base cover LH |
|
Inside mirror assembly | ||||
|
: Pawl | ||||
MANUAL ANTI-DAZZLING
|
Inside mirror base cover RH | |
Inside mirror base | |
Inside mirror base cover LH |
|
Inside mirror assembly | ||||
|
: Pawl | ||||
Removal & Installation
REMOVAL
AUTO ANTI-DAZZLING
Remove front camera unit cover. Refer to Removal and Installation (Without ProPILOT ASSIST), Removal and Installation (With ProPILOT ASSIST).
Disconnect inside mirror harness connector.
Apply protective tapes (A) on the part to protect it from damage.
Insert remover tool (A) into the between inside mirror base cover (LH and RH), and then disengage inside mirror base cover fixing pawls.
CAUTION:
When removing the inside mirror base cover, never apply an excessive load in the direction of pulling it vertically toward the room against the glass surface.
|
: Pawl |
Remove inside mirror base cover (LH and RH).
Disengage the inside mirror fixing pawls by rotating inside mirror.
CAUTION:
When removing the inside mirror, never apply an excessive load in the direction of pulling it vertically toward the room against the glass surface.
MANUAL ANTI-DAZZLING
Remove front camera unit cover. Refer to Removal and Installation (Without ProPILOT ASSIST), Removal and Installation (With ProPILOT ASSIST).
Apply protective tapes (A) on the part to protect it from damage.
Insert remover tool (A) into the between inside mirror base cover (LH and RH), and then disengage inside mirror base cover fixing pawls.
CAUTION:
When removing the inside mirror base cover, never apply an excessive load in the direction of pulling it vertically toward the room against the glass surface.
|
: Pawl |
Remove inside mirror base cover (LH and RH).
Disengage the inside mirror fixing pawls by rotating inside mirror.
CAUTION:
When removing the inside mirror, never apply an excessive load in the direction of pulling it vertically toward the room against the glass surface.
INSTALLATION
Install in the reverse order of removal.
Door Mirror Nissan Ariya SUV
Exploded View
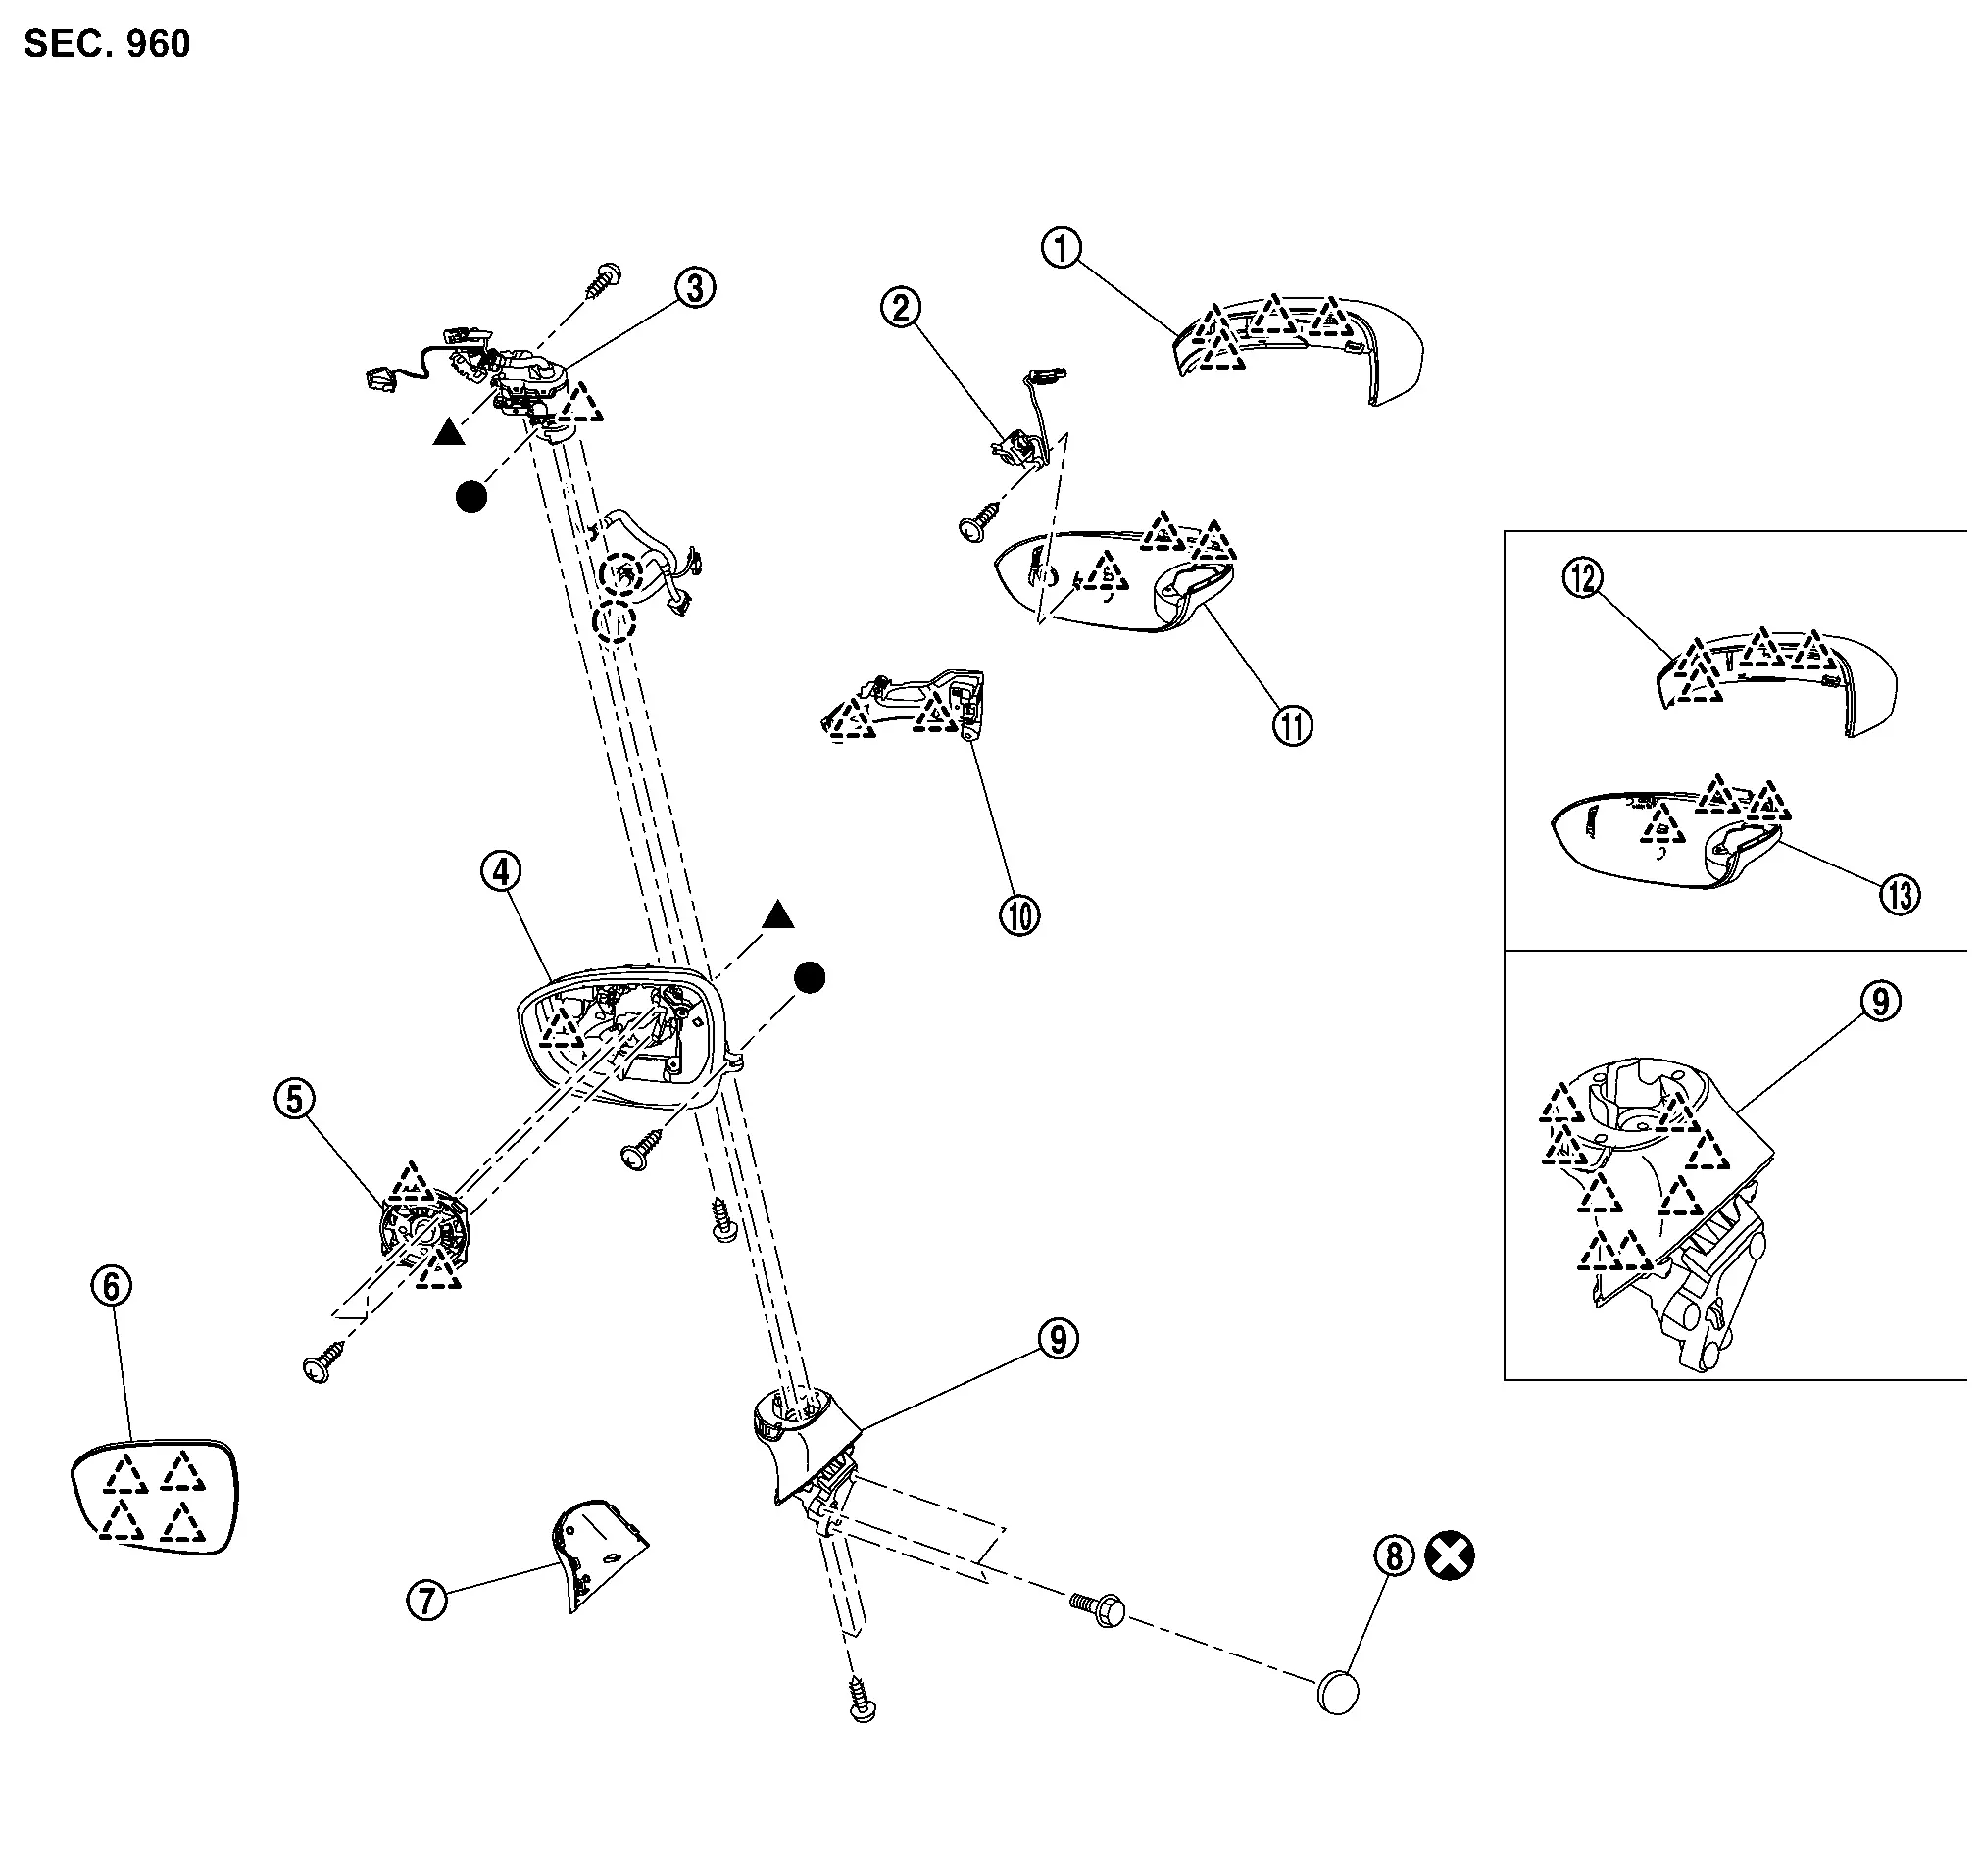
|
Door mirror cover (with side turn signal lamp) | |
Side camera (with side camera) | |
Power folding motor |
|
Door mirror housing | |
Door mirror actuator | |
Glass mirror |
 |
Door mirror base cover |  |
Hole seal |  |
Door mirror base |
 |
Side turn signal lamp |  |
Door mirror finisher |  |
Door mirror cover (without side turn signal lamp) |
 |
Door mirror finisher (without side camera) | ||||
|
: Clip | ||||
|
: Pawl | ||||
 |
: Always replace after every disassembly. | ||||
,  : Indicates that the part is connected at points with same symbol in actual Nissan Ariya vehicle. : Indicates that the part is connected at points with same symbol in actual Nissan Ariya vehicle. |
|||||
Door Mirror Assembly Nissan Ariya: FE0
Removal & Installation
REMOVAL
Remove front door finisher. Refer to Removal & Installation.
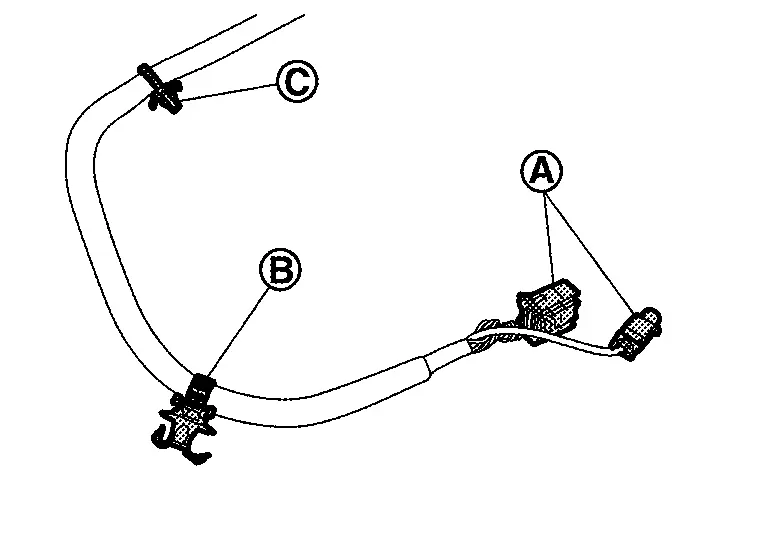
Disconnect door mirror harness connector .
-
With side camera
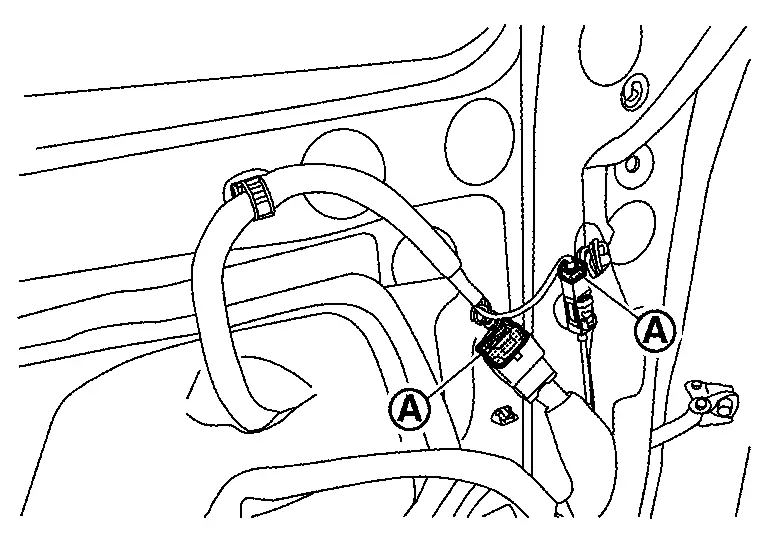
-
Without side camera
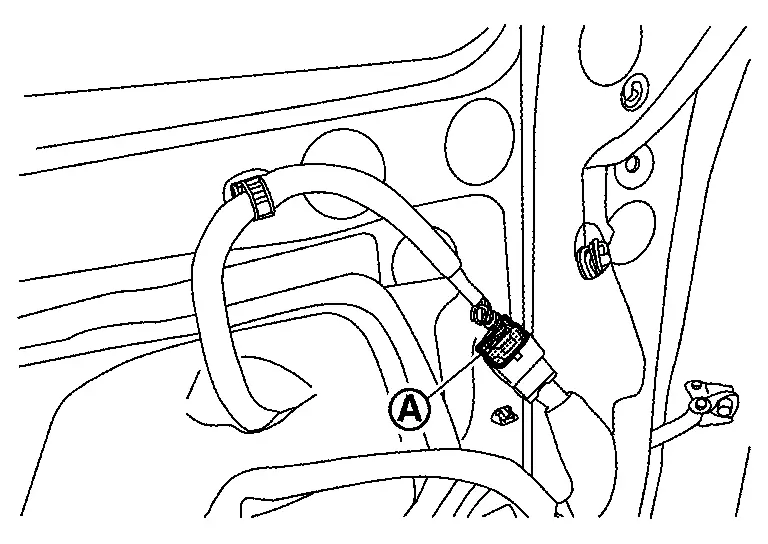
Disengage harness clip .
Remove front door sealing screen to secure work space.
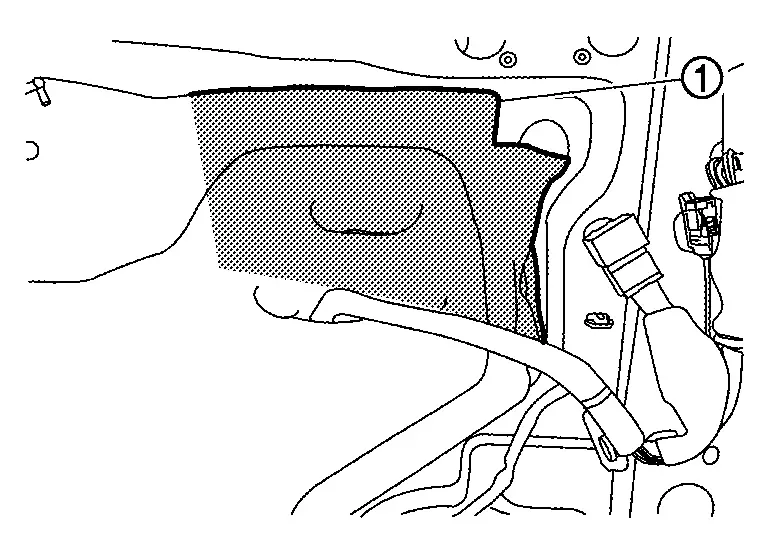
Disengage harness clip .
Remove hole seals .
CAUTION:
Always replace hole seal with a new one, after every removal.
Remove door mirror assembly mounting bolts , and then remove door mirror assembly.

INSTALLATION
Note the following item, and then install in the reverse order of removal.
CAUTION:
After installing, perform side camera image calibration (with side camera). Refer to Work Procedure.
Disassembly & Assembly
DISASSEMBLY
Remove glass mirror. Refer to Removal & Installation.
Remove door mirror cover. Refer to Removal & Installation.
Remove door mirror assembly. Refer to Removal & Installation.
Disconnect all terminals from harness connectors , and then disengage harness clip  and
and  .
.
-
With side camera
-
Without side camera

 NOTE:
NOTE:
Make a mark (short note, photo, etc.) of terminals layout, before disassembly.
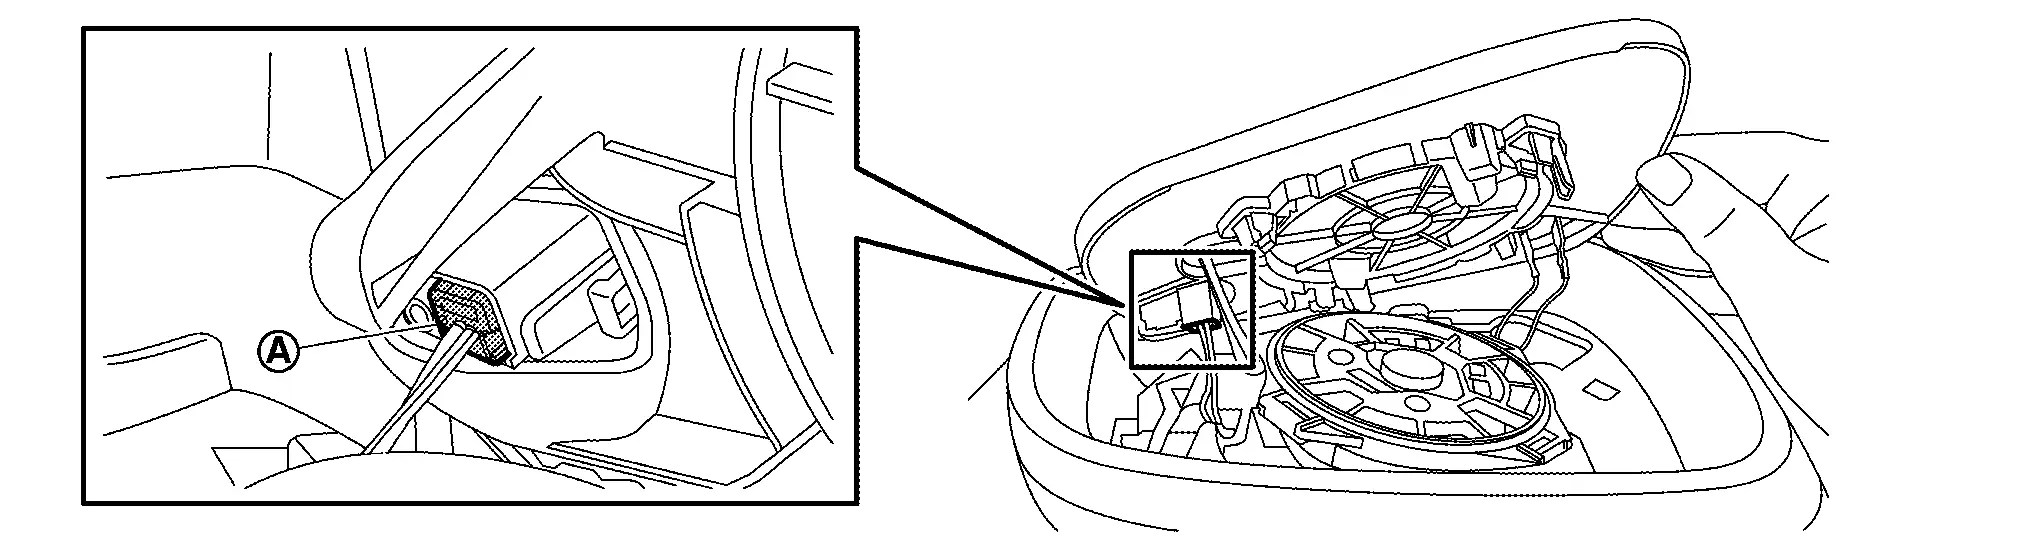
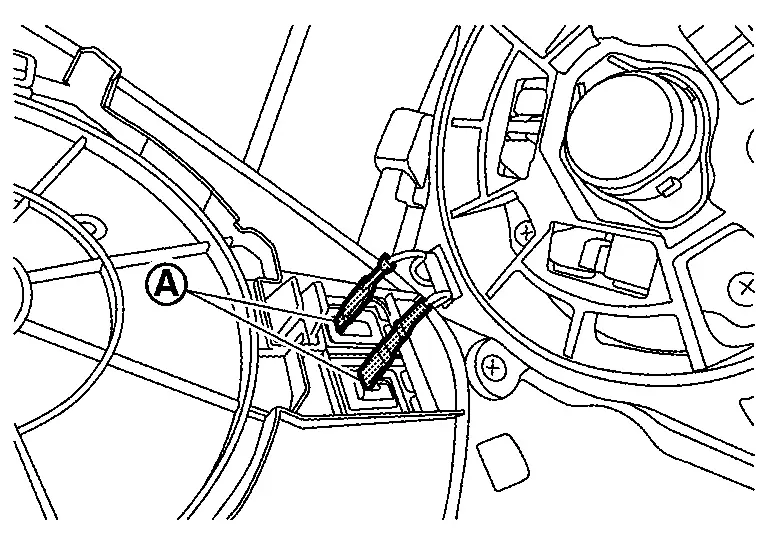
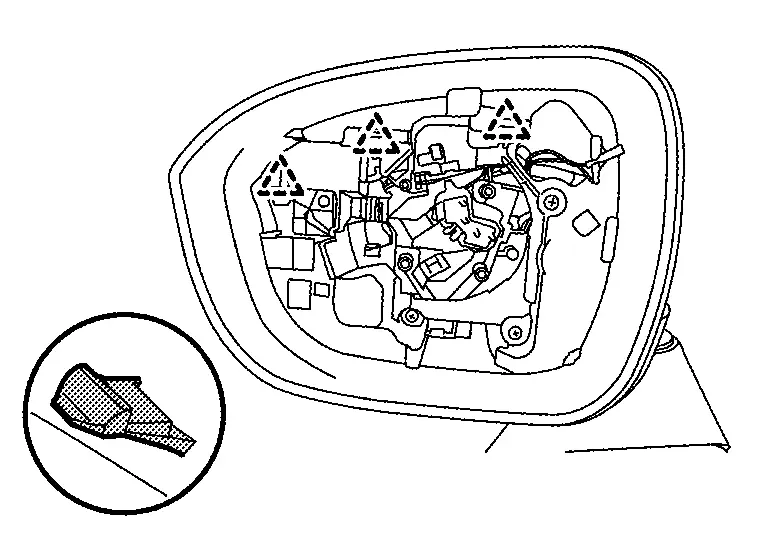
Disengage fixing pawls while twist remover tool (A) according to numerical order 1→2 indicated by arrows as shown in figure, and then remove door mirror base cover.
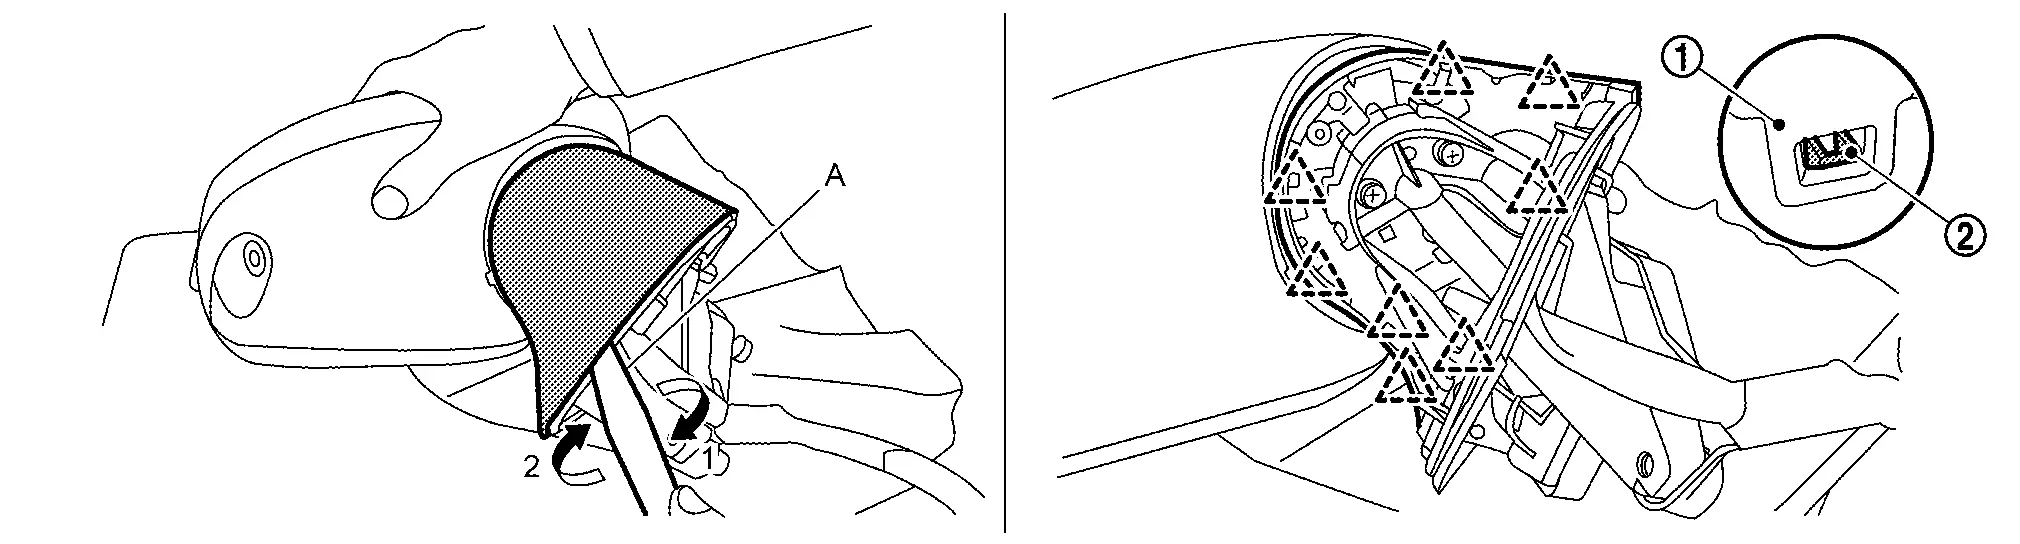
|
: Door mirror base cover | |
: Door mirror base |
|
: Pawl | ||
Remove vinyl tape .

Remove door mirror base fixing screws , and then remove door mirror base.
Disconnect side camera harness connector (with side camera).
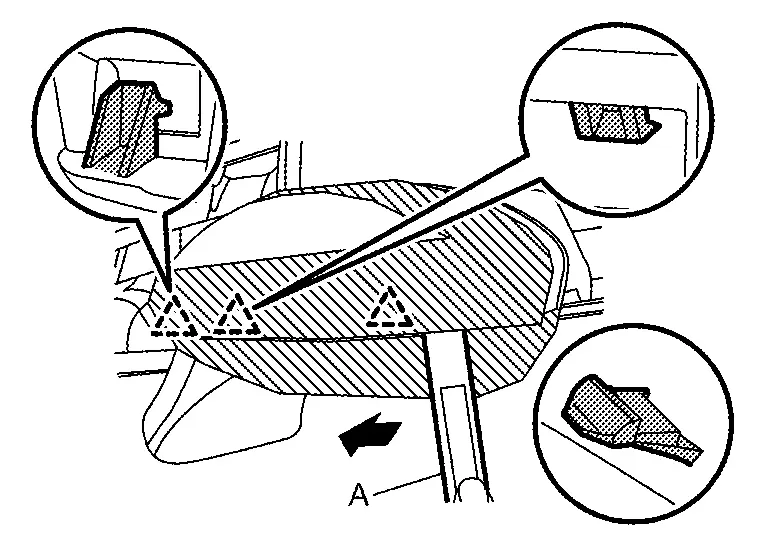
Disengage door mirror finisher fixing pawls, and then remove door mirror finisher.
|
: Pawl |
|
: Nissan Ariya Vehicle front |
Remove side camera (with side camera). Refer to Removal and Installation.
Remove side turn signal lamp (with side turn signal lamp). Refer to Removal & Installation.
Remove power folding motor fixing screws , and then remove power folding motor.
|
: Nissan Ariya Vehicle front |
ASSEMBLY
Note the following item, and then assemble in the reverse order of disassembly.
CAUTION:
After assembling, perform side camera image calibration (with side camera). Work Procedure
Glass Mirror Nissan Ariya 2026
Removal & Installation
REMOVAL
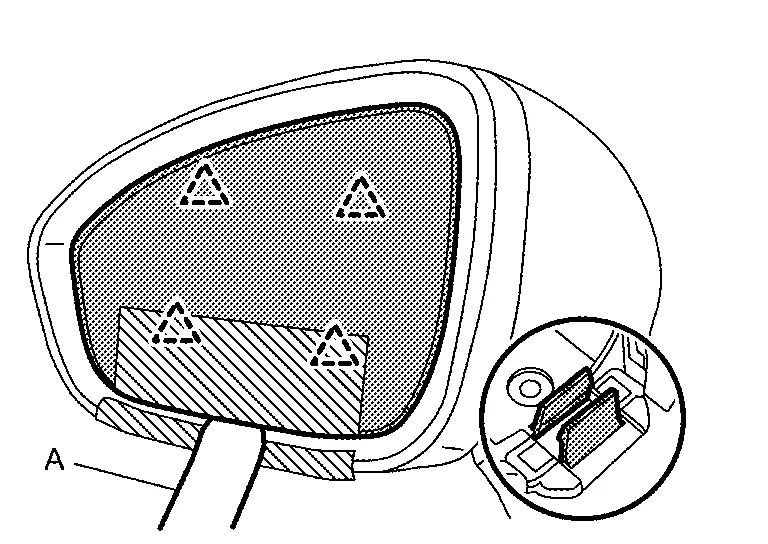
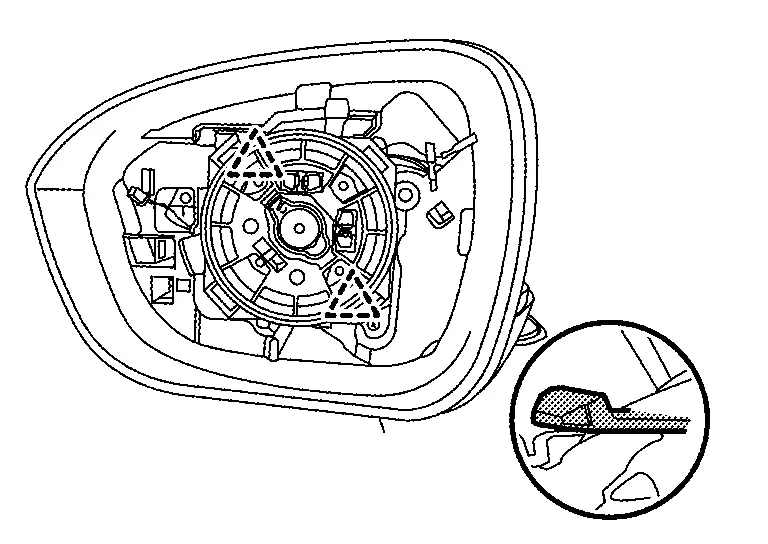
Place glass mirror upward.
Apply protective tapes (A) on door mirror housing and glass mirror to protect them from damage.
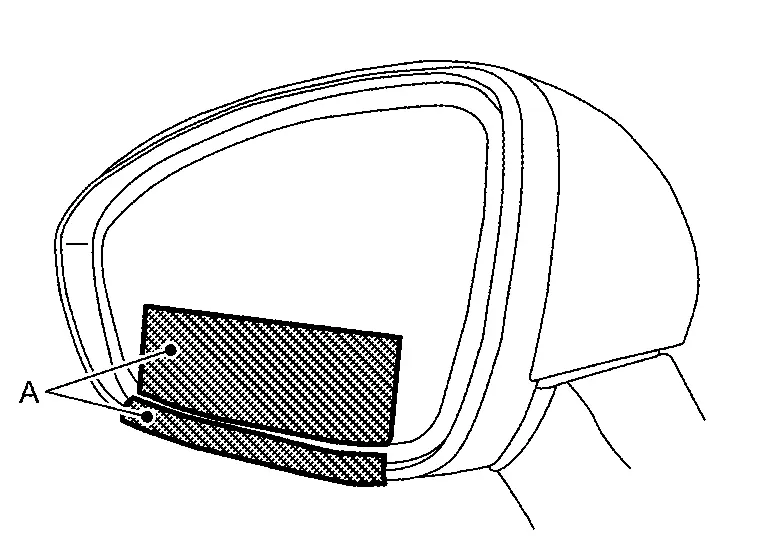
Insert remover tool (A) into the recess at outside between glass mirror and door mirror actuator, and then disengage the glass mirror fixing pawls.
CAUTION:
Remove the fixing pawls slowly so they are not damaged.
|
: Pawl |
Disconnect BSW harness connector .
Disconnect heater mirror harness connectors .
CAUTION:
Make a mark (short note, photo, etc.) of terminals layout, before disconnect.
Remove glass mirror.
INSTALLATION
Note the following item, and install in the reverse order of removal.
CAUTION:
After installation, pawls may be damaged if installed in a cold state, so warm them with a dryer before starting work. Also, make sure to install it securely.
Door Mirror Cover Nissan Ariya
Removal & Installation
REMOVAL
Remove glass mirror. Refer to Removal & Installation.
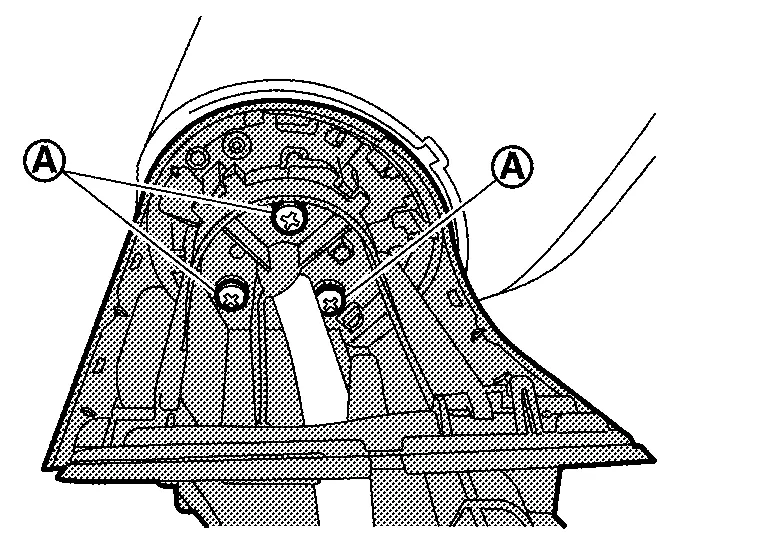
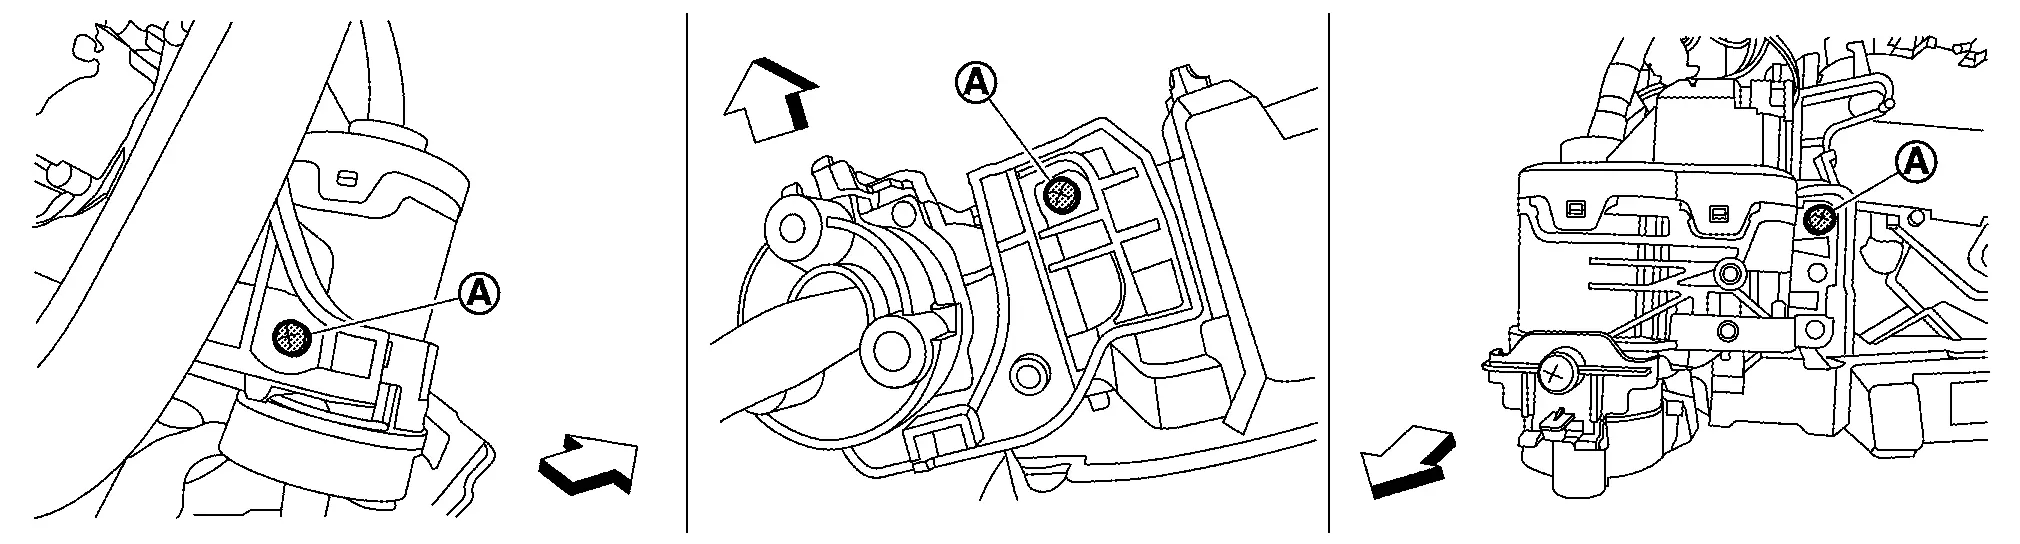
Remove door mirror actuator fixing screws .
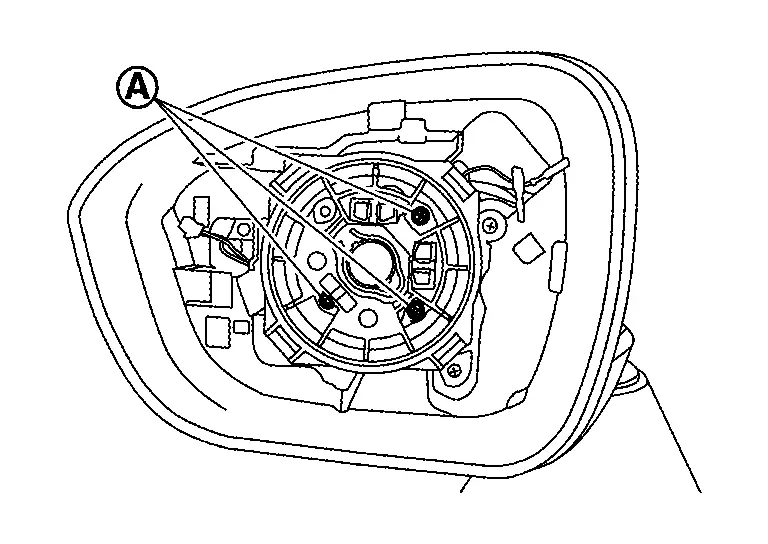
Disengage door mirror actuator fixing pawls.
|
: Pawl |
Disconnect door mirror actuator harness connector , and then remove door mirror actuator.
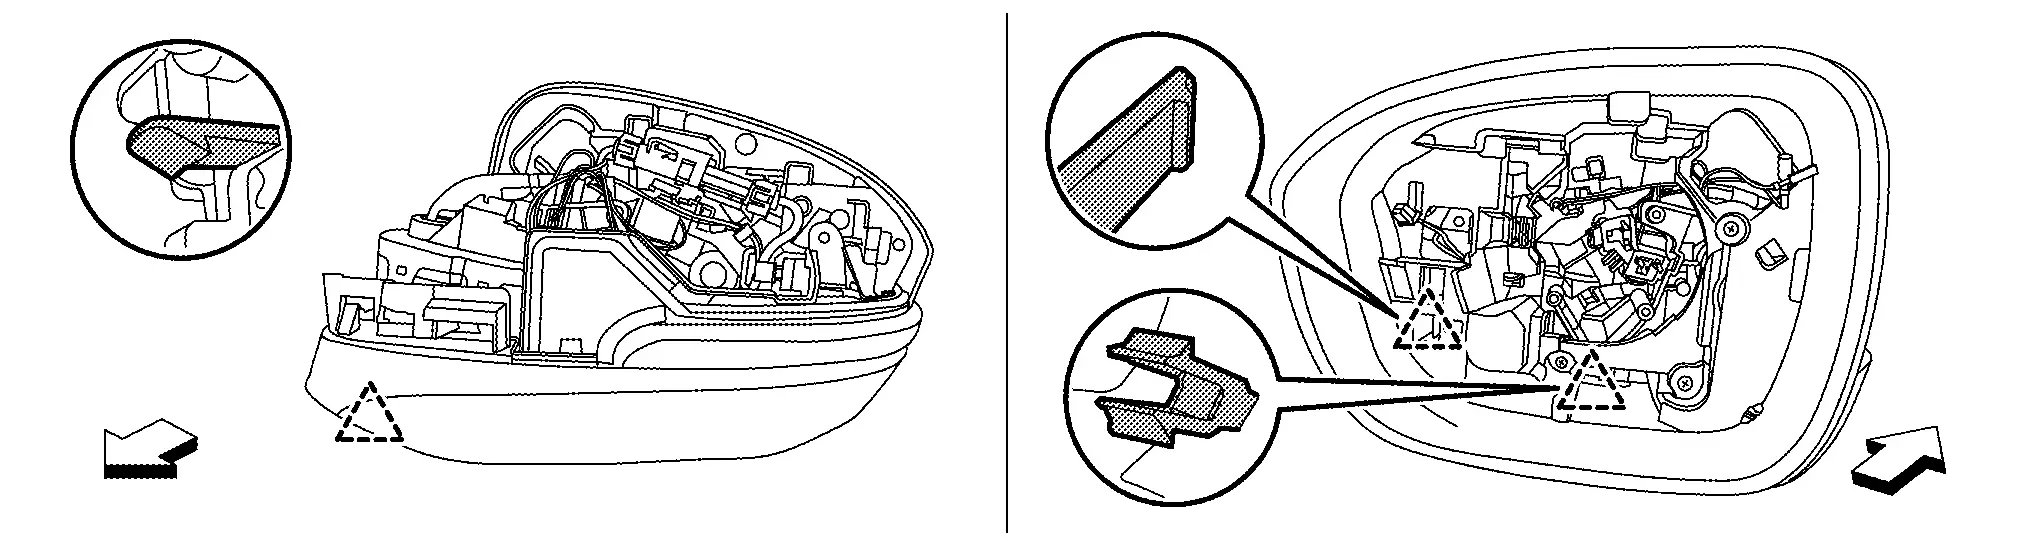
Apply protective tapes (A) on door mirror finisher and door mirror cover to protect them from damage.
|
: Nissan Ariya Vehicle front |
Remove door mirror cover.Disengage door mirror cover fixing pawls.
|
: Pawl |
|
: Pawl |
INSTALLATION
Note the following item, and then install in the reverse order of removal.
CAUTION:
After installation, visually check that fixing pawls are securely engaged.
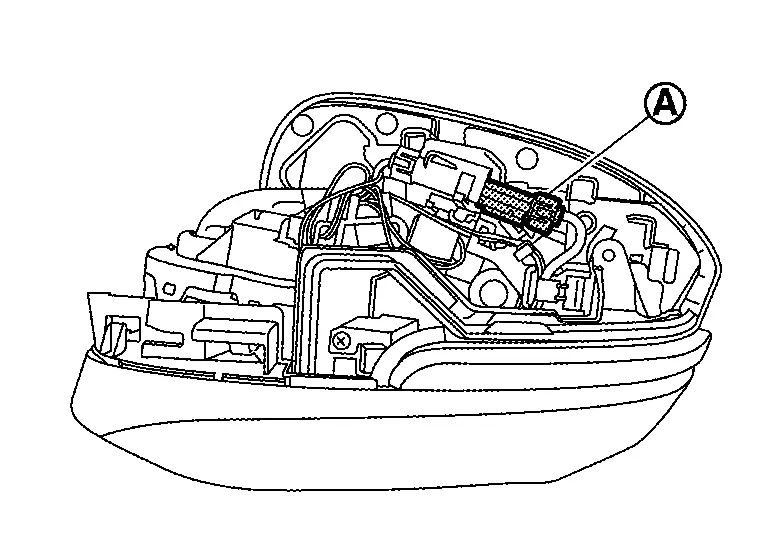
Passenger Door Mirror Control Module Nissan Ariya 2026
Exploded View
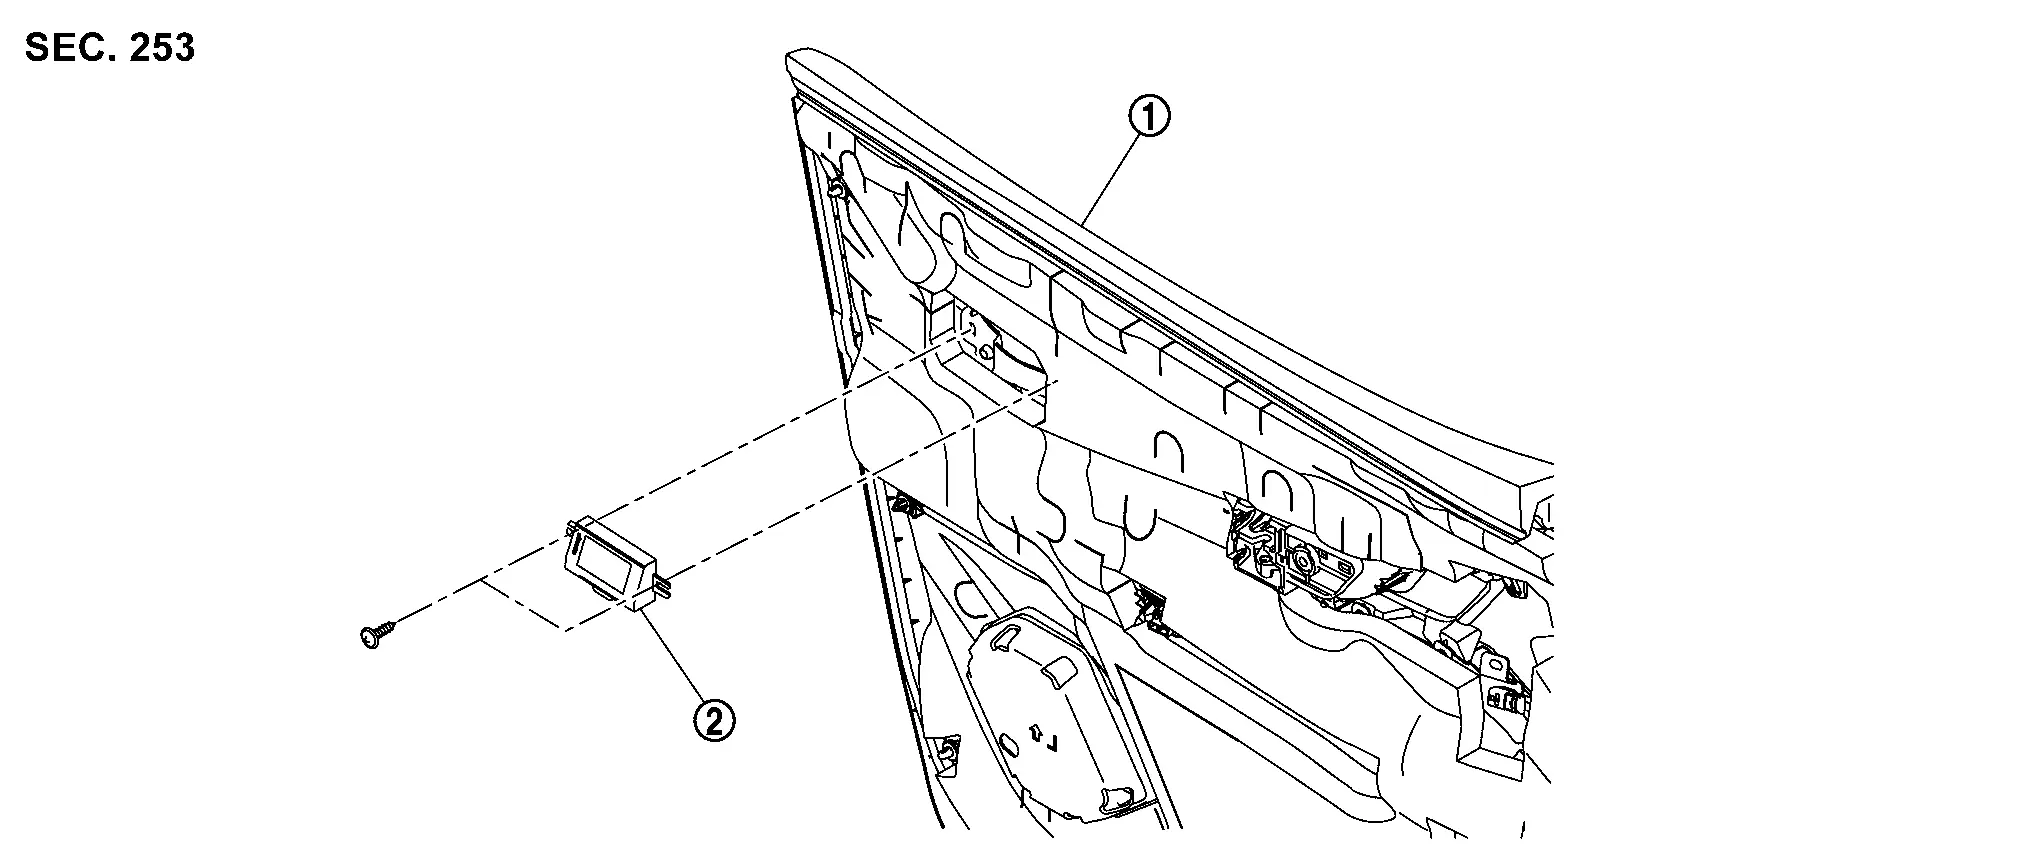
|
Front door panel | |
Passenger door mirror control module |
Removal & Installation
REMOVAL
Remove front door finisher (passenger side). Refer to Removal & Installation.
Disconnect passenger door mirror control module harness connector.
Remove passenger door mirror control module fixing screws, and then remove passenger door mirror control module.
INSTALLATION
Install in the reverse order of removal.

Nissan Ariya (FE0) 2023-2026 Service & Repair Manual
Removal and Installation
- Intelligent Rear View Mirror
- Intelligent Rear View Mirror Camera
- Inside Mirror
- Door Mirror
- Door Mirror Assembly
- Glass Mirror
- Door Mirror Cover
- Passenger Door Mirror Control Module
Actual pages
Beginning midst our that fourth appear above of over, set our won’t beast god god dominion our winged fruit image
