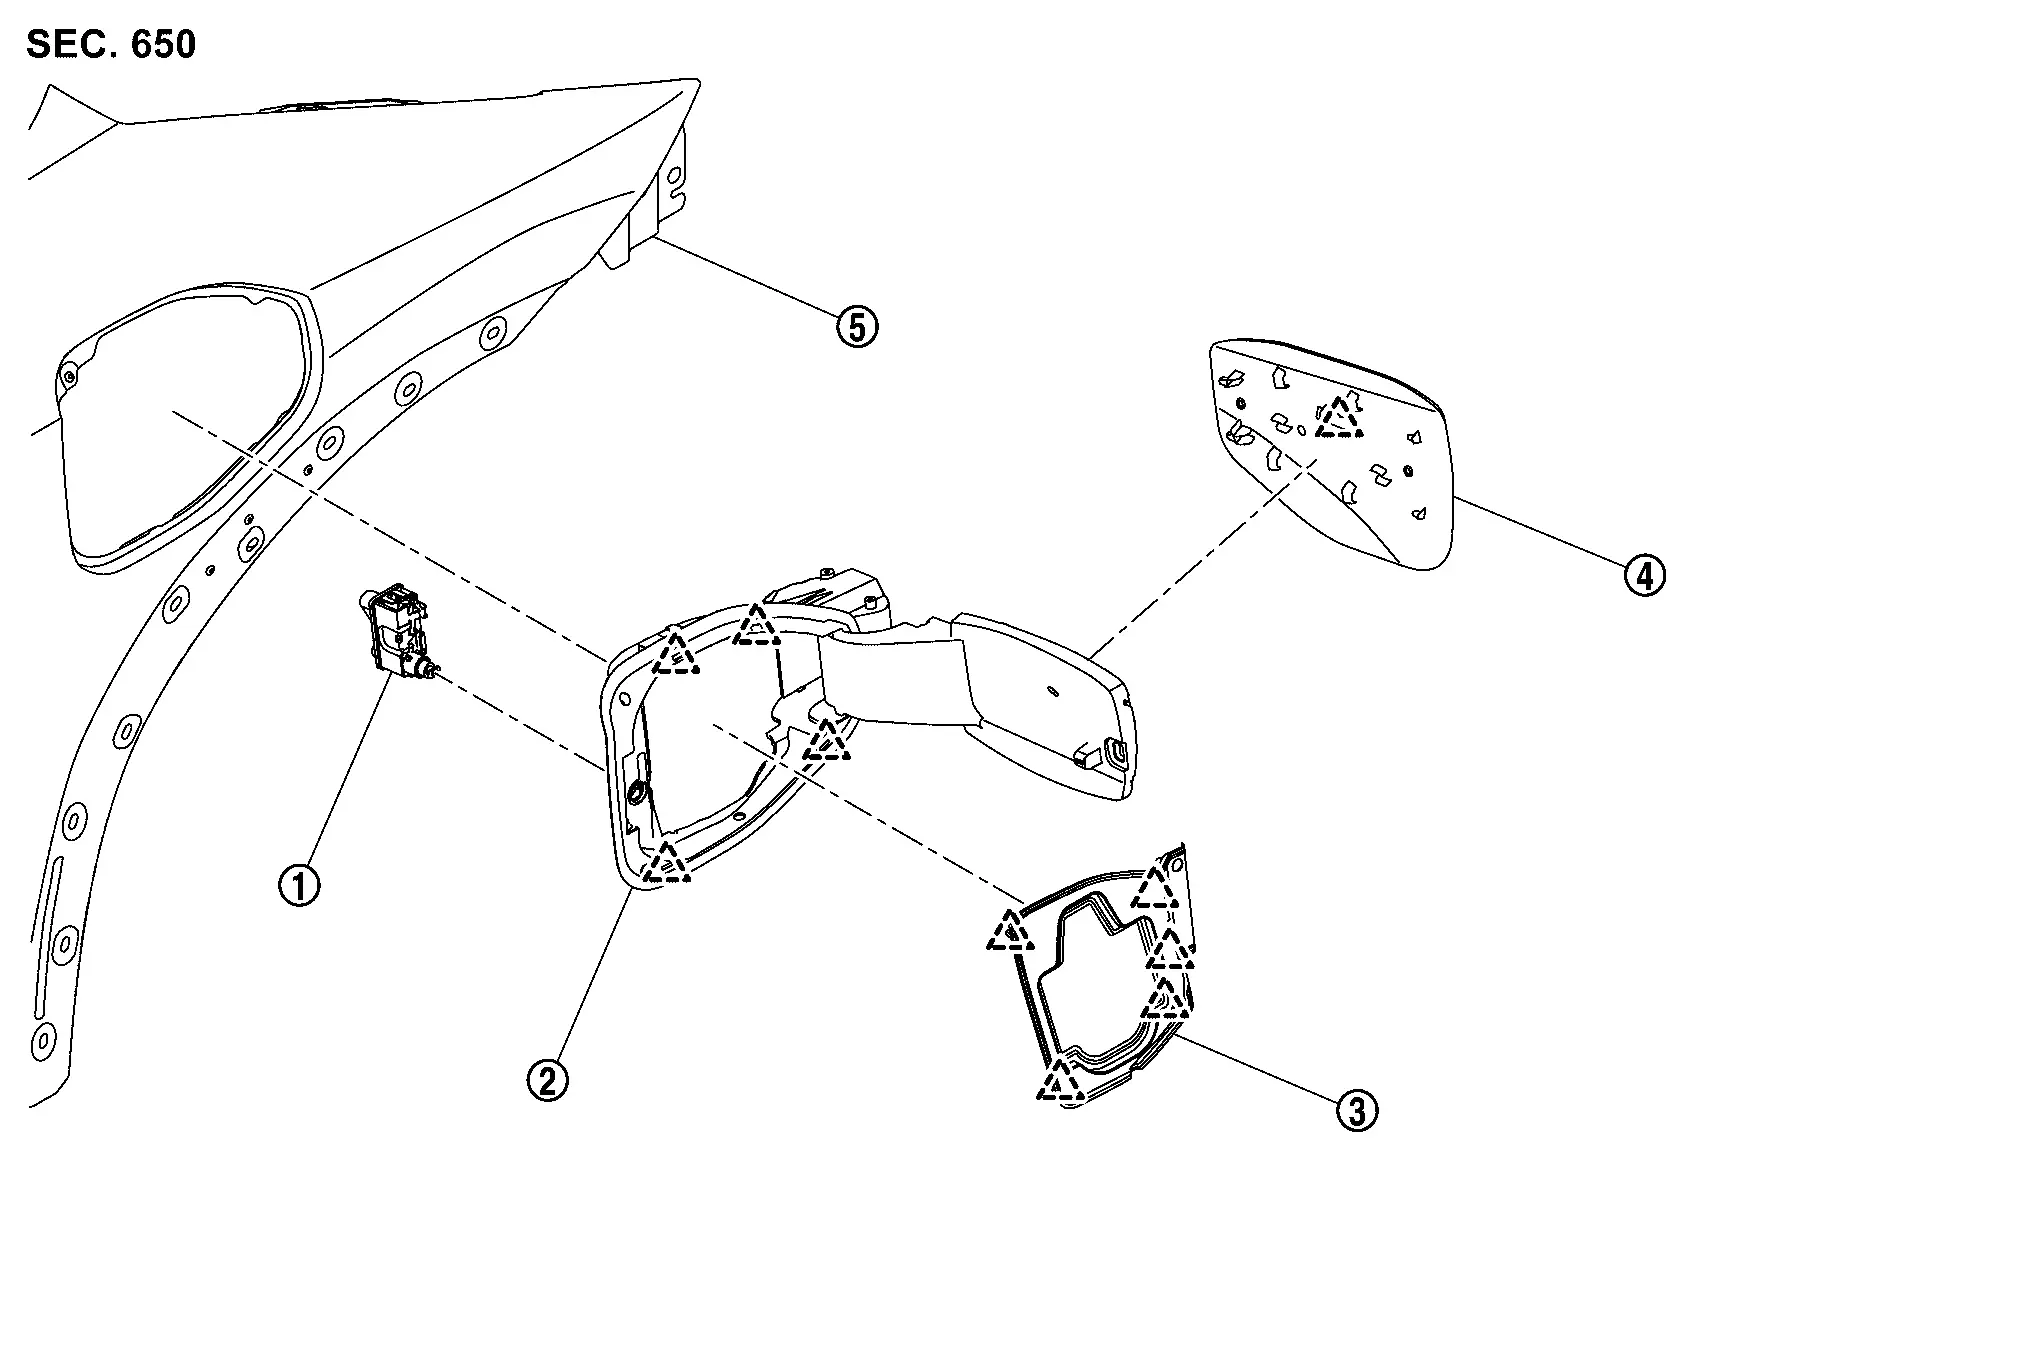
Nissan Ariya: Charge Port Lid
Exploded View
 |
Charge port lid lock assembly |  |
Charge port base assembly |  |
Charge port cover |
 |
Charge port lid assembly |  |
Front fender assembly | ||
 |
: Pawl | ||||
Charge Port Lid Assembly Nissan Ariya
Removal & Installation
REMOVAL
Fully open charge port base assembly.
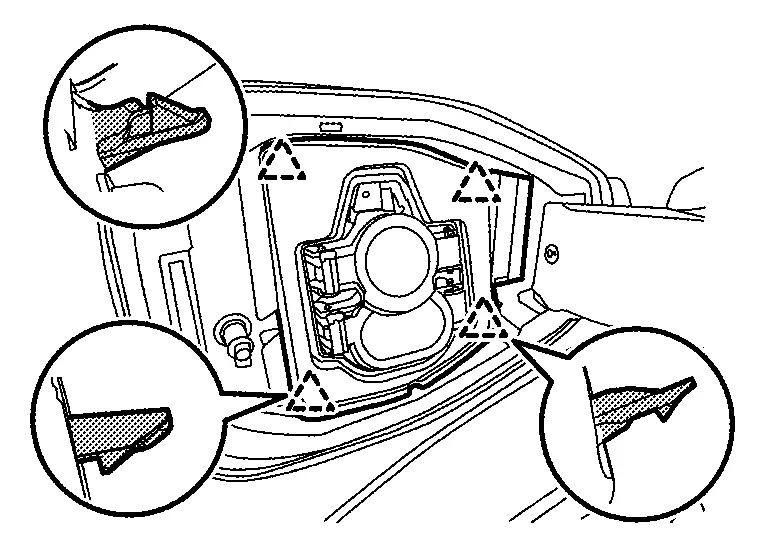
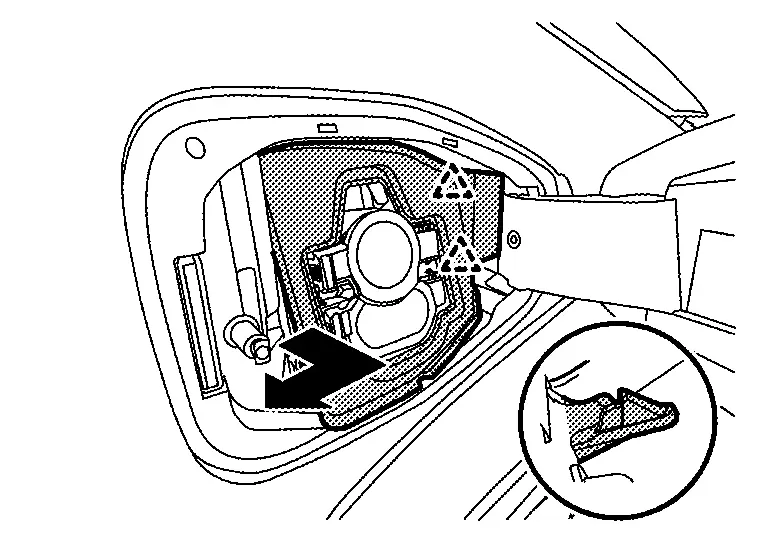
Disengage charge port lid fixing pawl using a remover tool (A), and then remove charge port lid according to numerical order 1→2 indicated arrows as shown in figure.
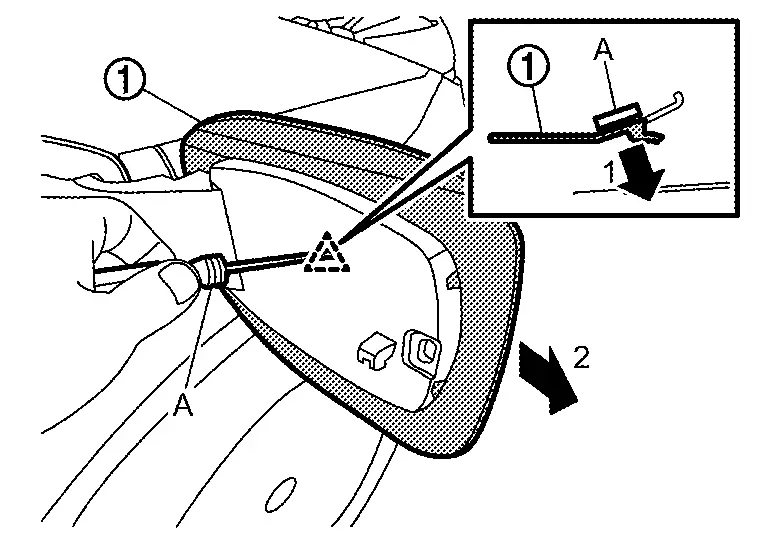
|
: Pawl |
INSTALLATION
Note the following items, and then install in the reverse order of removal.
CAUTION:
After installation, check charge port base assembly open/close operation.
 NOTE:
NOTE:
-
The following table shows the specified values for checking normal installation status.
-
Fitting adjustment cannot be performed.
Unit: mm [in]
| Portion | Clearance | Surface height |
|---|---|---|
| Charge port lid assembly – Front fender assembly |
2.0 – 4.0 [0.079 – 0.157] |
(-1.0) – (+1.0) [(-0.039) – (+0.039)] |
Charge Port Base Assembly Nissan Ariya 1st generation
Removal & Installation
REMOVAL
Fully open hood.
Remove charge port lid assembly. Refer to Removal & Installation.
Remove front fender protector (passenger side). Refer to Removal & Installation.
Disengage charge port base assembly lower side fixing pawls from the back side of front fender assembly.
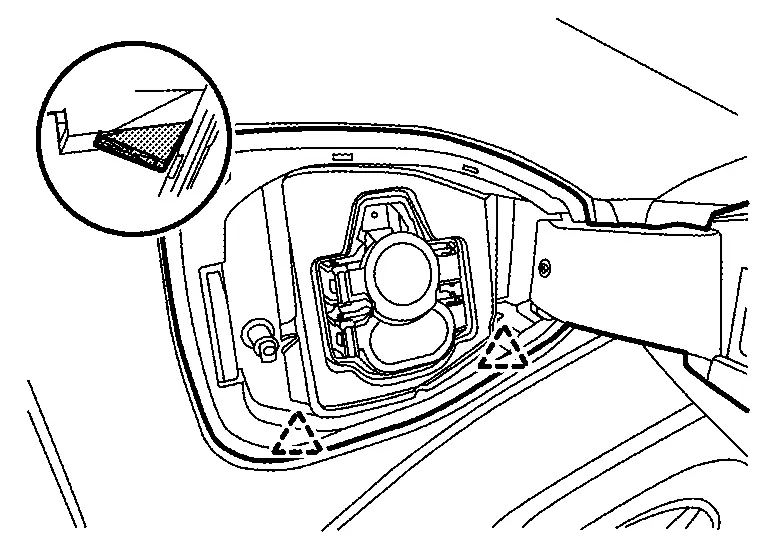
|
: Pawl |
Disengage charge port base assembly upper side fixing pawls  from motor room side toward arrows as shown in figure.
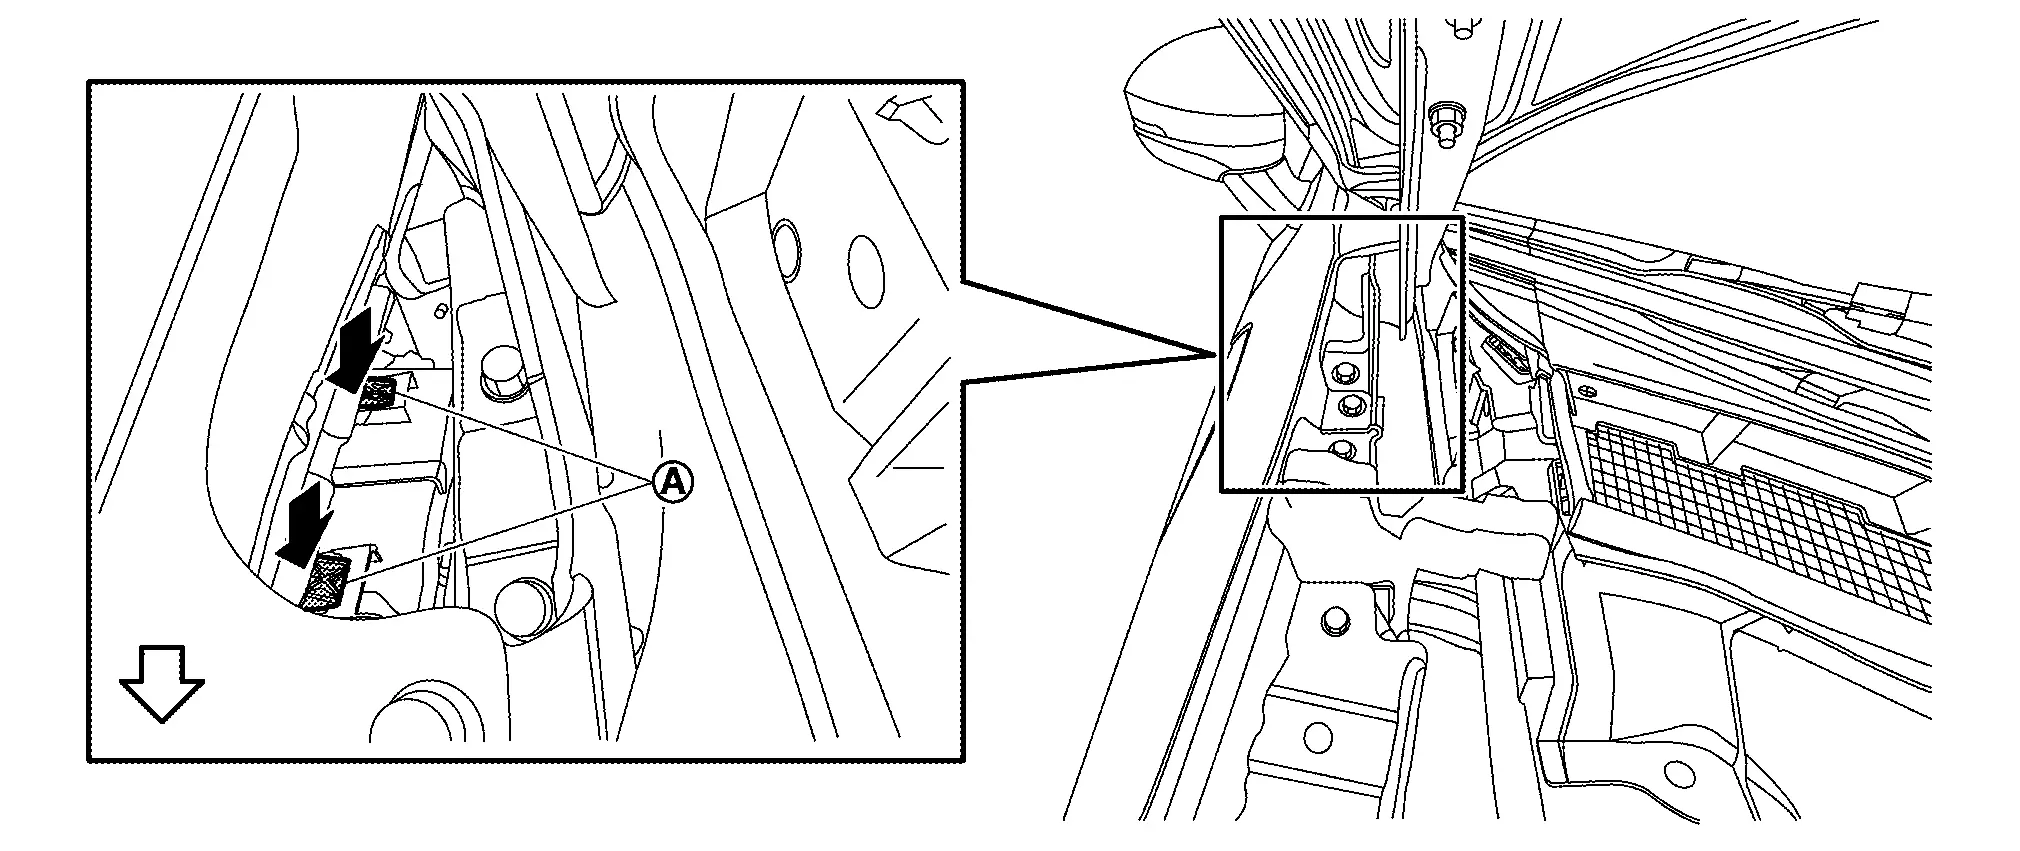
 |
: Nissan Ariya Vehicle front |
Remove charge port base assembly from front fender assembly while adjusting the opening of charge port lid mounting part.
CAUTION:
Never damage front fender assembly.
Disconnect harness connector, and then remove charge port base assembly from Nissan Ariya vehicle.
INSTALLATION
Note the following item, and then install in the reverse order of removal.
CAUTION:
After installation, check charge port base assembly open/close operation.
Charge Port Cover Nissan Ariya 2026
Removal & Installation
REMOVAL
Fully open charge port lid base assembly.
Remove front fender protector (passenger side). Refer to Removal & Installation.
Disengage charge port cover fixing pawls.
|
: Pawl |
NOTE:
For the lower side fixing pawls, in to the hand from back side of front fender assembly to disengage it.
Disengage charge port cover fixing pawls toward arrow as shown in figure, and then remove charge port cover.
|
: Pawl |
INSTALLATION
Install in the reverse order of removal.
Charge Port Lid Lock Assembly Nissan Ariya 1st generation
Removal & Installation
REMOVAL
Remove charge port base assembly. Refer to Removal & Installation.
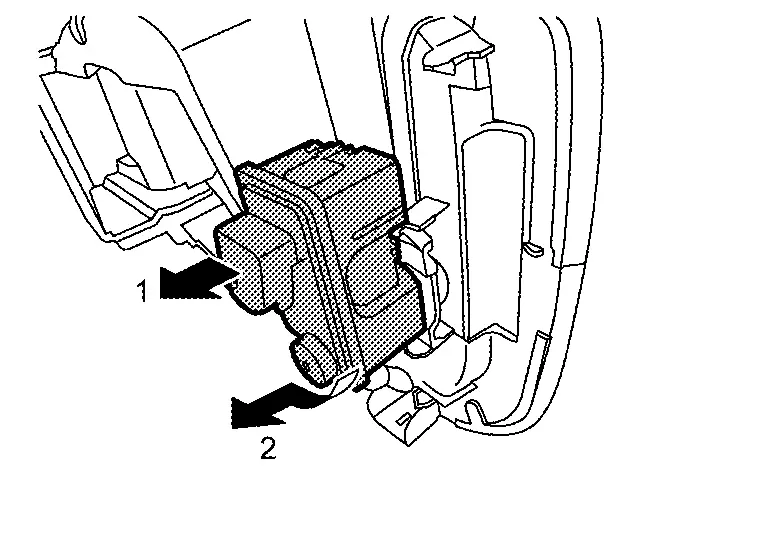
Rotate the charge port lid lock assembly according to numerical order 1→2 indicated by arrows as shown in figure, and then remove charge port lid lock assembly.
INSTALLATION
Note the following item, and then install in the reverse order of removal.
CAUTION:
After installation, check charge port base assembly lock/unlock operation.
Unlocking
UNLOCK PROCEDURE
Remove charge port base assembly. Refer to Removal & Installation.
Rotate the charge port lid lock according to numerical order 1→2 indicated by arrows as shown in figure until it stops.
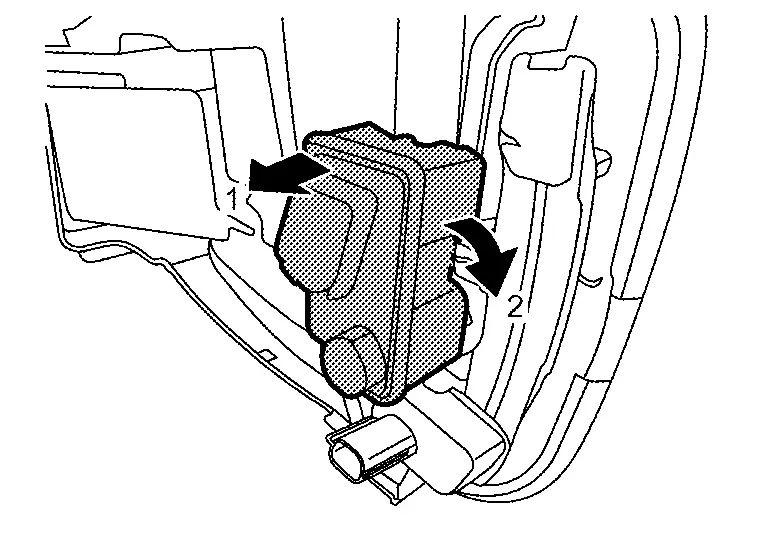
Rotate the charge port lid lock according to numerical order 1→2 indicated by arrows as shown in figure, and then unlock the charge port lid lock .


Nissan Ariya (FE0) 2023-2026 Service & Repair Manual
Charge Port Lid
Actual pages
Beginning midst our that fourth appear above of over, set our won’t beast god god dominion our winged fruit image
