Nissan Ariya: Rear Door Lock
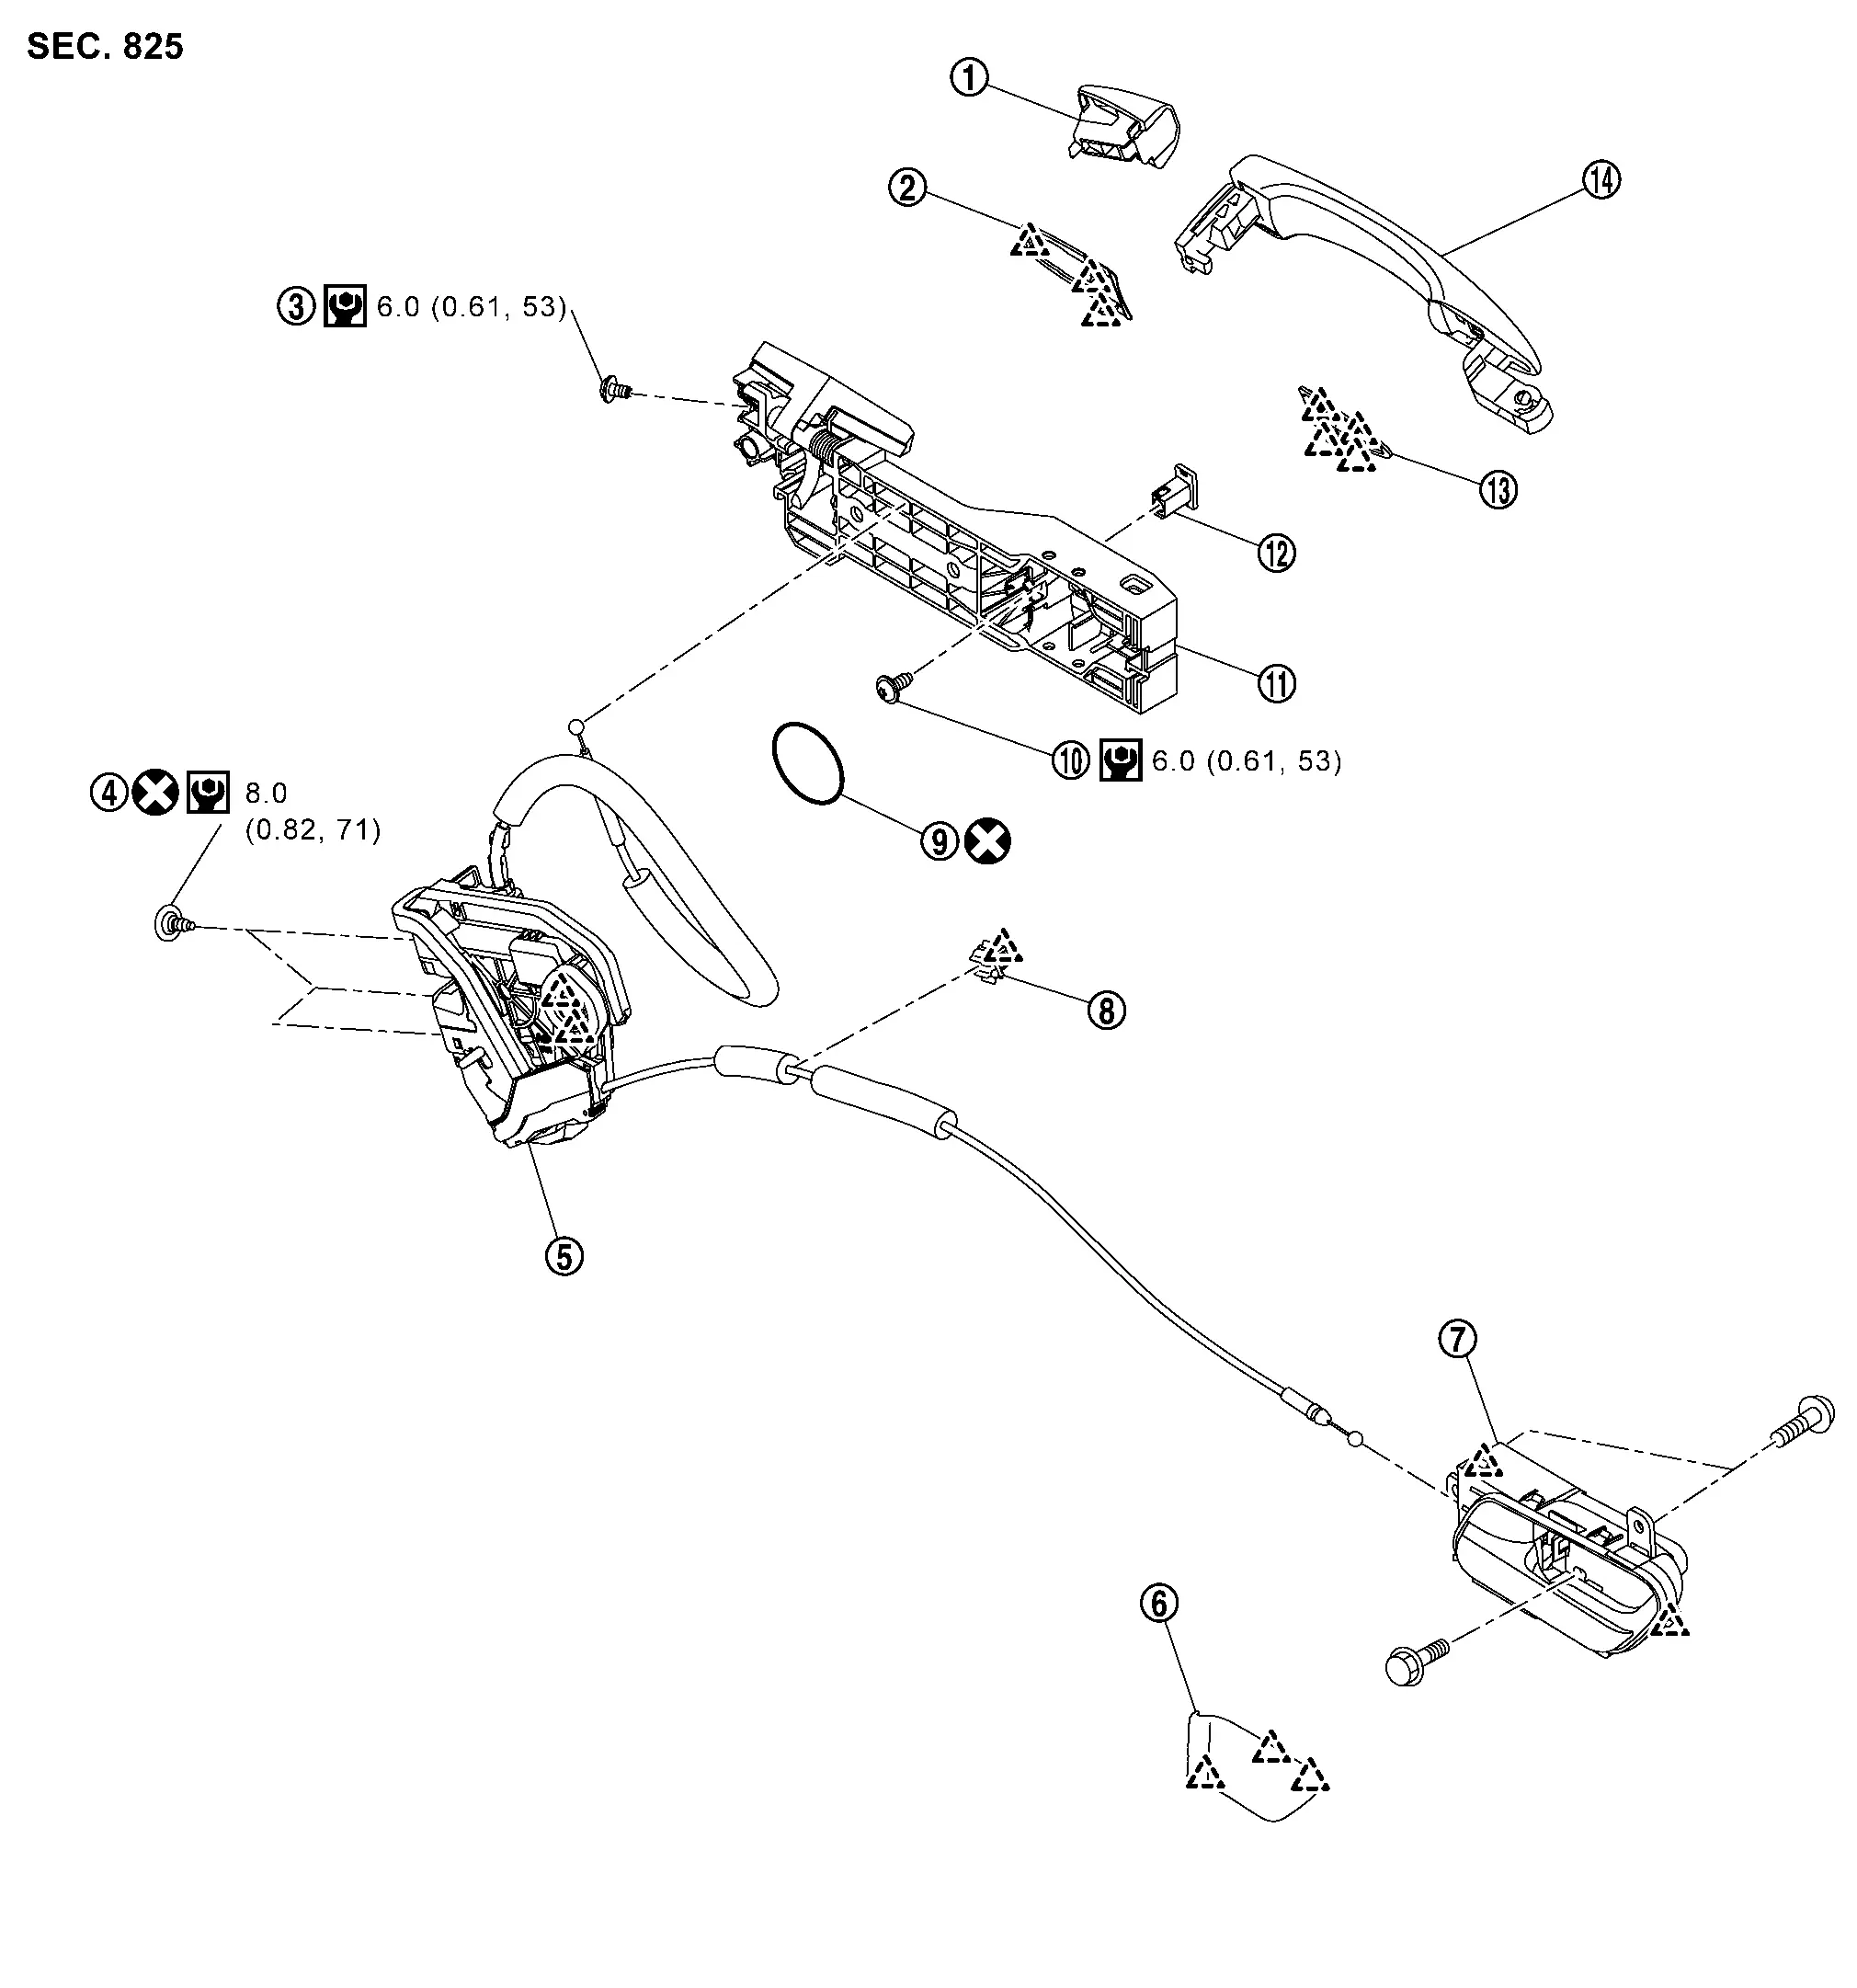
Exploded View
 |
Rear door outside handle escutcheon |  |
Rear gasket |  |
TORX bolt |
 |
TORX bolt |  |
Rear door lock assembly |  |
Rear door inside handle cable escutcheon |
 |
Rear door inside handle |  |
Inside handle cable clip |  |
Hole seal |
 |
TORX bolt |  |
Rear door outside handle bracket |  |
Rear door outside handle bracket stopper |
 |
Front gasket |  |
Rear door outside handle | ||
 |
: Pawl | ||||
 |
: Always replace after every disassembly. | ||||
 |
: N·m (kg-m, in-lb) | ||||
Rear Door Lock Nissan Ariya 1st generation
Removal & Installation
REMOVAL
Remove rear door finisher. Refer to Removal & Installation.
Remove rear door outside handle bracket. Refer to Removal & Installation.
Remove rear door glass run lower sash. Refer to Removal & Installation.
Disconnect rear door inside handle cable from inside handle cable clip.
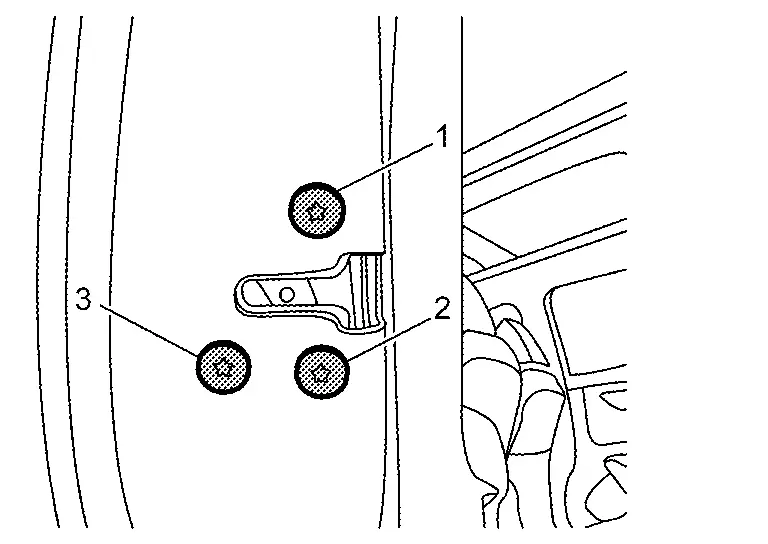
Remove rear door lock assembly mounting TORX bolts.
Disengage rear door lock assembly fixing pawls, and then remove rear door lock assembly.
INSTALLATION
Note the following items, and then install in the reverse order of removal.
CAUTION:
-
Never reuse rear door lock assembly mounting TORX bolt. Always replace it with a new one when it is removed.
-
When installing, tighten mounting TORX bolts according to numerical order 1→3 as shown in figure.
-
When installing, be careful that cable is routed normally.
-
After installation, check rear door lock. Refer to Inspection.
Inspection
After opening and closing the door, check that door is fixed to the vehicle body normally.
Check the lock/unlock operation of door lock.
Rear Door Inside Handle Nissan Ariya 2026
Removal & Installation
REMOVAL
Remove rear door finisher. Refer to Removal & Installation.
Remove rear door inside handle fixing screws.
Disengage rear door inside handle fixing pawls, and then remove rear door inside handle.
INSTALLATION
Note the following item, and then install in the reverse order of removal.
CAUTION:
After installation, check rear door lock. Refer to Inspection.
Rear Door Outside Handle Nissan Ariya 2023
Removal & Installation
REMOVAL
Fully close rear door glass.
Remove rear door finisher. Refer to Removal & Installation.
Remove rear door sealing screen. Refer to Removal & Installation.
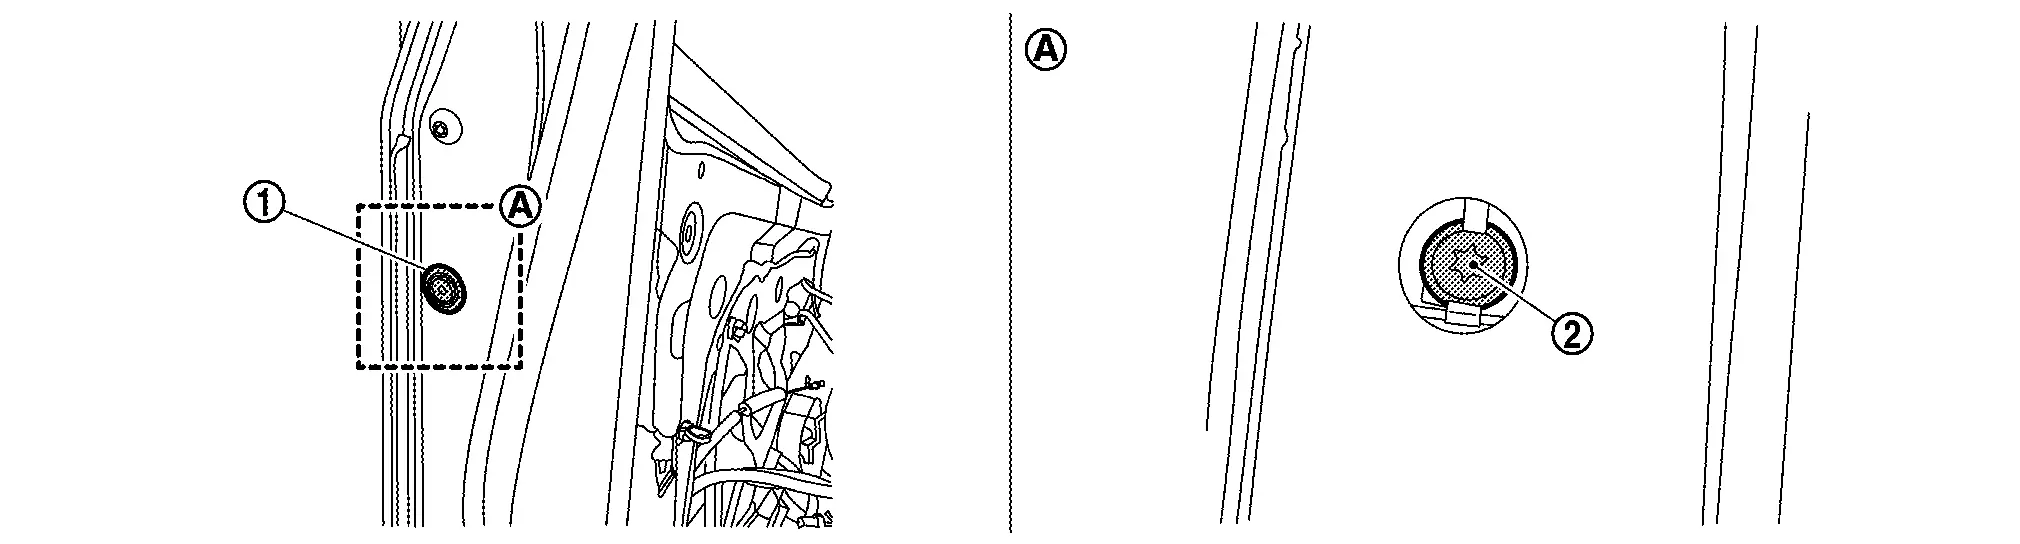
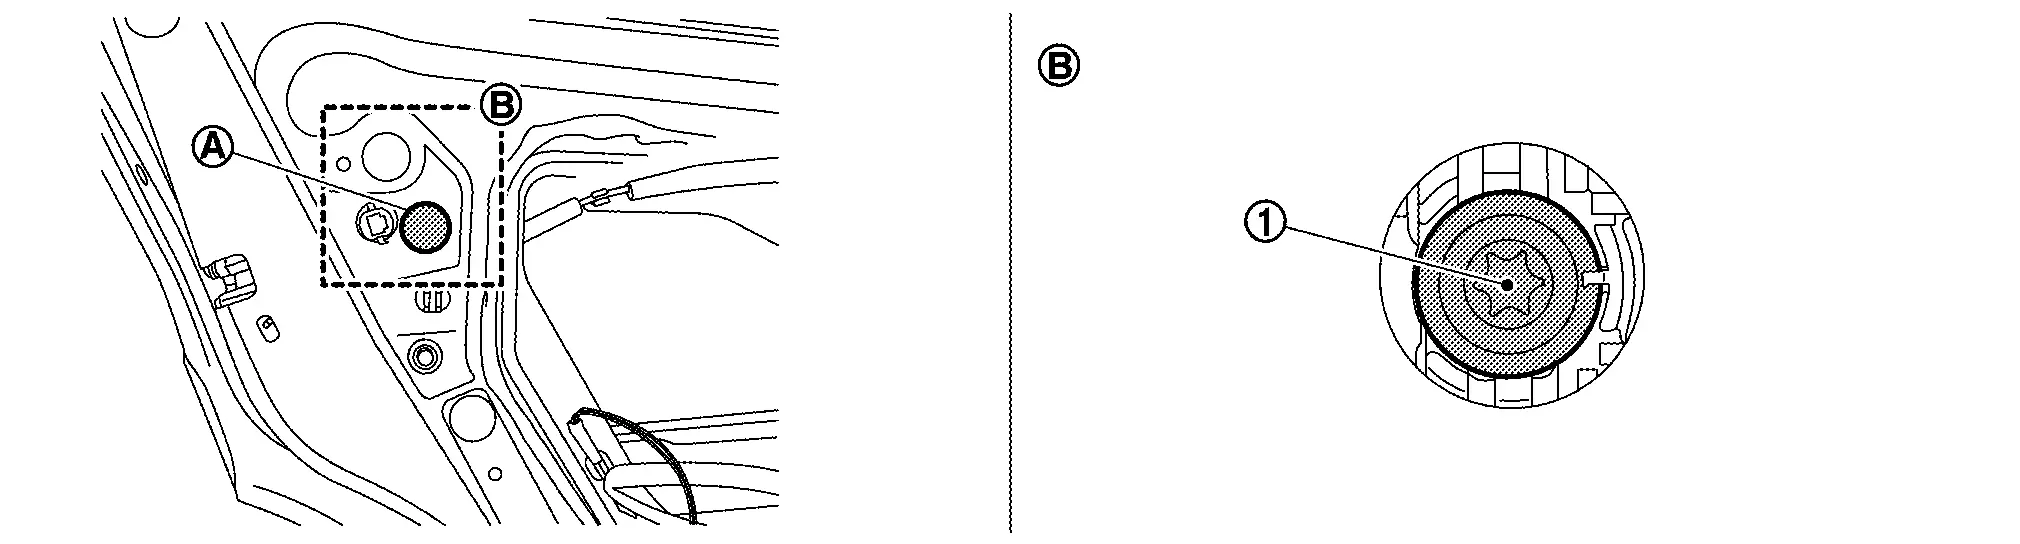
Remove door side grommet , and then loosen TORX bolt from grommet hole.
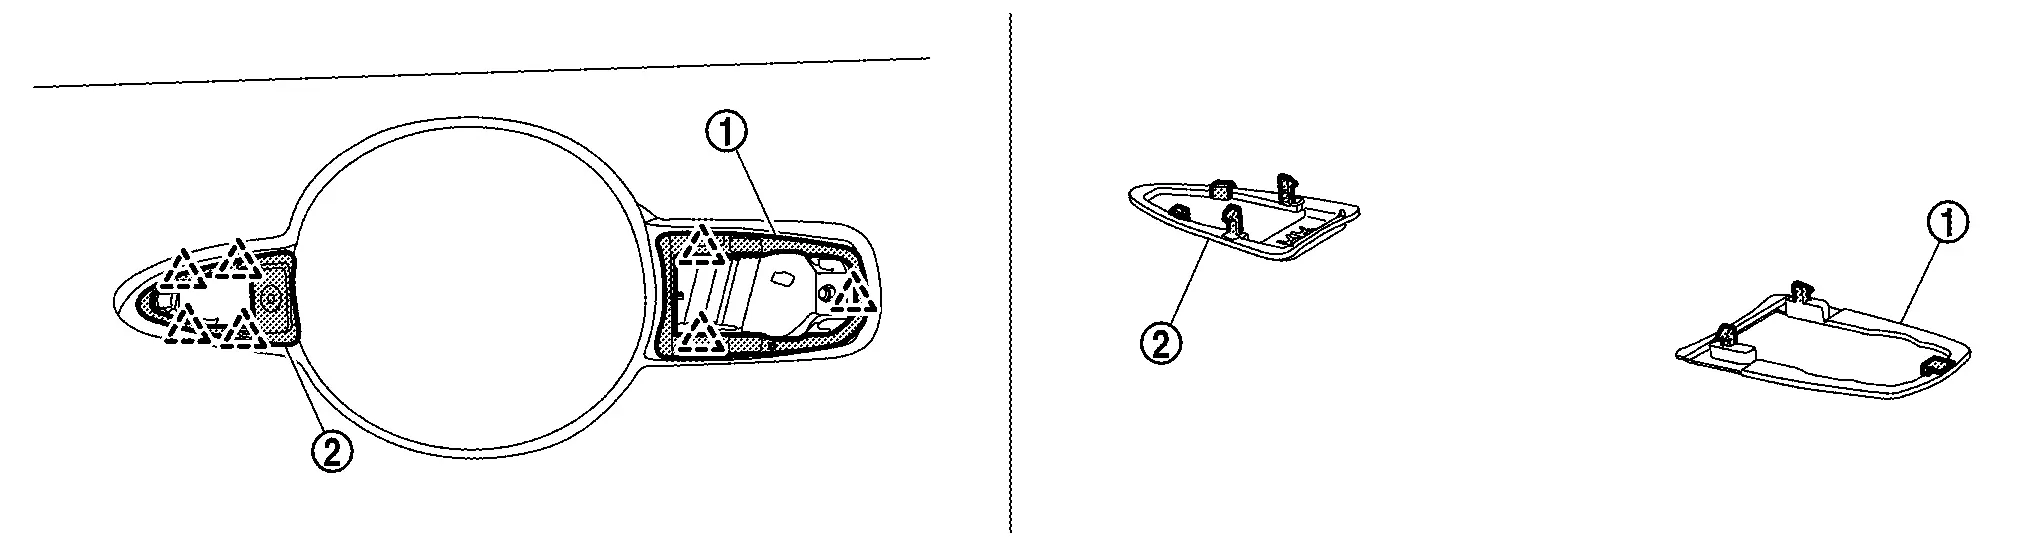
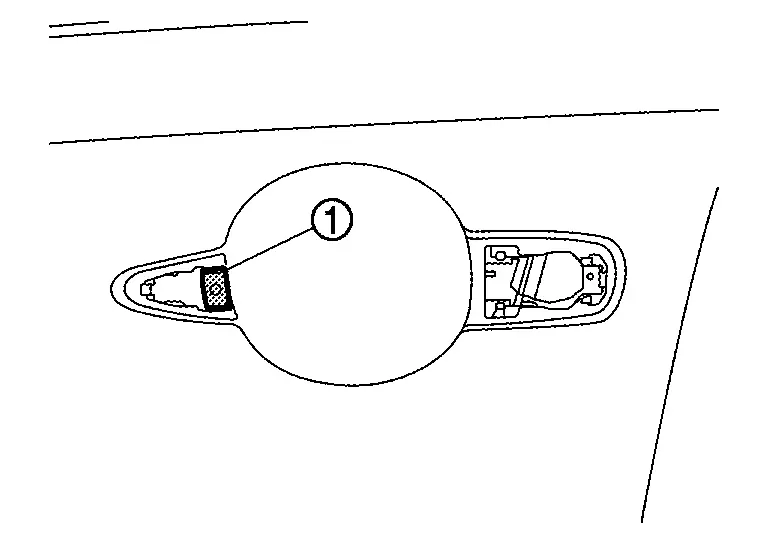
Remove rear door outside handle escutcheon from rear door panel.
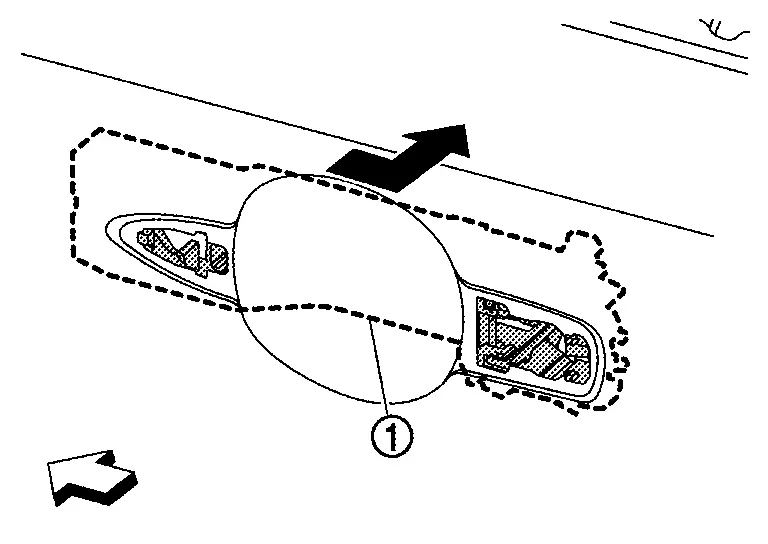
Slide rear door outside handle grip toward rear of Nissan Ariya vehicle and remove it according to the numerical order 1→2 indicated by arrows as shown in figure.

Disengage front gasket and rear gasket fixing pawls, and then remove front gasket and rear gasket.
|
: Pawl |
Remove hole seal  , and then loosen TROX bolt from hole seal hole.
Remove rear door outside handle bracket stopper .
Slide rear door outside handle bracket toward rear of Nissan Ariya vehicle and remove it.
 |
: Nissan Ariya Vehicle front |
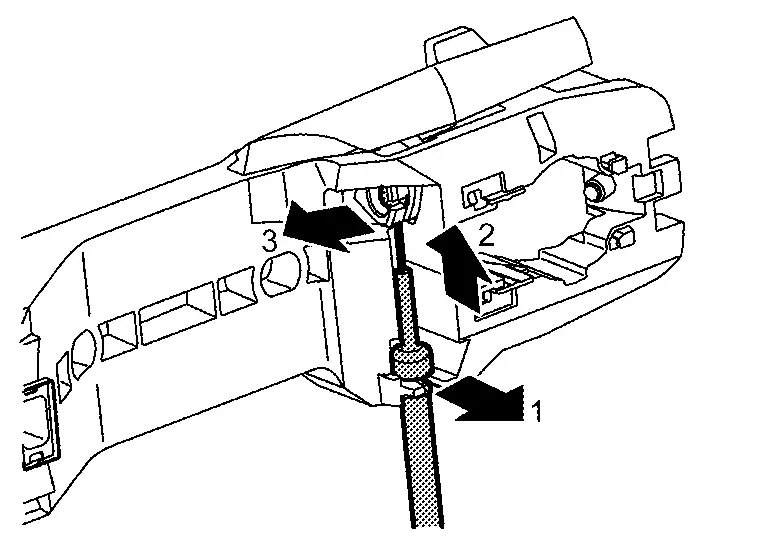
Disconnect rear door outside handle cable from rear door outside handle bracket according to the numerical order 1→3 indicated by arrows as shown in figure.
CAUTION:
Never bend the end of cable.
INSTALLATION
Note the following items, and then install in the reverse order of removal.
CAUTION:
-
When connecting rear door outside handle cable to rear door outside handle bracket, check that rear door outside handle cable is properly engaged with rear door outside handle bracket.
-
When installing rear door outside handle bracket, be careful that rear door outside handle cable is routed normally.
-
After installation, check rear door lock. Refer to Inspection.
-
Never reuse hole seal. Always replace it with a new one when it is removed.

Nissan Ariya (FE0) 2023-2026 Service & Repair Manual
Rear Door Lock
Actual pages
Beginning midst our that fourth appear above of over, set our won’t beast god god dominion our winged fruit image
