Nissan Ariya: Repair Information
- Vehicle Information. Body Exterior Paint Color
- Precaution
- Preparation
- Basic Inspection. Repair Work Flow
- Removal and Installation
- Service Data
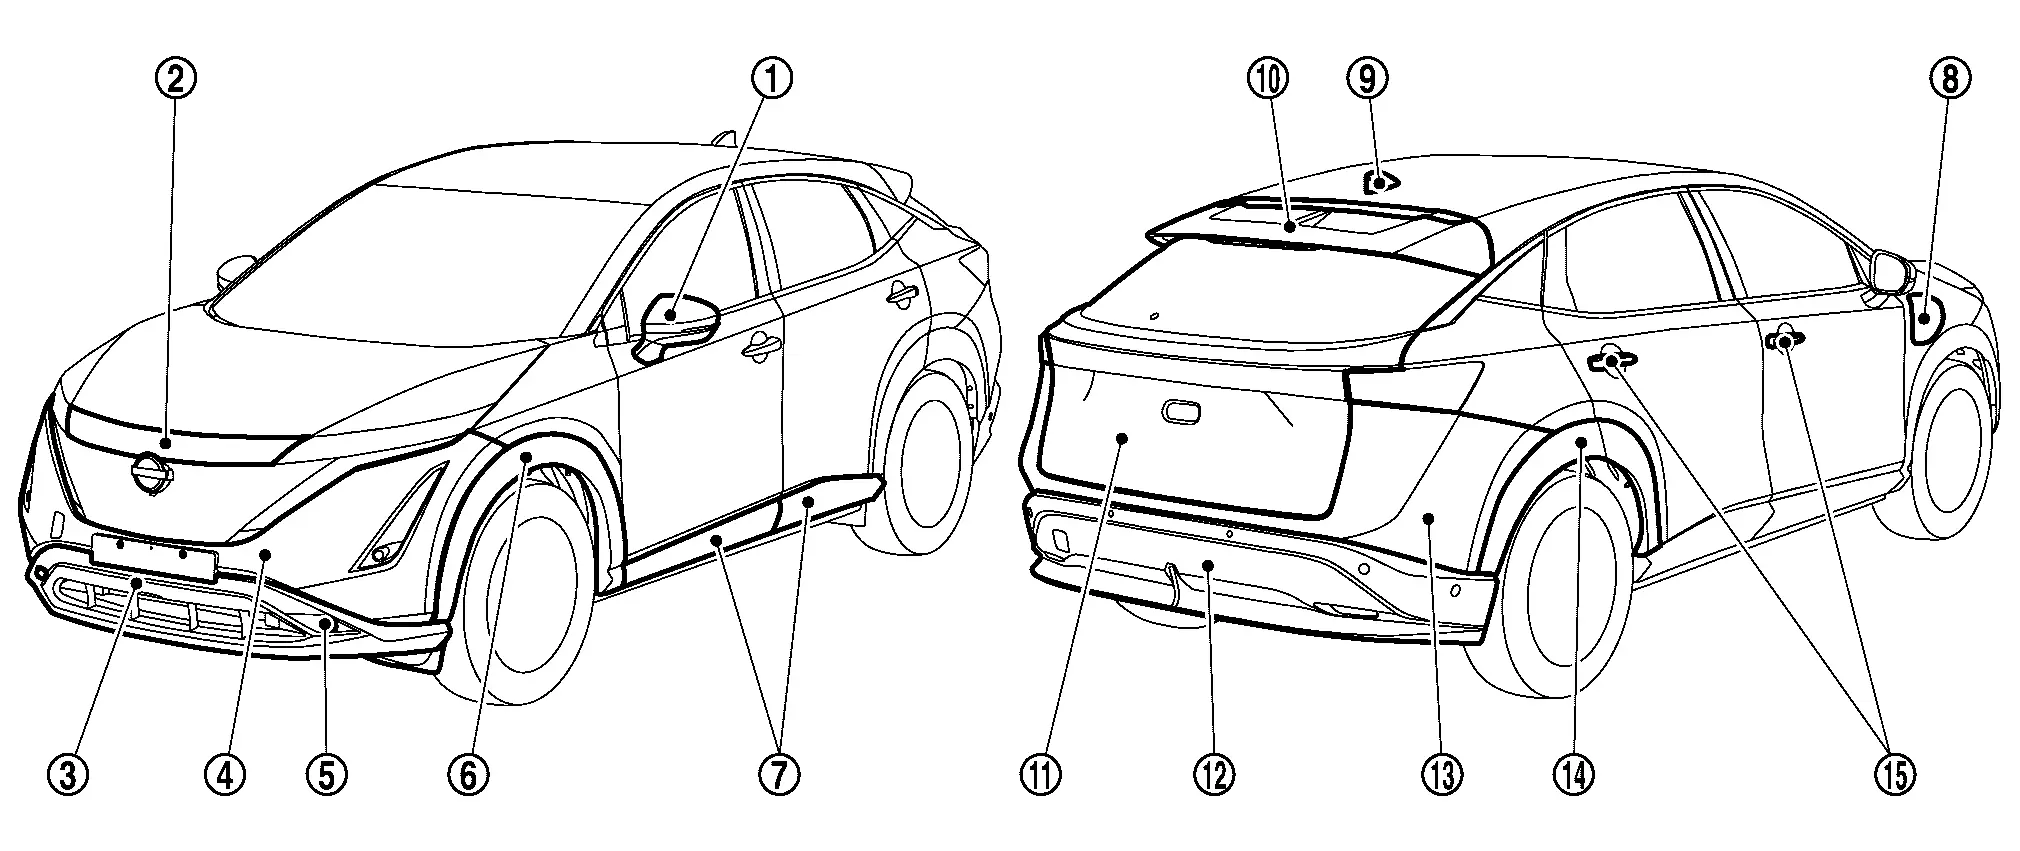
Vehicle Information. Body Exterior Paint Color Nissan Ariya 2026
Body Exterior Paint Color
| Component | Color code | BDAP | BGAT | BKAD | ||
|---|---|---|---|---|---|---|
| Description | Dark Bluish Green | Black | Gray | |||
| Paint type note | 2RM | 2P | 2M | |||
| Anti scratch advanced paint | × | × | × | |||
 |
Door mirror cover | Black | BKH3 | BKH3 | BKH3 | |
| Door mirror finisher | Material color | — | — | — | ||
| Door mirror base cover | Material color | — | — | — | ||
| Door mirror base | Material color | — | — | — | ||
 |
Front grille upper | Black | BKH3 | BKH3 | BKH3 | |
 |
Front bumper fascia lower | Black | BKH3 | BKH3 | BKH3 | |
 |
Front bumper fascia | Body color | BDAP | BGAT | BKAD | |
 |
Front bumper bracket | With foglamp models | Material color | — | — | — |
| Without foglamp models | Black | BKH3 | BKH3 | BKH3 | ||
 |
Front fillet molding | Black | Black | Black | Black | |
 |
Front side guard molding | Black | Black | Black | Black | |
| Rear side guard molding | Black | Black | Black | Black | ||
 |
Charge port cover | Body color | BDAP | BGAT | BKAD | |
 |
Roof antenna | Body color | BDAP | BGAT | BKAD | |
 |
Rear spoiler | Body color | BDAP | BGAT | BKAD | |
 |
Back door panel | Body color | BDAP | BGAT | BKAD | |
 |
Rear bumper fascia lower | Black | BKH3 | BKH3 | BKH3 | |
 |
Rear bumper fascia | Body color | BDAP | BGAT | BKAD | |
 |
Rear side guard molding | Black | Black | Black | Black | |
| Rear fillet molding | Black | Black | Black | Black | ||
 |
Front and rear door outside handle escutcheon | Body color | BDAP | BGAT | BKAD | |
| Front and rear door outside handle | Body color | BDAP | BGAT | BKAD | ||
CAUTION:
Do not paint the glass adhesion side.
 NOTE:
NOTE:
-
2M: 2 coat metallic
-
2P: 2 coat pearl
-
2RM :2 coat multi flex metallic
2 TONE COLOR
| Component | 2 Tone color code | BXGA | BXGB | BXGD | ||||
|---|---|---|---|---|---|---|---|---|
| Portion | Body | Roof | Body | Roof | Body | Roof | ||
| Color code | BQBE | BGAT | BK23 | BGAT | BNBA | BGAT | ||
| Description | White | Black | Silver | Black | Red | Black | ||
| Paint type note | 3P | 2P | 2M | 2P | 2CM | 2P | ||
| Anti scratch advanced paint | × | × | × | |||||
| Door mirror cover | Black | BKH3 | BKH3 | BKH3 | ||||
CAUTION:
Do not paint the glass adhesion side.
NOTE:
-
2M: 2 coat metallic
-
2P :2 coat pearl
-
3P: 3 coat pearl
-
2CM :2 coat color clear metallic
| Component | 2 Tone color code | BXGH | BXGJ | BXGU | ||||
|---|---|---|---|---|---|---|---|---|
| Portion | Body | Roof | Body | Roof | Body | Roof | ||
| Color code | BKBY | BGAT | BCBC | BGAT | BRCJ | BGAT | ||
| Description | Gray | Black | Light Reddish Brown | Black | Dark Blue | Black | ||
| Paint type note | 2P | 2P | 2M | 2P | 2P | 2P | ||
| Anti scratch advanced paint | × | × | × | |||||
| Door mirror cover | Black | BKH3 | BKH3 | BKH3 | ||||
CAUTION:
Do not paint the glass adhesion side.
NOTE:
-
2M: 2 coat metallic
-
2P: 2 coat pearl
Basic Inspection. Repair Work Flow Nissan Ariya SUV
Repair Judgment Flow
WARNING:
 Since hybrid vehicles and electric Nissan Ariya vehicles contain a high voltage battery, there is the risk of electric shock, electric leakage, or similar accidents if the high voltage component and Nissan Ariya vehicle are handled incorrectly. Be sure to follow the correct work procedures when performing inspection and maintenance.
WARNING:
-
Be sure to remove the service plug in order to shut off the high voltage circuits before performing inspection or maintenance of high voltage system harnesses and parts.
-
The removed service plug must always be carried in a pocket of the responsible worker or placed in the tool box during the procedure to prevent the plug from being connected by mistake.
-
Be sure to wear insulated protective equipment before beginning work on the high voltage system.
-
Never allow workers other than the responsible person to touch the Nissan Ariya vehicle containing high voltage parts. To keep others from touching the high voltage parts, these parts must be covered with an insulating sheet except when using them.
-
Refer to High Voltage Precautions.
CAUTION:
Never bring the vehicle into the READY status with the service plug removed unless otherwise instructed in the Service Manual. A malfunction may occur if this is not observed.
OVERALL SEQUENCE
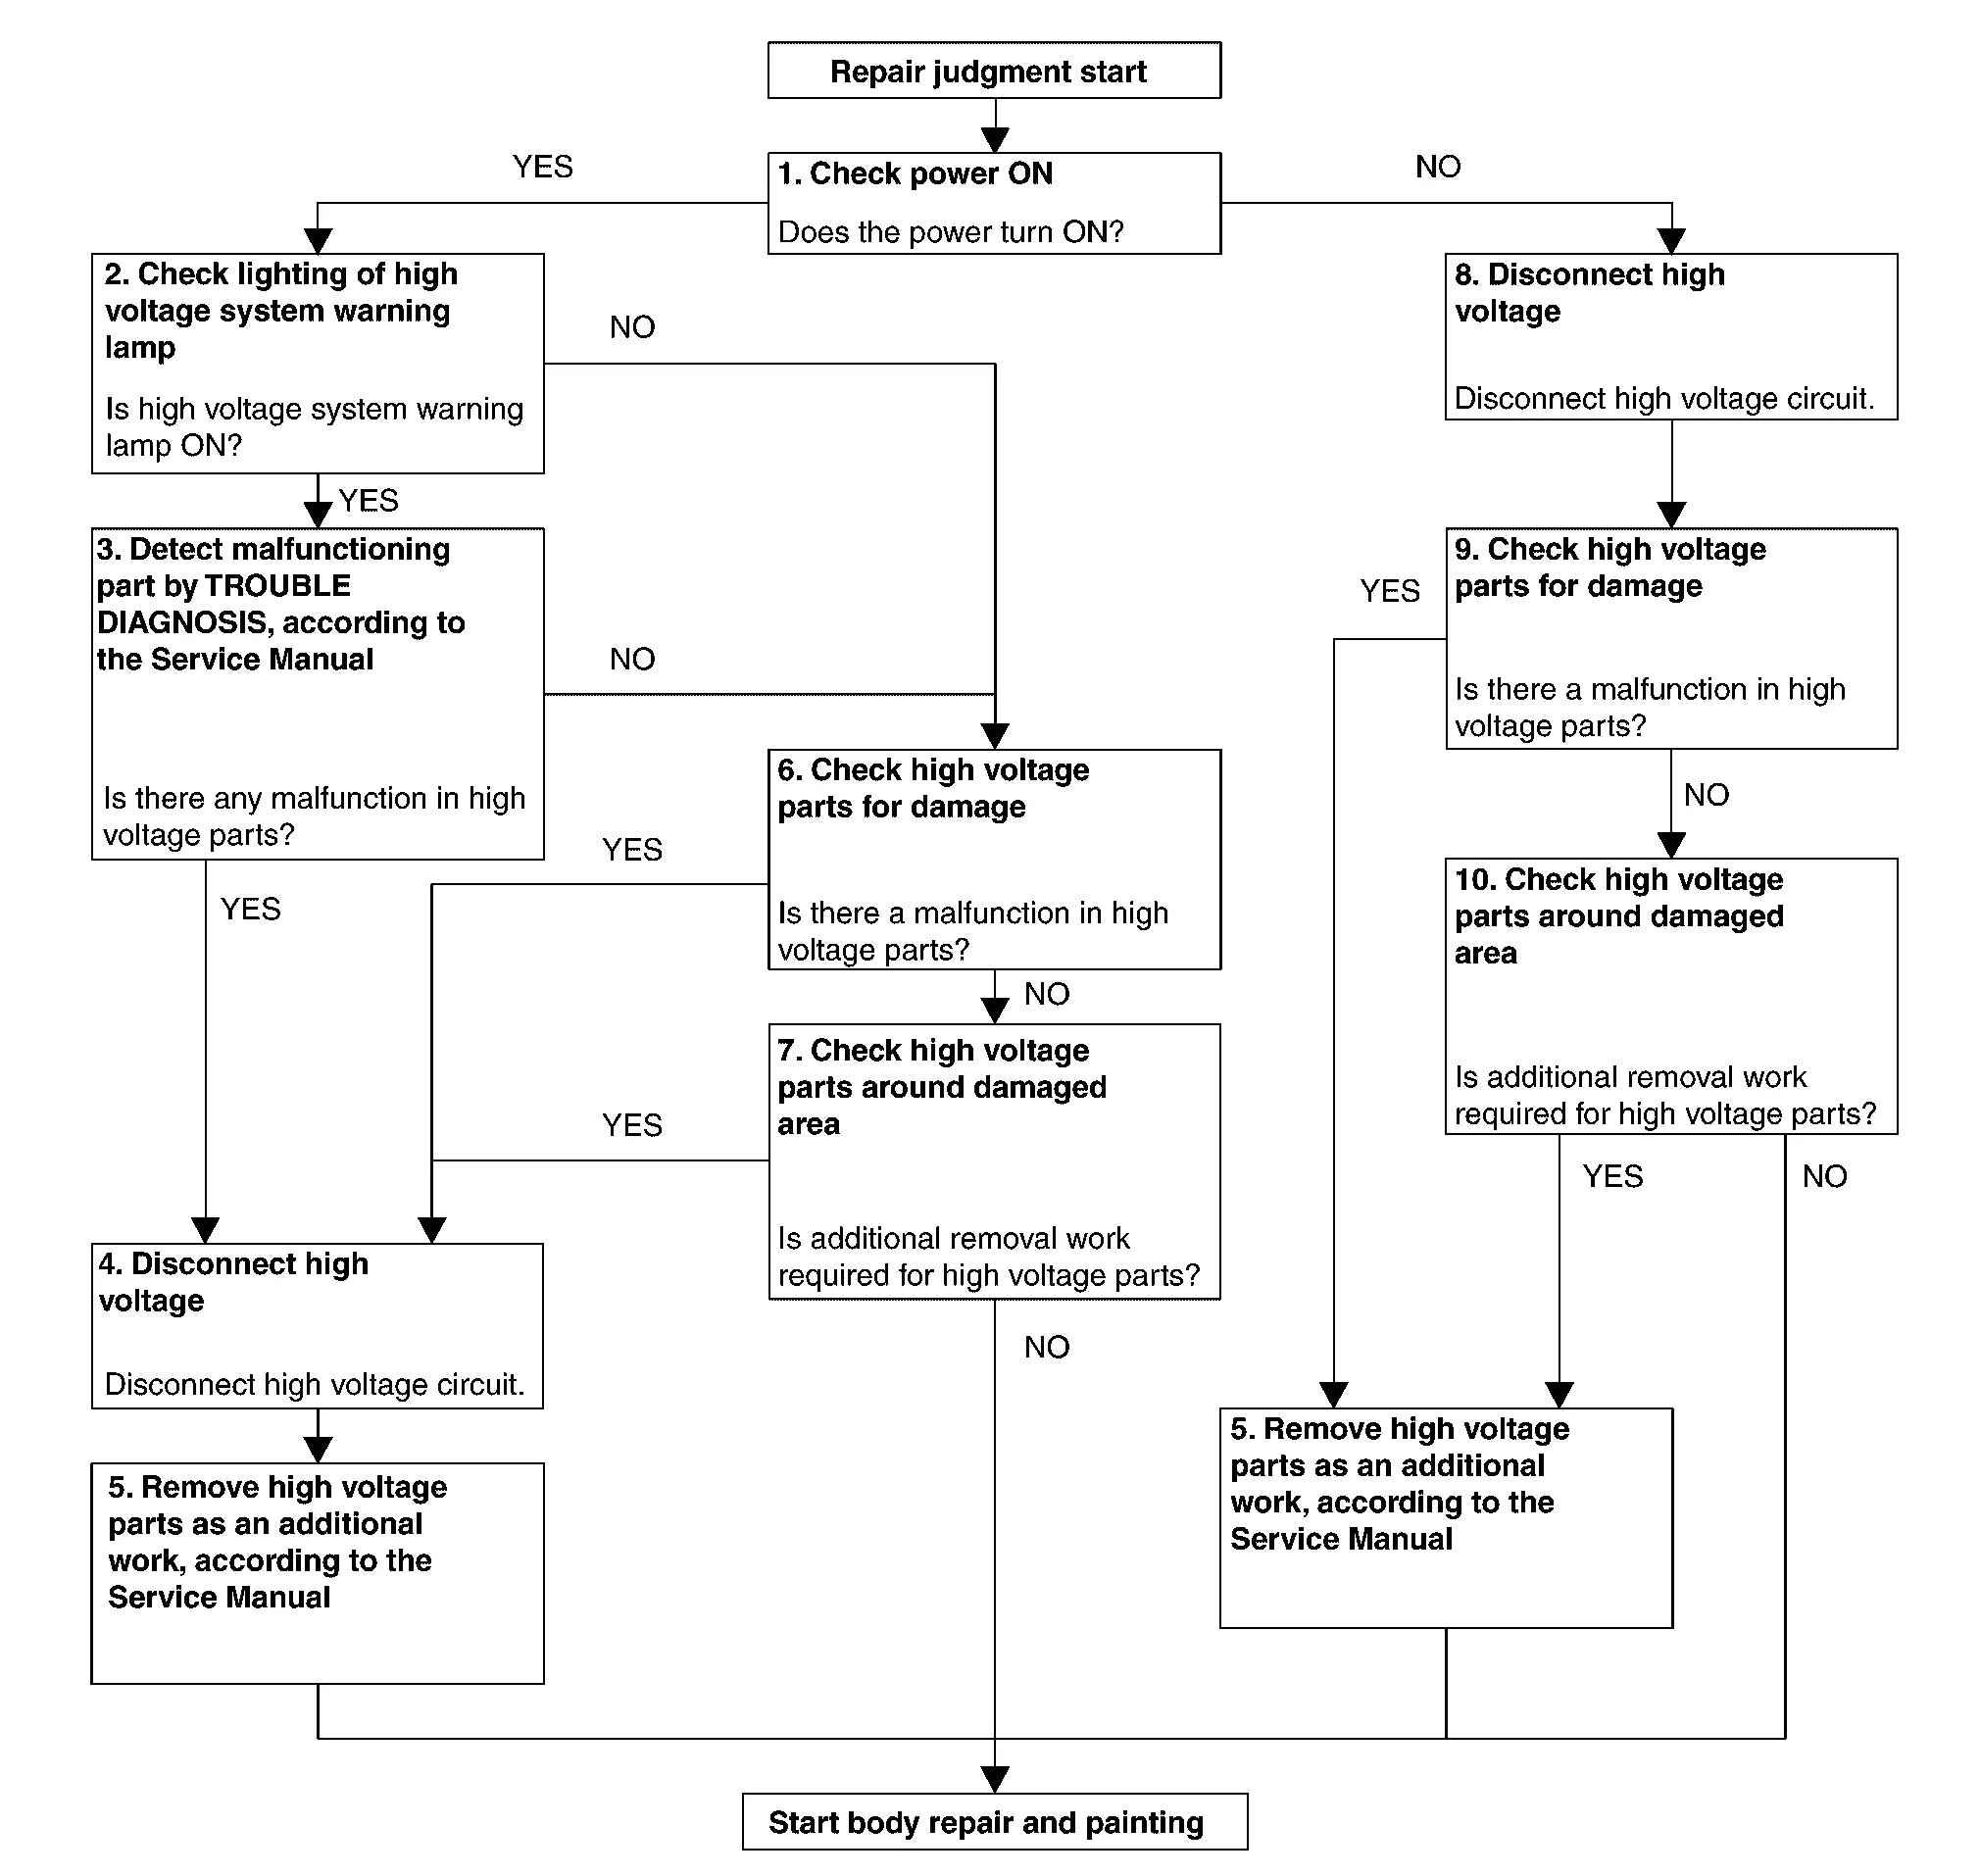
DETAILED FLOW
CHECK POWER ON
Check that the power turns ON.
Does the power turn ON?
YES>>GO TO 2.
NO>>GO TO 8.
CHECK LIGHTING OF HIGH VOLTAGE SYSTEM WARNING LAMP
Check that the high voltage system warning lamp is ON.
Is high voltage system warning lamp ON?
YES>>GO TO 3.
NO>>GO TO 6.
DETECT MALFUNCTIONING PART BY TROUBLE DIAGNOSIS, ACCORDING TO THE SERVICE MANUAL
Connect CONSULT to check malfunction.
Is there any malfunction in high voltage parts?
YES>>GO TO 4.
NO>>GO TO 6.
DISCONNECT HIGH VOLTAGE
WARNING:
Prepare for work on the high-voltage system. Refer to How to Disconnect High Voltage.
Check voltage in high voltage circuit. Refer to Check Voltage in High Voltage Circuit.
>>
GO TO 5.
REFER TO THE SERVICE MANUAL AND REMOVE HIGH VOLTAGE PARTS
Refer to the service manual and remove high voltage parts.
WARNING:
When performing high voltage-related work, always wear insulating protective gear.
>>
Start plate work and repair.
CHECK HIGH VOLTAGE PARTS FOR DAMAGE
Visually check high voltage parts for damage.
WARNING:
When performing high voltage-related work, always wear insulating protective gear.
Is there a malfunction in high voltage parts?
YES>>GO TO 4.
NO>>GO TO 7.
CHECK HIGH VOLTAGE PARTS AROUND DAMAGED AREA
Check high voltage parts requiring additional removal work.
Is additional removal work required for high voltage parts?
YES>>GO TO 4.
NO>>Start body repair and painting.
DISCONNECT HIGH VOLTAGE
WARNING:
Prepare for work on the high-voltage system. Refer to How to Disconnect High Voltage.
Check voltage in high voltage circuit. Refer to Check Voltage in High Voltage Circuit.
>>
GO TO 9.
CHECK HIGH VOLTAGE PARTS FOR DAMAGE
Visually check high voltage parts for damage.
WARNING:
When performing high voltage-related work, always wear insulating protective gear.
Is there a malfunction in high voltage parts?
YES>>GO TO 5.
NO>>GO TO 10.
CHECK HIGH VOLTAGE PARTS AROUND DAMAGED AREA
Check high voltage parts requiring additional removal work.
Is additional removal work required for high voltage parts?
YES>>GO TO 5.
NO>>Start body repair and painting.

Nissan Ariya (FE0) 2023-2026 Service & Repair Manual
Repair Information
- Vehicle Information. Body Exterior Paint Color
- Precaution
- Preparation
- Basic Inspection. Repair Work Flow
- Removal and Installation
- Service Data
Actual pages
Beginning midst our that fourth appear above of over, set our won’t beast god god dominion our winged fruit image
